Sunday 18 November 2012

A Little Christmas Project

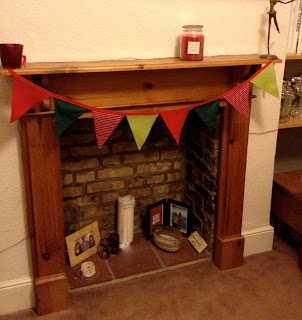
I've just begun a couple of projects which are taking some thinking and planning before I even get to the sewing stage, lots of pattern tracing, adding sleeves and making little adjustments. This is my least favourite part of dress making, I like to be at the machine or have a needle and thread in hand and see something coming together! So I decided to ease the frustration with a quick little christmas decoration project that I've had in mind for a while - Christmas Bunting!

I'd seen quite a few lovely versions in the shops and online to tempt me (including this gorgeous 1950s print from the dotcomgiftshop) but I couldn't help thinking should I really be spending this much money on such a simple to make item, the process of which I could work out myself and which could be cobbled together from and make use of fabric scraps which I can't bear to throw away. So, in need of just getting on and finishing a sewing project I whipped up a small length this afternoon from scraps I found when rummaging through my stash yesterday.


It was a quick and satisfying project and I'm very pleased with the end result. I used a combination of felt and woven fabric to create the triangles. With the felt pieces I simply cut out the size of triangle I wanted and it was ready to attach. With the woven fabric (to prevent a raw fraying edge) I cut out two pieces for each triangle, making sure to add 1cm down each long edge for seam allowance. I then stitched the two triangles together down both long sides (right sides together), trimmed the seam allowance around the point, turned right side out and pressed to give me nice neat triangles. I imagine if you wanted to be even more speedy about it you could cut out the woven shapes with pinking shears to help combat fraying and give you a different edge on some pieces.

I pinned the completed triangles along the middle of a wide piece of bought bias tape and stitched along the tops of the triangles in a straight line with my machine. Then all that was left to do was fold over the the bias tape to enclose the messy top edges and stitch straight along again. I'm really happy that I chose to use bias tape rather than a flat piece of ribbon as the finish is neat front and back. However pretty patterned and festive ribbons are a lot more readily available than anything other than plain bias tape so I'm quite tempted to try just attaching the triangles to the back of the ribbon rather than folding over if I make a second lot. I could obviously put a bit more effort in and make my own bias tape from patterned fabric but I find it so time consuming and fiddly!


As this has turned out so well I'm now planning to make a longer length with letters on each triangle spelling out Merry Christmas. I think I could have a lot of fun with combinations of prints and colours and also trying out some new techniques for applying the letters; maybe some applique, some embroidery and even some printing. Sadly I don't have enough Christmas appropriate fabric and bias tape lying around for this much bunting but I'm planning a bit of a mega fabric shopping trip next weekend for a number of things so I've added this to the list!

One of the things I'll be looking for next weekend are fabric and notions to gift to my allocated recipients for Vicki Kate's Sew Very Merry Christmas Swap and KraftyKat's Sewing Secret Santa. The idea behind both is that you have a good look on the other person's blog to get an idea of their style and what they like to make and they also provide you with an idea of the kind of thing they might like to receive/what projects they would like supplies for. Then you go out and choose some bits and pieces within a given budget, wrap them up and send them off in time for Christmas, then you receive a carefully chosen parcel in return! I think it's a fantastic idea and I can't wait to unwrap my little packages on Christmas morning!

I know it's probably still a little early to be saying so but I can't wait for Christmas!