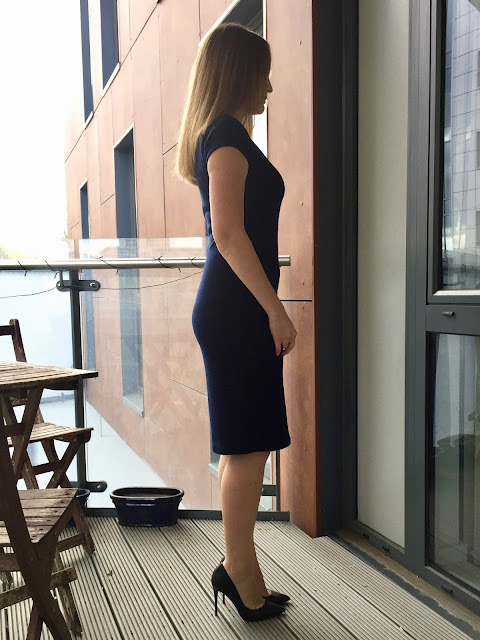
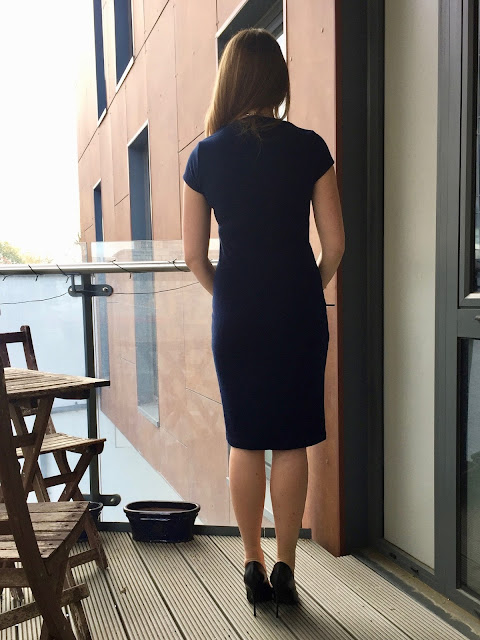
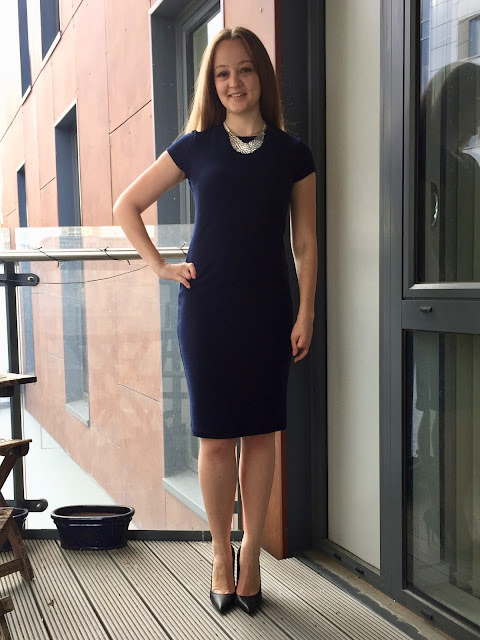
December is party dress season and I've been lucky enough to have reason to make myself a couple this year. This one came about slightly unexpectedly as it was a pattern test, which I wasn't aware at the time was going to become a total staple in my wardrobe. This is the Sangria Dress from Sally's new collection for Capital Chic Patterns. I had a tough time choosing which pattern to test but my lack of time meant I went with the speediest option with this little knit number. I also made a muslin to test Grasshopper as I fell in love with those curvy style lines. Fingers crossed I'll get time to make up a proper version to share with you soon.
The fabric is a top quality scuba fabric from Fabric Godmother which I bought from Josie at The Handmade Fair back in September. I really like Fabric Godmother for the fact that they stock so much fabric that's suitable for dressmaking and reflects current trends; scuba being a prime example. Making a single choice from Josie's stall was incredibly difficult and I was pretty close to walking away with a bit of each bolt but I eventually made a fairly restrained choice in this...my intentions for it being a second Rigel Bomber as I had such a great experience making this up in fairly thick and stable knit last time. When Sally showed me her new collection and I saw Sangria my plans instantly changed and I couldn't be happier with this match of fabric and pattern. That purchase was obviously meant to be!
Fabric Godmother often get bolt ends of designer lines and this fabric in particular is from Max Mara. I think it was around £16/m which for a fabric of this quality I found to be reasonable. I've shied away from neoprenes and scubas before as every one I've found feels either very stiff and thick or very flimsy, shiny and weirdly synthetic feeling. If you haven't come across either before neoprene is basically like wetsuit fabric and can be used to make quite sculptural garments. The best way to describe scuba is like its thinner and stretchier cousin which is quite similar to a fairly thick jersey. This fabric has none of the off-putting qualities I was wary of, having a beautiful drape and soft hand. One side has the expected smooth finish of a scuba with a slight sheen but the other has a gorgeous matt, crepey texture.
Despite how much I love touching it and wearing it the fabric was a complete nightmare to sew! It didn't like pins (a rotary cutter, mat and weights were the way to go with cutting), my stitches were skipping and my thread fraying away in the needle. I had the best results with a fresh microtex needle and tried various threads until settling on black (not navy for some reason!) sew all Gutermann. My twin needle actually coped well with the hem. It was also one of those fabrics that was quite resilient to a press. Bouncy seams are a big handmade giveaway to me so I walked up the heat and steam and used a press cloth to get mine tidy.
Pattern wise there are only 15 pages of PDF to print and assemble so the prep was super quick. There's a 1cm seam allowance throughout which I've found that to be pretty standard with quite a lot of knit patterns but its something I need to keep reminding myself of throughout before I go on autopilot with 5/8"!
I cut the size 12 at the bust and waist and the 14 at the hip as I was wary about it being too clingy, which is a problem I've found when trying on RTW dresses of this style. I'm so happy to say it's not clingy at all and the fit is actually what I'm most pleased about with this dress. I feel so happy and comfortable in it, which for a going out dress is a huge plus. The only thing I might change next time is to do a slight sway back adjustment as I've got a bit of excess fabric in the small of my back. I cut the length of the size 12 and the hem hits just where I wanted with a 3/4" hem (I'm 5ft 3 for reference). I needed just 1.3m of fabric at 150cm wide.
A little cap sleeve is my favourite shape and these are gorgeous. I particularly like the skinny binding used to finish the sleeves. I did have a little trouble with this feature when sewing it up but the problems I had have been rectified in the released version of the pattern and instructions. These clean and stylish finishings are exactly what I have come to expect from Sally's designs. This is quite a simple one for her and could definitely be tackled by a beginner. If you're looking for something a little more challenging I definitely recommend any of her other designs as they all have lovely unique features and construction techniques to push your sewing on to the next level.
The one big problem I had was inserting the centre back zip...which you may have noticed from the pictures I ended up doing without! The dress wriggles on fairly comfortably without it thank goodness as I ripped out and reinserted that zip more times than I can count! The problem was entirely due to my own lack of experience putting zips into knits as all of the Capital Chic patterns include incredibly thorough instructions on zip insertion. Whatever I did the zip wouldn't lay flat against my back and I was ending up with an unsightly lumpy bumpy spine. I think the first time I accidentally stretched my fabric out and my problems were exacerbated by the fact that my machine was hating the fabric, plus the pooling of fabric in my sway back wasn't going to help it sit flat. Looking back now I think I could have fused thin strips of non stretch interfacing along the area where the zip is inserted to prevent it stretching out. Charlotte from English Girl At Home used a short zip in the back of hers which is a great idea to avoid the problems I had I think!
The neckline is finished with a wide faced neckband which is the first time I've tried such a finish on a knit garment; I love it! It sits so flat and even. The fact that it's faced rather than just a folded band firstly means it's shaped so there's less risk of it stretching out weirdly as its sewn on and it can also be under-stitched. My favourite! The neckline is assembled entirely with a straight stitch in the instructions which means its all nice and secure and you don't need the stretch in this area because of the centre back zip. If you're going to omit the zip like I have you should construct this with a zig zag or stretch stitch so you that the neckline will stretch when you pull it on over your head.
The plain navy isn't the most exciting choice of fabric I could have made for this dress but it has made it suitable for numerous occasions and I've had a lot of fun accessorising it and dressing it up or down. Josie was also stocking this fabric in a hot pink and when my plans changed from bomber to dress I almost regretted not going with the pink but the navy is definitely more me! I know I'm going to be pulling this out of my wardrobe time and time again as a failsafe option for cocktails, dinner out, parties and more formal work occasions depending on how its styled. If you need a last minute Christmas dress get on it; its a speedy sew and perfect for accommodating all those Christmas treats!


This is so lovely Fiona, you look gorgeous in it. The Sangria dress is top of my list once I've finished my coat so thanks for all the tips! x
ReplyDeleteThanks Jane! I can see you in this! I've done it the other way around to you and have done Sangria then coat!
DeleteYour dress is so beautiful and fits you perfectly. I'd have never guessed that the fabric was difficult to sew with. You did such a great job.
ReplyDeleteThanks so much! I'm so pleased that the frustrating time I had with the fabric doesn't show. I've had such a good time wearing it since it was finished I've almost forgotten what a pain it was!
DeleteYou look really nice in this outfit. Those heels and the gaps in that decking make me nervous!
ReplyDeleteHaha thank you! I was being very careful as I tottered back and forth to the camera!
DeleteFantástico, me encanta como coses Fiona.
ReplyDeleteThank you very much!
DeleteStunning dress, it fits you so well and it's so classy.
ReplyDeleteThanks Lynsey! It's got a great cut to it and just the right amount of ease I like in a stretchy dress. I couldn't be happier with it
DeleteOK, so this is gorgeous! I love the fabric you chose Fiona, Max Mara would be proud! Thanks again for all your help with the testing process! -- Sally
ReplyDeleteThanks Sally, it's all down to you and your patterns! You are so welcome the pleasure was all mine
Delete