Tuesday, 28 February 2017

February Indie Pattern Update!


Well it has been another whirlwind of a month with an awful lot going on in the indie sewing pattern community and it looks like a lot more to come in March! I'm heading to the Knitting & Stitching Show at Olympia at the weekend and am hoping to discover some new patterns and companies. We've had a tiny taste of spring sunshine here in London last week (as well as a very un-springlike storm!) and I'm well and truly ready for winter to be over. I can't start wearing my spring wardrobe yet but I sure can start planning my sewing and gathering the supplies! I'm excited to see what new season patterns are going to be released.


New Pattern Companies


  • Sew Sin City launched with two new knicker patterns; the Linda Mid-Rise Panty and the Rhyanne Low-Rise Panty. Taylor is hoping to release a handful of new underwear patterns every few months and is focussing on functional yet pretty lingerie. I like the classic shapes of these first two and the sheer polka-dotted sample in particular! 
  • Also launching with a small collection of classy basics this month is Just Patterns. Their designs are inspired by high end RTW and are refreshingly aimed at experienced dressmakers. Relying on established sewing skills they include a suggested order of construction (laid out in a clear chart) rather than in depth instructions although there are resource pages on their site for further guidance. Starting with the Pleated Skirt, Slip Dress and Bias Top they have two more soon to follow!
  • Not strictly new but new to me and a company I couldn't resist sharing with you all are DP Studio. This French design studio have some incredibly inventive and contemporary designs amongst their collection of patterns printed in both french and english. Alongside the 'couture' designs they have a basics section from which you can purchase sleeve, collar and hood patterns to mix and match with their vast array of garment shapes. I can't wait to try.


New Patterns


  • Style Arc released another bang on trend pattern; the Giselle Dress is a wrap style with ruffles which I am seriously tempted by for summer cocktails on balmy evenings. Also new from them this month is the Brooklyn Knit Top (with oversized roll neck) and the Brooklyn Knit Pant which can be bought separately or in a discounted bundle.
  • There are two new patterns from Tessuti this month. The Iris Dress is a lantern shape maxi dress with the option to include an exposed binding between the panels of the skirt. The Leni Top is has a boxy shape with clean v neck. I think it would be gorgeous in a crisp, fresh linen.
  • February's edition of Seamwork Magazine was all about silohuette. The patterns released with it are the Ariane Bodysuit and Eliza Slip Skirt. I like the thin gores in the slip and the idea of having a strappy bodysuit in my wardrobe is really growing on me.
  • One of a number of beautiful lingerie patterns released this month, the new Harriet Bra from Cloth Habit seems to have gone down a storm within the blogging community. Its an underwired soft cup bra with balconette neckline. I'm particularly fond of the beautiful pale, sheer versions that have been popping up on social media.
  • Ready to Sew released the Jimmy Jumper. The swinging shape of view A is gorgeous but I love the little darts running along the raglan seams and seams of the side panel on view B. One of those subtle little details that really elevates a basic garment.
  • Made by Rae launched the Cleo skirt late last month and has been posting an assortment of stunning printed skirts made with it throughout February. Its a pleated skirt with pockets and a waistband which is elasticated at the rear making it super comfortable and omitting the need for any fastenings.
  • The Zadie Dress is the latest release from Tilly and the Buttons. There has been some great creative colour-blocking going on over on Instagram and I love that the pockets are concealed within the z-shaped seaming.
  • Orageuse released their Borealis collection this month, comprising of the Riga Coat, Berlin Skirt and Helsinki Blouse. The skirt is probably my favourite (those pockets!!) but I'm taken with the details of the coat such as the super wide belt loop at the rear. They are also offering a free downloadable booklet to draft and sew your own Oslo Wrap.
  • On my cutting table at the moment is the new Delphy Ballet Top from Half Moon Atelier. Its a classic cami with a variety of strap options. I love the low scoop back of view A and the gathering at the centre of the bust brings back fond childhood memories of ballet leotards!
  • So Sew Easy released a free pattern for Women's Sweatpants. The download is accompanied by and in depth photo tutorial on their blog showing how to construct them.
  • The Julia Pocket Top is new from Sew Me Something, available in both paper and PDF formats. Its a comfortable, boxy style with pockets cleverly concealed in a seam running across the stomach.
  • Ohhh Lulu Lingerie released both the Romy Bra and Celeste Bikini Cut Panties. The Romy is slightly more complex than her other bra patterns with a three piece lined cup and scooped back. The knickers are designed for knits and if you're feeling confident there is a free version available with less detailed instructions and options.
  • New from Boho Banjo is the Two Pegs Skirt. This one certainly lives up to her 'art to wear' moto with its bell shape and options to make the panelled front design either curved or square.
  • Also with a skirt pattern this month is Wear Lemonade with the Ada Skirt. Another knock out chic design from them with a button front, tie at the waist and deep pockets set into the side panels.
  • Its been a while since Maria Denmark treated us to a new pattern and she hasn't disappointed with the 407 Annika Boat Neck Dress. Form fitting and designed for heavier knits, its described as the perfect winter dress.
  • Sew Caroline released the Primrose Peplum Top. Its form fitting through the body with gathered or circular deep peplum options starting at the waist. It also has no less than 5 sleeve options!
  • The February PDF pattern release from Sew Over It was the Lizzie Pleated Skirt. Perfect to showcase special fabrics it is a fully lined, classic pleated design.
  • Hey June Handmade launched the Mountain Pose Yoga Pants. I adore the lovely dipped front shape of view A created by the overlapping wide waistband. You can get the pattern for free at the moment by joining the Facebook group.
  • The Scarlet Swing Dress is new from Greenstyle Creations. The swing shape is perfect as we head into warmer weather and the wide variety of options include on trend bell cuffs and cold shoulders.
  • Hot Patterns released the Milano Dolman T's pattern. It is currently only available in paper format but PDF is soon to come. I really like the wide neckline and panelled style lines.
  • The Mid-Rise Ginger Jeans pattern from Closet Case Patterns was originally only available as part of their online jeans-making workshop but can now be purchased as a stand-alone PDF patten. Very tempted to try these out with the flared leg expansion pack now!
  • Straight Stitch Designs released the Phinney Ridge Cardigan. Its a classic relaxed style and Kimberley has published a tutorial on how to lengthen it. I adore her striped duster length version.
  • Sew This Pattern launched the Daphne Day Dress which has a flattering fit and flare shape thanks to the wide waistband. It also features a lovely semi circular back cut out with button fastening at the nape.
  • New from Scroop Patterns is the Fantail Skirt. I love their concept of releasing a historical and modern version which can be bought separately or as one. Its a 5 gored a-line style with a fan of pleats at the centre back. The historically accurate version is full length with loose pleats and the modern version is knee length with pleats sewn down to the lower hip.
  • Wardrobe By Me launched the curvy version of their Asta Dress in sizes US 14-24. It features the same three neckline options and sleeve lengths as the original pattern but drafted from a plus size block.
  • Its been quite the month for skirt pattern releases, spring must be on its way! The Megan Skirt is new from Designer Stitch and is a panelled a-line design which would be perfect for colour-blocking or mixing prints.
  • Ann Normandy Design released the Short Sleeved Dress pattern. Its a loose fitting tunic style with square neckline which features a deep v shaped slit at the centre front. I can see this turning into a totally different dress when using different weight of fabric.
  • If you sign up to the new How To Do Fashion newsletter you will receive an exclusive new free PDF pattern. Full details of the pattern are yet to be released but the preview picture includes a gorgeous simple sleeveless top. An ideal opportunity to try out this company is you haven't yet.
  • The final pattern release I've spotted this month is the Blackwood Cardigan from Helen's Closet. Its designed for lightweight knits and to be worn open so is perfect for layering and comes in two lengths with the option for patch pockets.


Sew-alongs


  • Allie from Indie Sew has been running a sew-along for her Lonetree Jacket and Vest pattern over the last couple of weeks. Its super thorough with lots of tips and tricks for sewing all those fiddly jacket details.
  • There have been a series of posts going up over on the Tilly and The Buttons blog to guide you through the essential points of sewing their new Zadie Dress. With its interesting seaming stabilising those knit seams is particularly essential!

Pattern Updates and Expansion Packs


  • As well as her two new patterns this month Sarah from Ohhh Lulu Lingerie updated her Ava High Waist Panties to include an additional size, more in-depth instructions and further variations including a scalloped lace overlay which I love
  • Blank Slate Patterns re-released their Shoreline Boatneck and it now includes a tunic variation. If you purchase the pattern you also receive a 'hack pack' including instructions on how to add bell sleeves, a button back, gathered skirt and more!


Upcoming!


  • I'm super excited about the new collection from Named which is all set to be released tomorrow (1st March). I fell in love with this company last summer and can't wait to get my hands on more. Named 'Playground' the spring/summer collection includes 8 patterns including two which are 2 designs in 1.
  • In the Folds has her next pattern in collaboration with Peppermint Magazine coming soon. The magazine has a collection of lovely designs free to download from their website.
  • Pauline Alice hinted on Instagram that she has more than one new pattern ready to release very soon! I'm intrigued to see what unique touches she is adding this time.
  • Kennis from Itch to Stitch is currently testing the Newport Top and Tierras Woven Joggers patterns
  • Kristiann from Victory Patterns has hinted that she has a new pattern on its way soon! After the dramatic beauty of her Trina Dress I'm really looking forward to the reveal of this one.
  • Tilly is already working on her summer pattern release. This one is to be named Etta.

Other Exciting News


  • The first book from effortlessly chic patten company The Maker's Atelier is out now! Called The Essential Collection it includes 8 patterns for interchangeable separates essential to your wardrobe.
  • The french indie pattern community seems to be booming at the moment. Paprika Patterns are getting in on the act, working on French translations of their patterns.
  • Jenny from Cashmerette launched a new online workshop called Fitting for Curves: Pattern Adjustments for the Upper Body. You can learn to fit your body shape by following video tutorials and an ebook.
  • Also with a new online class are Sew Over It. Learn to make your first coat with 'Intro to Sewing Coats: The Chloe Coat'. Chloe is a new pattern for them and such a gorgeous classic design with detachable scarf. It almost makes me wish I'd held off making my first coat so I could make use of all the tips!
  • Colette Patterns have made some changes to Seamwork Magazine. They are planning quarterly bumper issues with smaller ones in between. The regular PDF pattern releases will continue and the mid month add ons will now be available instantly from an exclusive members only area.

With the huge list of new releases this month I'd be surprised to find out there were any that I missed! But as always feel free to contribute any extra news you've heard in the comments below. I'm off to do a bit of sewing now but will leave you with a bit of indie sewing inspiration from the blogging community.


  • I was in love at first sight with Sonja's version of the Grainline Cascade Duffle Coat. Isn't that wide striped wool amazing?! She did such a great job matching them and I love the black leather toggles.
  • Ange's sequin fabric choice for the Talvikki Sweater from Named is incredible! The drama of that collar and the added sparkle prove that sweatshirts don't have to be boring basics.
  • Jade's pink and burnt orange Marlborough Bra is delicious. That colour combination is so unusual and super luxurious when you combine lace and satin.
  • I had the pleasure of seeing (and touching!) Marie's awesome Martha Dress in person when we were in Denmark. How brilliant is the combo of tie dyed velvet and this style?!
  • Yasmeen's maxi length Moneta Dress has made me see the pattern in a whole new light! That billowing striped jersey skirt is so beautiful.
SaveSaveSaveSaveSaveSaveSaveSave
SaveSave

Saturday, 25 February 2017

Handmade Gifts: Laurel Blouse and Chef's Apron

After that fairly mammoth post about my boned silk dress mid week I thought I'd share a couple of slightly more straightforward projects today! Thank you all for the lovely comments and likes for my dress. Its so great to hear that so many of you enjoy those lengthy posts that go into all the details of instruction; they're my favourite thing to read on sewing blogs and probably to write too!

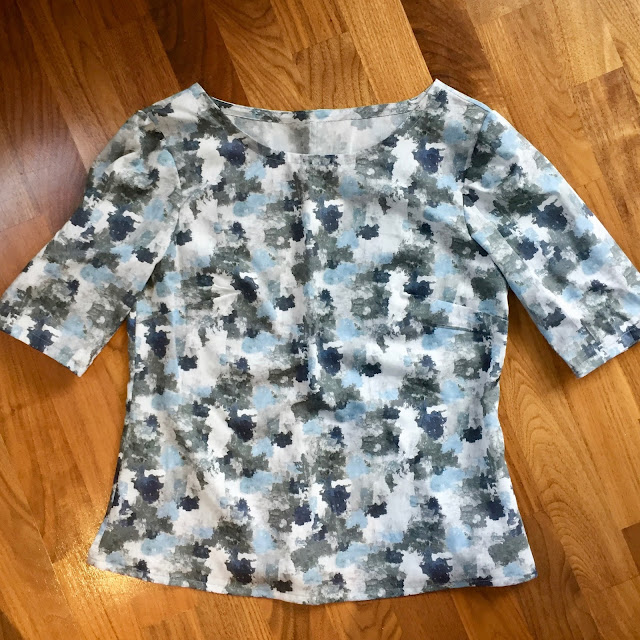
I've got the last of my selfless sewing projects from Christmas last year to show you today. In case you missed them I've already posted about the silk robe I made for a friend's birthday and the hoodies I made for my brother and stepdad. I've spoken in those last two posts about how difficult it is to sew garments as surprise gifts for others because you need to fit them. Fortunately I get lucky with my mum as she is a very similar size and shape to me. In fact I think most of her fitting issues would be exactly the same as my own! I made her a Laurel Blouse a couple of years back after she loved mine and tried it on.

Diary of a Chain Stitcher: John Lewis Cotton Lawn Print Colette Laurel Blouse

The idea to make this gift actually came from the fabric. I'd been humming and hawing about what to give my Mum. I wasn't particularly planning to make her anything but she said to me one day 'are you going to make lots of your presents this year? I love it when you do that!'. So the idea was simmering away in the back of my brain when I was shopping for work in John Lewis one day and came across this amazing print on a fine cotton lawn. Its part of John Lewis's own range of fabrics and if I remember rightly came in a few colours at the time. Something about it just screamed 'Mum!' at me and the idea for a second Laurel was born.

Diary of a Chain Stitcher: John Lewis Cotton Lawn Print Colette Laurel Blouse

I'd actually been wanting to make another because as my sewing skills have improved I've started to think I could have done a better job first time around. When I first made the Laurel for myself I had real trouble with the technique of using bias binding as a facing as described in the pattern instructions. I think part of the problem I had was that I was trying to attach quite a wide shop-bought cotton binding to a poly crepe and that coupled with the fact that the curve of the neckline is quite tight at the shoulder seams was always going to be difficult. On that version and every subsequent version since I've used my own self drafted facing to finish the neck instead. I have always loved the binding finish on the cuffs and really wanted to get it to work on the neck and get rid of the awkward facing flipping out issue. For this one I took the plunge and cut my own fairly narrow binding from the fashion fabric. It turned out so much better and easier than I had imagined as the lawn was so much more malleable than the shop bought binding. I'm very proud of my neat stitching!

Diary of a Chain Stitcher: John Lewis Cotton Lawn Print Colette Laurel Blouse

I followed the binding application method described in the instructions for the Grainline Alder Shirtdress. Finishing the armholes for this dress was the first time I've had real success using binding as a facing and Jen describes it really well in small steps. The additional step of under stitching the binding before you turn it under and grading those seam allowances makes a huge different to how smoothly the finished binding sits.

The light weight and softness of the lawn also really helped with the other issue that I've had with this pattern; setting in the sleeves with no puckering or gathering. I've previously ended up with a bit of a puffy sleeve head but the fine cotton was much better to ease in. As with all the versions since my first I stuck with my alterations to the shape of the armhole. The blouse pattern pieces are a completely different shape to the dress in this area and I have filled in the curve of the armhole at the front to make it shallower and give more room across the chest. Other than that the construction process was very smooth and enjoyable. I used french seams throughout to make it extra special. If you are considering this pattern I would recommend making a muslin as it has taken me a while to tweak it into shape but the effort is worth it. Its a lovely classic shape which is so my Mum. It really suits her and I'm wishing on the warmer weather so she can get some wear out of it!

Diary of a Chain Stitcher: Baking Print Great British Sewing Bee Butcher's Apron

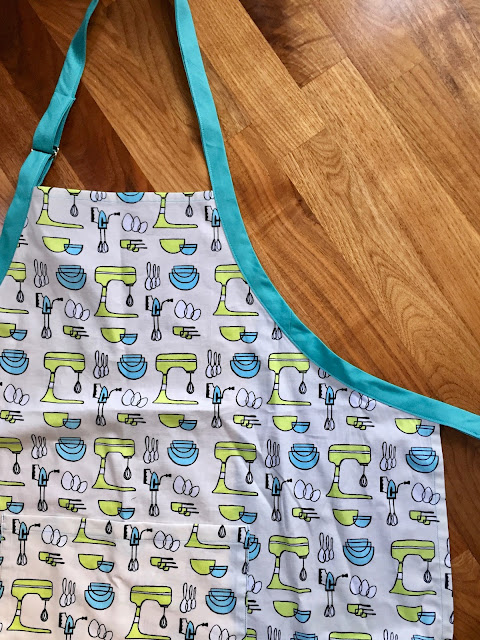
The last gift I made was for my good friend Tom. He lives nearby and its become a tradition for him to pop round for a bit of spontaneous baking; namely flapjack. I'm always laughing at the fact that he has to come to mine to do it because he doesn't have any of the equipment. So I bought him a flapjack tin, wooden spoon and made him an apron! I used the Butcher's Apron pattern from the Great British Sewing Bee book from the first series. Its a great shape and size for an apron and I like that it most definitely works for a man too. I was pretty impressed with the instructions and it would definitely be a good project for a beginner as you can use some nice stable fabrics and it only has a couple of pattern pieces. It does require some accurate sewing to attach that pocket neatly and if you're just starting out you might find apply the strap (which is effectively a wide binding) a little fiddly. But a nice challenge and a very satisfying result.

Diary of a Chain Stitcher: Baking Print Great British Sewing Bee Butcher's Apron

The fabric was a gift from my Mum years back when I hadn't been sewing all that long. I'm not sure where she got it from but isn't it a fantastic print for kitchen-wear?! I love the combination of clean, fresh colours and the scale of the repeat print of baking equipment. It was beautiful to work with too, a nice thick and smooth weight of quilting cotton. The binding I made from some plain cotton of a similar weight I had in my stash. I thought it worked well to bring out the turquoise in the print. I used to hate making my own bias but for some reason now I quite enjoy the therapeutic nature of working through the steps! I think it might have something to do with discovering water erasable fabric pens and how much easier they make it to be accurate.

Diary of a Chain Stitcher: Baking Print Great British Sewing Bee Butcher's Apron

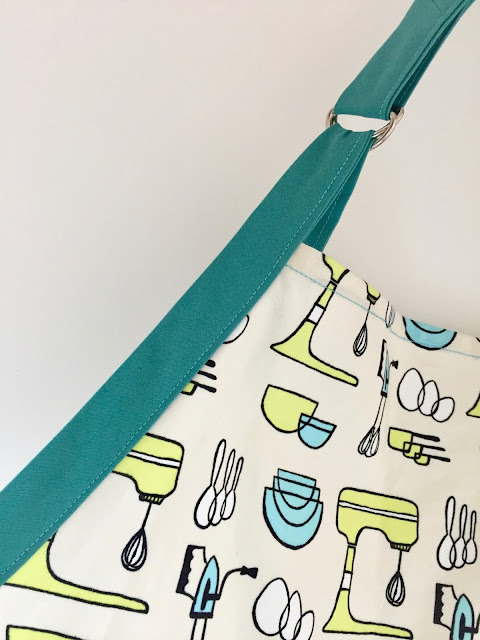
I like the added professional touch of the d-rings to shorten the neckline strap. But I couldn't figure out how to get them to work right! I attached them as instructed by simply looping them both onto the end of the short strap at the neckline, folding the end back and stitching to secure. But no amount of googling could get the strap to hold securely in place without getting twisted! Perhaps Tom has figured it out for himself!

Diary of a Chain Stitcher: Baking Print Great British Sewing Bee Butcher's Apron

I also want to give a shout out to a handmade gift that I received this year! I've already shared a very popular picture of them on Instagram but love them so much they need including on here too. My amazing Mum has only just started sewing but made me this gorgeous set of pattern weights complete with drawstring bag to store them in! Isn't the tape measure print quilting cotton the perfect choice? She got the idea after seeing Rumana's set on the last series of Sewing Bee and followed an online tutorial to make this rice filled set. I know she isn't entirely happy with them but I can't see any faults. They are so neatly made! It meant so much to receive these and was such a surprise as I know she is still quite daunted by her machine and fabric shears.

Diary of a Chain Stitcher: Handmade Tape Measure Print Sewing Pattern Weights

It was so wonderful to be on the receiving end of a handmade gift and made me realise that every second I put into sewing something for someone else is 100% worth it to make them feel as good as I did when I opened these. I'm already planning some handmade surprises for my loved ones this year but as I know they all have a little stalk of this blog from time to time those ideas will have to remain a secret for now!

UPDATE FROM MY MUM! Apparently the baking print cotton she bought me on a trip to NYC and it was from Pins & Needles on the Upper East Side. The tape measure print she bought in Liberty before Christmas although I'm not sure that its one of Liberty's own prints. Thanks mum!
SaveSave

Wednesday, 22 February 2017

Kelly Green Silk Occasion Dress

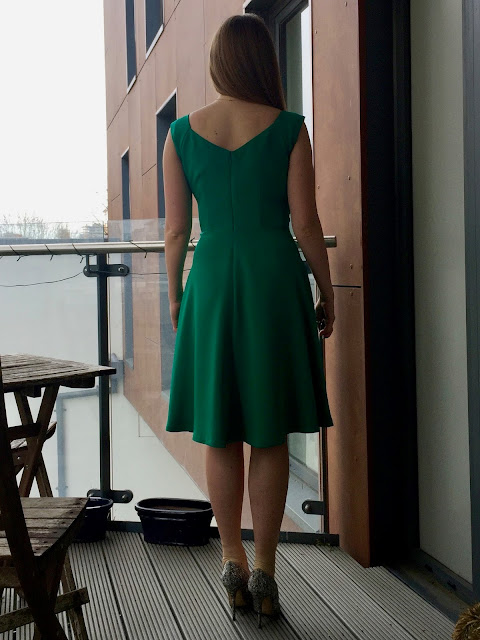
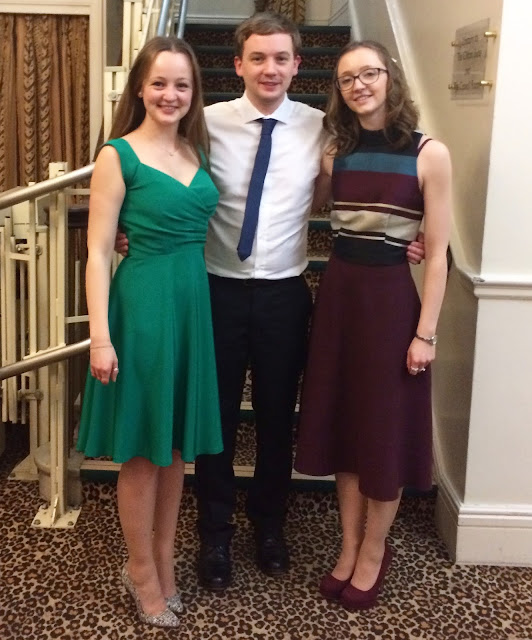
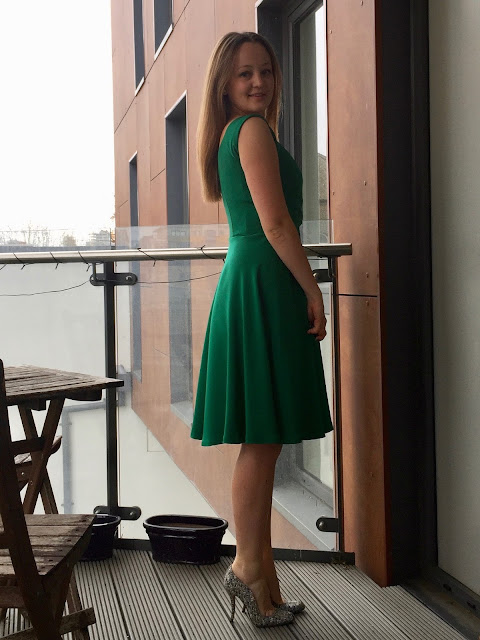
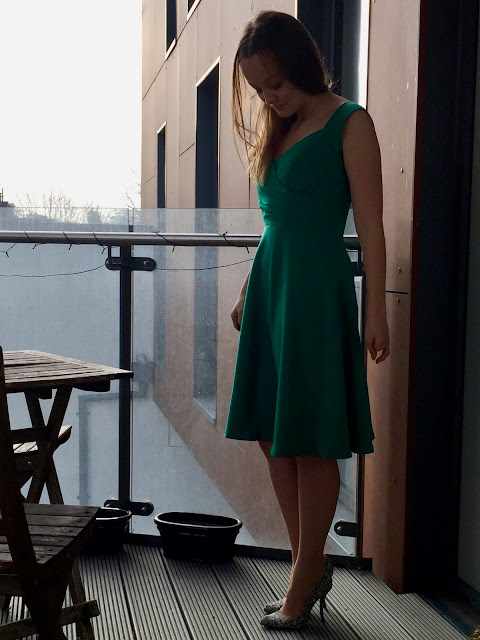
The dress I've got to share with you today has been a real labour of love and I enjoyed every single second of making it. Even the whole day spent fitting the bodice! I like nothing better than a reason to sew myself something special and challenging and what better reason could I have than the wedding of my step-sister 10 days ago? I mulled over what I wanted to make for over a year and bought the fabric long before I decided on a style and pattern. When I visited Mood Fabrics NYC last April I spent a good hour pawing at bolts in the glorious silk section and when I glimpsed this vibrant Kelly Green 4 Ply Silk Crepe it was love at first sight. It has got the most amazing thickness and weight to it combined with such a luxurious drape and sheen. Its similar to what I would call a silk morocain here in the UK. At $35/yard it was a real treat but similar silks this side of the Atlantic are likely to cost double. I on the spot decided that this was going to be used for my wedding outfit and bought 2.5 yards which turned out to be plenty for this design. I might even have enough left to piece together a slinky cami if I'm lucky.

Diary of a Chain Stitcher: B5814 Gertie for Butterick Dress in Kelly Green Silk Crepe from Mood Fabrics

I've wanted to make B5814 (one of Gertie's designs for Butterick) for a really long time; I think I've had it pinned to my sewing pattern wish list on Pinterest since it was released! The one thing stopping me, apart from an occasion to wear it) was that I wasn't totally sold on the style of the skirt with the pleated drape at the hip. Once I had chosen the silk I pretty much ruled the pattern out as I wanted a style that would make the most of the amazing movement in it. Then it occurred to me one day that it would actually look beautiful used for the pleats of the bodice and I could switch out the skirt for a simple flippy half circle.

Diary of a Chain Stitcher: B5814 Gertie for Butterick Dress in Kelly Green Silk Crepe from Mood Fabrics

The silk was going to need some support to maintain the lovely crisp lines of the bodice so I underlined all the bodice pieces and sleeves with silk organza. I love doing this and find hand basting the pieces together so therapeutic. The organza has given just the right amount of structure to the bodice shape but still allows the pleats of the bodice to fall in lovely soft folds once the basting stitches were removed. I really wanted to go all out and make this dress the best it could be so I even used proper basting thread for the first time which breaks fairly easily to make it more simple to remove. I also actually used beeswax for all my hand sewing and was blown away by the difference it made. It certainly made those two hours hand sewing the hem more pleasant!

Diary of a Chain Stitcher: B5814 Gertie for Butterick Dress in Kelly Green Silk Crepe from Mood Fabrics

Looking at the sizing on the envelope I cut a muslin using the size 10 bust and 12 waist. I read a whole heap of fitting advice on Pattern Review which almost put me off! I went in with the mindset that I was going to need to send some time on the fit and was actually pleasantly surprised. Yes I needed to raise the neckline (Gertie herself says its not a modest dress) but it was amazing at how secure and comfortable I felt in the first muslin despite how exposed I was! To make this alteration as straightforward as possible I measured and wrote on the muslin how much higher I wanted it to be at various points across the front. The most was 1" at the centre front. I then added paper behind my pattern pieces, marked these points and joined them all using my french curve, grading to nothing at the ends where the edge meets another seam. I liked the way the right bodice piece dipped down under the left bust so didn't add any height there.

Diary of a Chain Stitcher: B5814 Gertie for Butterick Dress in Kelly Green Silk Crepe from Mood Fabrics

The rest fit so beautifully that the only other change I needed to make was to get the sleeves to stay put on the shoulder. Gertie's fitting post was invaluable to me at this point and the changes I made were pretty much exactly what she suggests. I pinned out a bit at each front raglan sleeve seam and pinned a wedge at the top so it fitted the curve of my shoulder then transferred those adjustments to the pattern pieces. If you are going to follow Gertie's advice take note that in her pictures she shaves of a wedge in the wrong place on the second one. You need to change the shape of the seam where the sleeve meets the bodice, not where the sleeve meets itself under the arm. Its pretty easy to get muddled at various points with these small bodice pieces so I was glad I made a muslin just to practice the construction! The sleeves fit so well now; not too tight or loose. Each adjustment was only tiny but made a huge difference. The neckline is quite wide so I expected to have to wear a strapless bra but I was pleased to find I could away with my normal one which has wide set straps. Its flesh coloured so if anything did peek out as I moved around you wouldn't really notice.

Diary of a Chain Stitcher: B5814 Gertie for Butterick Dress in Kelly Green Silk Crepe from Mood Fabrics

As I mentioned the fitting did take me a whole day as I made a second muslin to check my adjustments, inserted zips in both and painstakingly transferred all markings. These included seam allowances so I could press down the top edges accurately and bust point and waistline markings so I could accurately assess fit. All that time fitting was absolutely worth it to be able to forget I was even wearing something so special whilst whirling around dancing a ceilidh! I was wonderfully comfortable and happy in it all day.

Diary of a Chain Stitcher: B5814 Gertie for Butterick Dress in Kelly Green Silk Crepe from Mood Fabrics

The time taken on fitting a muslin gave me more confidence when the time came to cut into my fabric and I enjoyed the whole construction process even more knowing I had a dress which was going to work. A couple of days after cutting I went to see La La Land and like most of us was drooling over the dresses when I realised that what I was making was very similar to Emma Stone's green date night dress! Total happy accident that gave me even more confidence in my choices. Looking at pictures of that dress and the way it moves I've got my suspicions that this very fabric might have been the one used!

Diary of a Chain Stitcher: B5814 Gertie for Butterick Dress in Kelly Green Silk Crepe from Mood Fabrics

Construction-wise its one of those wonderful dresses that looks beautifully simple from the outside but has all sorts going on underneath to make it look that effortless! The instructions for this pattern are very thorough and include all kinds of well thought out techniques but I threw a few extra in there for good measure! Firstly do use tailors tacks to transfer all your markings. I always use them anyway as they are such an accurate way of working and for this design they are invaluably clear when matching up all those pleat lines. I wouldn't want to risk damaging the silk with a washable marker or even chalk. Luckily one of the bonuses of underlining with silk organza is that you can make all your markings nice and clearly onto that!

Diary of a Chain Stitcher: B5814 Gertie for Butterick Dress in Kelly Green Silk Crepe from Mood Fabrics

The bodice has boning along the front and back darts and set just back from the side seams. The pattern instructs you to use the kind of plastic boning which comes inside a removable fabric casing which is just what I did. There are quite a few different types of boning an ways to insert it into a garment which I might cover in a future post but the plastic boning provides all the shape you need for this style. If you are looking for more support you might want to consider spiral steel boning. My lining is a perfectly coloured satin remnant I picked up on my trip to Stoff & Stil. This has a tight weave and crisper hand than the silk and organza combo and provided a nice string base to sew the boning to.

Diary of a Chain Stitcher: B5814 Gertie for Butterick Dress in Kelly Green Silk Crepe from Mood Fabrics

I was really worried about the neckline gaping as I know that is often a problem with low cut wrap styles and the fact that I had altered that area made me even more concerned. I stay-stitched this edge and then stabilised this edge with selvedge strips of the organza sewn close the stitching within the seam allowance. This edge is then under-stitched which is so satisfying to do and then look at! My mum pointed out that with the low wrap neckline it could have been a dress that I spent all day fiddling with, feeling self conscious but it sat so beautifully I couldn't be more pleased.

Diary of a Chain Stitcher: B5814 Gertie for Butterick Dress in Kelly Green Silk Crepe from Mood Fabrics

The wiggle skirt from the pattern is underlined rather than lined and as I really didn't want to change the movement or drape of the silk at all I opted to go without a lining in the skirt. This brings me on to the one thing I didn't like about this pattern; the finishing of the bodice down the centre back and waist. When a bodice is lined I would usually attach the skirt and insert the zip into the exterior fabric only then press under and stitch down the edges of the lining for a today finish. These instructions have you treat the lining and fashion fabric as one at this stage so you end up with visible seam allowances down the centre back and along the waistline. I'm not keen on how this looks but by the time I realised I would have had to unpick quite a lot of the bodice finishing and didn't want to damage my silk. This finish seems a little odd when you've made so much effort to finish the rest of the bodice beautifully; the lining is hand stitched in place at the underarms and side seams.

Diary of a Chain Stitcher: B5814 Gertie for Butterick Dress in Kelly Green Silk Crepe from Mood Fabrics

I bound the edges of the centre back seam with bias strips of the silk before inserting the zip in an attempt to make the exposed seam allowances as pretty as possible! The instructions have you turn down the top ends of the zip tape and tack them in place before putting it it which I found fiddly and also don't like the look of now its done. I must admit the closure at the top does look so neat and clean from the outside though. I think this is the first time I managed to get the placement of hook and eye just right so the two edges sit flush together. The waistline was a few millimetres away from matching first time around and when everything else was coming together so beautifully I couldn't stand it not to be perfect! I unpicked it once and am now super happy with it. I covered the bottom end of the zipper tape with a square of the silk folded around to enclose all the raw edges. As I left the skirt unlined I didn't want the raw end of the tape catching on the silk or my tights.

Diary of a Chain Stitcher: B5814 Gertie for Butterick Dress in Kelly Green Silk Crepe from Mood Fabrics

Because of the faux wrap style and the the way the lining is finished the waist seam does get quite bulky at points across the front. If you're making the skirt that comes with the pattern that has the lovely drop on the front this would get even thicker and I imagine be quite tricky to handle. Throughout the whole construction process I heavily trimmed and graded my seam allowances as I didn't want any bulk showing through this lovely soft silk. As the waistline was already a tad bulky I was reluctant to bind the raw edge as I had done with the centre back. Instead I resorted to pinking it, comforting myself with the fact that it is hidden behind the waist stay anyway.

Diary of a Chain Stitcher: B5814 Gertie for Butterick Dress in Kelly Green Silk Crepe from Mood Fabrics

To make the waist stay I used curved petersham from Maculloch & Wallis and followed the guidance in Claire Schaeffer's Couture Sewing Techniques. I got about as confused with them as I did when I made my chiffon dress a couple of years back so ended up getting that dress out and copying it! I absolutely recommend adding a waist stay to any special occasion dress or dress whose skirt has a bit of weight to it. When it fits your waist snuggly it keeps everything sitting in just the right place. To get the length right on mine I measured my waist and added what I needed to turn back to create the fastenings at the ends rather than use the guide provided with the pattern. The sizing on this seemed to be a bit off.

Once the dress was completed I left it to hang for a good 48 hours as parts of that semi circular skirt are on the bias and would likely stretch out. It dropped all kinds of wonky and I had to put my dress form to good use, measuring up from the floor and marking an even height to level it off. I took off between 2-5" in the end, using two 1/2" turns for the hem to give it a bit of body. I'm sure it still looks uneven on the hanger but in the pictures it looks good to me!

Diary of a Chain Stitcher: B5814 Gertie for Butterick Dress in Kelly Green Silk Crepe from Mood Fabrics

I did have a mini disaster right at the final hurdle. I had been so careful with the silk all the way through, using an organza pressing cloth and having total paranoia about pricking my finger and bleeding on it when hand sewing! I was giving it the final press after finishing the hem and my iron decided to clean itself out all over the back of the bodice. I could have cried. I gave myself a stern taking to and carefully wet the spots a little more to 'blur' the edges and prevent water rings then dried it out the best I could by gently using the heat of the iron through layers of paper towel. Thankfully by next morning not a mark could be seen.

Diary of a Chain Stitcher: B5814 Gertie for Butterick Dress in Kelly Green Silk Crepe from Mood Fabrics

If you've made it to the end of the post well done! There's nothing I like more than talking about the nitty gritty of sewing techniques and once I get going there's no stopping me! I can't wait to find an excuse to take this dress for another spin, I'll have to resist making any more party dresses for a while...or just find more parties

Thursday, 16 February 2017

Handmade Gifts: McCalls 6614 Hoodies for Men

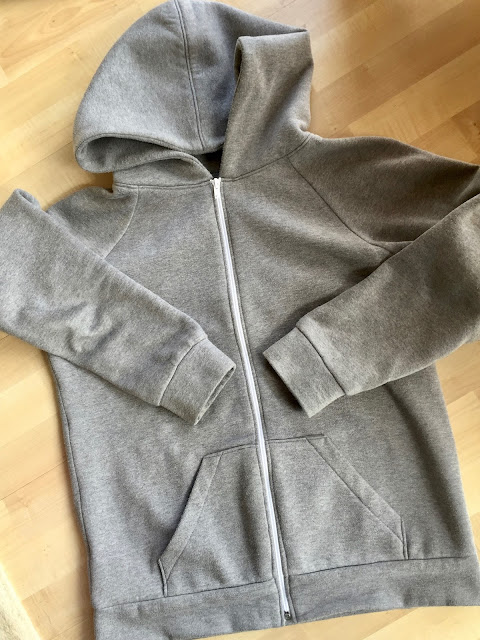
I have been desperate to post about the dress I worked so hard on to wear to my step-sister's wedding last week but the gloomy London winter light is making it impossible to get any decent pictures. Fingers crossed for the weekend! In the meantime I've got the next in my series of posts about gifts I sewed for loved ones for Christmas and birthdays at the end of last year. Well actually this is a trio of hoodies, the first of which I sewed back in 2015 for my brother for Christmas. The second was my stepdad's Christmas present this year and the third was for my brother's birthday; identical but a different colour as he loved the first so much!

Diary of a Chain Stitcher: McCalls 6614 Mens Hoodie in Fleece-Backed Sweat-shirting

In my last post I wrote about the challenge of sewing clothing as gifts being the difficulty of getting them to fit but remain a surprise. Hoodies are a little risky in that you want the right amount of ease and don't want the waistband ending up too snug or the sleeves too baggy. However they are quite forgiving in that they are a relaxed fitting knit garment and in general men have less curves to work around than ladies! The initial idea of making a hoodie for my brother actually came from him. He asked me for one for Christmas 2014 and jokingly suggested I could make it. At that time I didn't feel like my sewing skills were up to the challenge so I decided to surprise him with one the following year. Surprised he was; he didn't even realise I had made it until I told him!

Diary of a Chain Stitcher: McCalls 6614 Mens Hoodie in Fleece-Backed Sweat-shirting

I spent quite a lot of time looking into hoodie patterns and found it difficult to find one in the relaxed classic mens style I was after but settled on McCalls 6614 in the end. I definitely wanted a zip up the front and nothing too unusual in the details. There's actually a better selection around now than when I first made this but menswear patterns can be so hard to come by. This is definitely one of those patterns where you have to look past the photos on the envelope to the line drawings! I used view D by the way; the other versions all pull on over the head and feature princess seams which I think make them more suited to a female figure.

Diary of a Chain Stitcher: McCalls 6614 Mens Hoodie in Fleece-Backed Sweat-shirting

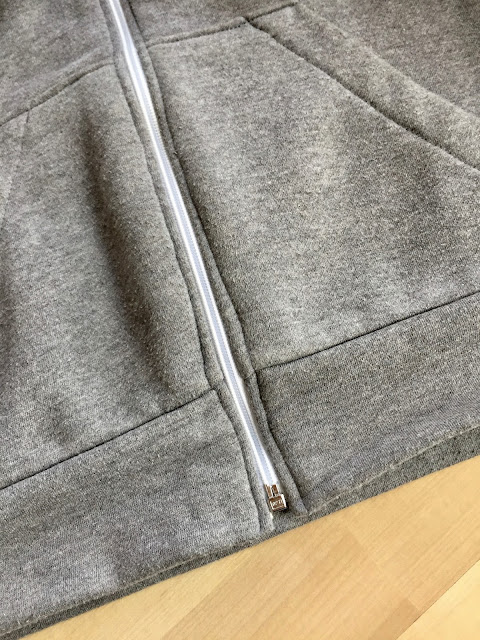
I did a lot of research into other bloggers' experiences of making hoodies looking for tips and tricks. I was a bit nervous about making my very first garment of this sort as a gift and I wanted it to be the best I could make it. I found Novita's post on the hoodie she made for her husband and it was that post which swung the decision to use this pattern. In the end the only thing I changed about the pattern and instructions was to omit the facing pieces. In these plush sweat-shirtings I think it adds too much bulk and I would have needed much more fabric to get these bits out. I felt certain that I'd never seen a facing on a RTW hoodie or similar knit garment but lo and behold I've seen them everywhere in the shops since! Instead of the facing I copied Novita's genius idea to add cotton tape along the edge of the zip for a neat finish. I simply stitched it along the zip tape before turning that edge under and top-stitching. On the versions I made this year I found twill tape to match the hoodie colour which looks super clean but I think I might actually prefer the contrast of the cream tape on my brother's first one. Combined with the white fleece inside it looks like a specially considered design choice and is one of those unique little touches you can add when you're making your own.

Diary of a Chain Stitcher: McCalls 6614 Mens Hoodie in Fleece-Backed Sweat-shirting

I think the 2016 versions turned out ever so slightly better just because of my increased sewing experience. But I am still unbelievably proud of the first one. Despite not being one of my most ambitious or well made makes this is still one of the projects I am most proud of. He wears it ALL the time (and now he has the second 9 times out of 10 when  I visit he's wearing one of them) and although I love being able to tell people I made my own outfit for me nothing beats the feeling of seeing one of your favourite people wearing something you made and looking so good in it! I love how much he likes it and I was amazed at how well it fit and suited him when he first put it on. I actually took these pictures this Christmas so a year of heavy wear is responsible for those bobbles. I unfortunately failed at persuading any modelled pictures!

Diary of a Chain Stitcher: McCalls 6614 Mens Hoodie in Fleece-Backed Sweat-shirting

I was confused by the shoulder darts when I first cut the pattern. When I'm using a stretch fabric why do I need a dart? In fact to ensure a good shape and fit especially in thicker, more stable knit fabrics like this darts are often essential. In fact just yesterday I was in a fitting for some lycra all in one costumes and despite being a very fine clingy stretch fabric the costume maker was carefully considering where to place seams for shaping and where darts might be needed. This sweat shirting have any of that 'cling' that means it can rely on stretching around the body so the garment needs to have shape within its construction and shoulders are a particularly awkward body part to fit a garment around. The shoulder shape is lovely (although it is a unisex pattern so I wonder how it looks on a lady) and I also really like the cut of the spongy lined hood and slim fit. Both my brother and step dad are fairly average in height and build and I cut the size medium. Everything about it is spot on as I wanted including the length of the sleeve and in the body.

Diary of a Chain Stitcher: McCalls 6614 Mens Hoodie in Fleece-Backed Sweat-shirting

I REALLY enjoyed making all three of these. They require just the right amount of concentration and are so satisfying to see come together. I love a garment with a raglan sleeve! The most difficult part of construction is probably the insertion of the zip. Inserting a zip into a knit fabric can be tricky as you don't want to stretch the fabric out along the tape and forever distort the shape. I had real trouble with this on my Sangria Dress but luckily this stable sweat shirting is much more forgiving. Getting the front pockets and waistband to match up either side of the zip is essential as that area is such a feature. I will admit to unpicking and restitching a number of times on all three but it was so worth it!

Diary of a Chain Stitcher: McCalls 6614 Mens Hoodie in Fleece-Backed Sweat-shirting

The top-stitching is also well worth taking your time over as it makes it look super professional and stops the seams looking puffy which can be a home-made giveaway. I constructed the main seams with a narrow zig zag stitch on my machine and finished them on the overlocker but did all the topstitching with a standard straight stitch as this is a relaxed fitting hoodie that goes on like a jacket so doesn't really require any stretch.

Diary of a Chain Stitcher: McCalls 6614 Mens Hoodie in Fleece-Backed Sweat-shirting

The one thing to bear in mind if you are going to make this pattern is that only one zip length is listed for all sizes. Of course as the size increases the length of the front does too so this length of zip only works for one size. Quite a glaring mistake! I'd recommend making the garment up and measuring the length of the opening before you buy. Its frustrating as you have to wait to finish your garment but at least your zip will be the right length. I think I ended up needing a 26" zip but as I got mine from John Lewis I bought a few and returned what I didn't need. The open ended zips were actually really difficult to find in a decent selection of colours but I'm really pleased with all three of my choices. I like the contrast on the grey and the green (I went with beige for the green as the white looked too harsh) but a pale colour against the black was too stark so I kept it simple with black. John Lewis are pretty averagely priced for a UK supplier of these but I couldn't believe how expensive they were! The cost of notions like these can really whack up the cost of a garment but its always worth investing in good quality zips.

Diary of a Chain Stitcher: McCalls 6614 Mens Hoodie in Fleece-Backed Sweat-shirting

The grey fabric with the white fleece back came from A to Z Fabrics on Goldhawk Road which is the one next door to the Costa when you come out of the tube. This shop often has some hidden gems if you rummage hard enough and know what to look for. I have since realised that sweat shirting with a contrast colour reverse like this can actually be quite tricky to come by so I'm very pleased with my impromptu choice! The fabrics for the green and black versions both came from Rolls & Rems in Lewisham who have a good selection of knits upstairs. These are again both fleece backed rather than loop backed.

Diary of a Chain Stitcher: McCalls 6614 Mens Hoodie in Fleece-Backed Sweat-shirting

All three fabrics are of a very similar weight and stability with actually quite limited stretch so I was confident the fit of the second and third would be similar to the original. The one change I made to these two was increasing the size of the cuffs at the request of my brother. He can get his hands through the grey cuffs but likes to push them up to his elbows when wearing which the knit didn't have enough stretch in to do. I added 1" to the size of them this time and apparently that is 'spot on'. I didn't increase the width of the sleeve, it just meant less easing needed to be done when attaching the cuffs. I did consider using a ribbing for the cuffs and waistband instead but I knew both recipients would prefer a solid colour to wear with everything and I couldn't find a decent ribbing to match (which might sound ridiculous as one of them is black but have you ever tried to match two blacks, near impossible!).

Diary of a Chain Stitcher: McCalls 6614 Mens Hoodie in Fleece-Backed Sweat-shirting

To sum it up I'm incredibly proud of all three of these presents and hope the wearers enjoy them as much as I enjoyed making them. I highly recommend a hoodie as a handmade gift (I'd actually love to try making a lighter weight one in some super soft merino) and this pattern is a cracker if you want a fairly slim zip up style. I definitely see more of these in my future! 

Thursday, 2 February 2017

Handmade Gifts: Liberty Silk Satin Almada Robe

I made a fair few handmade gifts that I was really proud of back in December. The first of which was this silk robe which was a birthday gift for my friend Checca. I wanted to give her something super special as it was a special birthday plus I knew she'd appreciate something I had sewn as she sews too (and is very talented at it, I keep on at her to start a blog!). That did mean the pressure was on to make a really good job of it though as she'd spot any mistakes! I do enjoy sewing gifts for the home and other small soft goods but what I really like to sew is clothes. However, when making clothes as gifts I always come a bit unstuck when it comes to the fit as you can't try it on them without ruining the surprise! For Checca's present I thought about what clothing I could make that had a more generic size range and wouldn't need a fitting. I suddenly remembered that I'd chosen the Almada Robe pattern with some of my original Seamwork credits as I couldn't resist the beautiful and unusual kimono inspired design and I was sold on the idea.

Diary of a Chain Stitcher: Liberty Silk Satin Almada Robe

All I needed now was the perfect fabric. I'd originally chosen the pattern with the idea of making it up in a double gauze (and this is still high up my personal sewing wish list, I've been eyeing up Nano Iro for months!) but wanted to use something really luxurious for such a special occasion. I'm not usually a huge fan of Liberty prints for my clothing but this kind of garment is perfect to showcase one of their more ornate designs. I remembered spying some Liberty print silks in Classic Textiles on Goldhawk Road a while back so took myself on a little jaunt and was delighted to find a whole array of designs for even less than I remembered! I have now of course entirely forgotten how much this was but it was somewhere in the region of £14.95 per metre. An absolute steal if you consider that Liberty silks are £45/m in store! If you can't get to west London Liberty are currently offering 50% off a whole load of their archive fabrics including this very print in both this and the purple colour-way!

Diary of a Chain Stitcher: Liberty Silk Satin Almada Robe

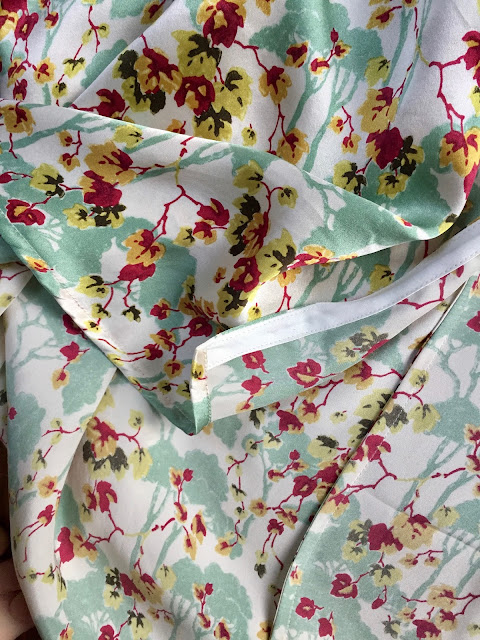
I felt like the trees in this design had a slightly oriental feel to them and loved how that complimented the kimono style of the pattern. They had at least three colour ways of this print in stock and I had a hard time picking but eventually settled on the green as Checca has amazing red hair which I thought would bring out the rich red of the leaves. When buying it I did forget to note that its only 139cm wide so had some trouble squeezing it out of the two metres I bought. I was forced to make the cuffs slightly narrower to fit but this turned out to be a happy accident as I think the delicate silk suits the change and the wider cuff would need a fabric with more body to support it.

Diary of a Chain Stitcher: Liberty Silk Satin Almada Robe

I had some cream sand-washed silk satin leftovers stashed from when I made my Vogue 1247 blouse which was the perfect match in weight for the Liberty print and worked out great for the binding along the front edge. The matt sand-washed texture makes it slightly gripper than the satin which I fin makes it slightly easier to work with. This and the fact that it presses well with crisp folds is a godsend when doing something fiddly like the narrow binding. The pattern does recommend you interface the tie and cuff pieces but I decided to omit it for a couple of reasons. Firstly I wanted to retain the delicate fluidity of the silk and secondly I was concerned about using a fusible on something so fine. I considered hand basting in silk organza which is my go to choice for special projects but it has way too much body to be paired with this silk.

Diary of a Chain Stitcher: Liberty Silk Satin Almada Robe

The quality of the silk is absolutely as you would expect from Liberty. This is their Belgravia silk satin and it has a stunning sheen on the right side and a super smooth matt finish on the reverse which feels amazing against the skin. It weighs practically nothing but retains an opacity and as you can see it moves and drapes beautifully. I pre-washed it on a 30 degree delicate cycle in the machine. I usually do this with my silks and as it was a gift I wanted it to be easy to care for.

Diary of a Chain Stitcher: Liberty Silk Satin Almada Robe

Cutting out was tricky as the pieces are really big so there's plenty of room for the silk to shift about and move off grain. I cut everything in a single layer on my carpeted bedroom floor. I like doing this for silk as the carpet grips the fabric a little and prevents too much shifting. I know some people advise to use as few pins as possible as they tend to leave holes in the silk but I personally like to use lots of pins in a slippery silk like this as it makes it so much easier to control. I just make sure to keep all my pins in the seam allowances and now have some super fine Merchant and Mills entomology pins for use with fine fabrics which are awesome. I used the finest microtex needle I had to hand and a Gutermann Sew All Thread; a combo I find somehow cures most problems I have with skipped stitches!

Diary of a Chain Stitcher: Liberty Silk Satin Almada Robe

I've been generally quite impressed with Seamwork patterns so far but have only tried four; this, the Mesa and Neenah Dresses and a Paxon Sweater I made for my Dad. I had some fitting issues with the Paxon and Mesa (I don't seem to get on with Colette armholes!) but was impressed with the instructions and style lines. I'm not a fan of every design and some of them seem very basic but to build up a wardrobe of staple garments quite quickly as they advertised I they're a good a good bet. The simple lines of the patterns also mean they'd be a good starting point to try a bit of pattern hacking and experimentation. The PDFs do drive me a bit mad as I feel like I'm wasting a huge amount of paper but that's pretty much the only negative I've found.

The finishing on this pattern in particular is well thought out. Just because the designs are simple and patterns affordable doesn't mean they skimp on basic instructions and construction techniques; they're well chosen for the styles and intended fabric. My favourite part is how the ties are attached really neatly by sewing them on right sides together then folding them back on themselves and using two rows of topstitching to hide the raw end.

Diary of a Chain Stitcher: Liberty Silk Satin Almada Robe

As I was using this lovely fine silk and I wanted this to be a gift to treasure for years to come I used french seams throughout. I made them as tiny as I could! I love this technique and was really happy with how they turned out on this. How well silk responds to heat and steam helped no end when it came to getting clean even finishing. It was really time consuming though as there were so many long seams! I liked that the way the cuff is attached meant I could use french seams here too and it looks really lovely. Even though my cuffs were narrower than intended I think having a cuff rather than the same binding finish that is along the front really lifts the design and gives it that extra something.

Diary of a Chain Stitcher: Liberty Silk Satin Almada Robe

Fit wise there's not a lot to say as it's such a loose fitting garment! It is fairly short so I'd be more inclined to wear it with PJ bottoms or shorts than a slip. It becomes even shorter when you tie it up tight so I'm tempted to lengthen it when I eventually get around to making a version for myself. The other thing I would note is that the kimono style of the sleeves mean that the armholes are very deep and as the sleeves are short this means you can see right inside when you lift your arms! Definitely more of a luxury item for layering rather than a robe to be worn for modesty.

Diary of a Chain Stitcher: Liberty Silk Satin Almada Robe

I can't now find how long this one was supposed to take to make but all Seamwork patterns are advertised as taking between 1-3 hours. Making it in silk and french seaming meant this took WAY longer than that and to be honest I think this pattern would take me longer whatever the fabric as it requires some accuracy and concentration. I don't think I'm a particularly slow sewer but I am careful and I think most of the patterns will take longer than suggested if you are too.

Thank you to Checca for inspiring this project and giving me a reason to sew something so frivolous and with such a wonderful fabric. It was hard to hand this over when the time came so I really can't wait to find the perfect fabric for my own now!
SaveSave