Tropical Shorts and Back Cut Out Tee
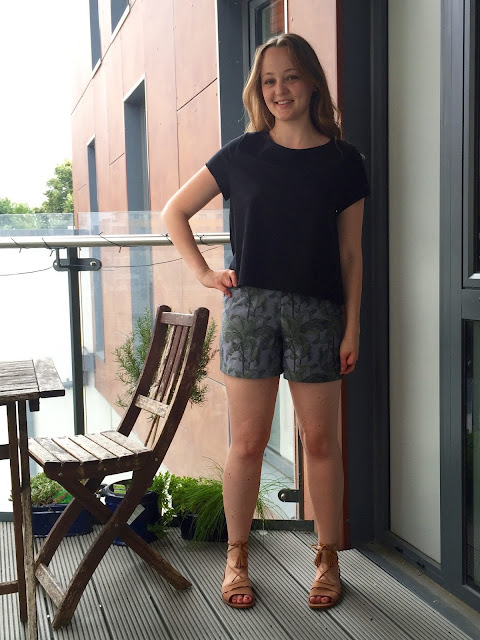
When the fabric arrived it was just what I was hoping for, the fabric descriptions on the Mood Fabrics website very rarely disappoint. A pretty lightweight denim, almost verging on a chambray, with a smooth and fairly crisp hand. I absolutely love the scale of the print. I didn't attempt to pattern match but did take care to ensure that the fairly clear rows of palms in the print did run around the body to keep things looking even. I actually opted to use the wrong side of the fabric as the right side after much deliberation. The print is nice, strong and inky on the right side but I preferred the softer finish of the paler grey background for this summer garment.
I chose to use the shorts part of the By Hand London Holly Jumpsuit for a couple of reasons. Firstly I already know it fits me well around the hips and secondly the simple, clean shape is perfect for showcasing a bold print. I usually make up the UK size 10 from BHL and get a lovely figure skimming fit but as I wanted these shorts to be a little more relaxed I went up a size. I only needed a yard of fabric. I wanted to feel comfortable wandering around all day in these and also possibly working in them in London when we get our usual two weeks of proper summer temperatures so lengthened them by 2.5" then used a nice deep hem. I'm happy with how this has turned out and also really like the amount of ease around the leg opening which is because the pattern is actually for palazzo style wide legged trousers (more on these another time hint hint!).
One of the things I really like about this pattern is the slim waistband and where that sits. I used a lightweight fusible interfacing as I didn't want anything too stiff around my midriff in the summer heat and hand-stitched down the inside. For once I remembered to add in one of the gorgeous 'Made with Mood' labels that came with my order! I'm very happy with my invisible zip insertion and realised when I was making this project that this is a technique that doesn't phase me at all anymore. I used to hesitate when I got to that step in the instructions and I don't know when that changed but I found myself zooming through this one without a second thought. That must be some kind of landmark in learning to sew!
Despite the large print being quite an unusual choice for me these shorts have become a great basic addition to my wardrobe because of the fairy neutral colours and the fact that they work with so many different tops. In the heat of the French Riviera in July I knew I wasn't going to want to be wearing a high waist with anything tucked in so decided I needed a breezy boxy top to pair with them. I kept it clean and chic with a solid black and managed to squeeze this out of the fabric I had left over from my little black Laurel dress, made way back at the end of 2014. It's wool sateen (long since sold out of course) which you may find an odd choice for a top made for hot climates but it's very lightweight, super smooth on the skin and the natural fibres meant I was cool all day long.
It might look simple but the fun is all in the back with this top!
I really love interesting back details in clothing as I think it's very easy to only think about how you look from the front but actually people see us from all angles. This particular idea is one I've been mulling over for a while and I thought the simple lines of the Inari Tee from Named Patterns would be the perfect style to try it on. I did also briefly consider the Grainline Scout Tee but opted for the looser fit through the shoulder.
Altering the pattern was actually very simple to do. After measuring how far I would like the v to come down my back I drew that shape on the pattern piece itself, remembering to add a 1cm seam allowance to match the rest of the pattern. I then drew on the position of the 'cross bars' working out the spacing and their width. I attempted to ensure that one bar would be covering the point where the back band of my bra is which has semi worked but things tend to shift around over the course of the day! The final step was to draft a new back facing from the altered back pattern piece. Drafting a facing is very easy to do, there's a good tutorial over on the Colette blog for it.
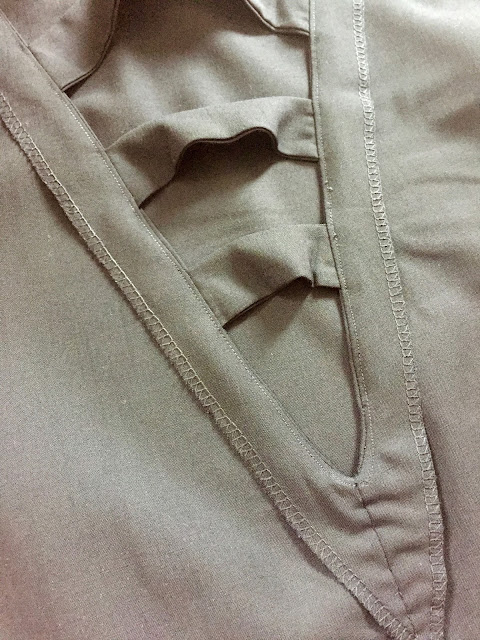
The trickiest part was the construction. I couldn't really figure it out until I was doing it and I'm not sure I could explain to you now how I did! I first made the straps by simply sewing along the long edges of each rectangle and turning them through. Then when you get to the point of attaching the facing the ends of these bars need to be sandwiched between the facing and main bodice pieces. It sounds straightforward enough but the trick is in working out exactly how the straps need to be positioned so they lay flat across your back when worn without pulling the v neckline together and out of shape or sagging away from the body. This is really hard to do because it can't all be laid out flat and pinned in place as it needs to be sewn right sides together a turned through. It's very hard to explain with words but essentially you are sewing one side of the facing and straps down and then the straps have to fold back on themselves for you to sew the other!
The fabric has a little bit of stretch which it's important to be conscious of as you sew, much as you would when sewing a seam line that's on the bias. Other than that this kind of suiting weight wool is really lovely and straightforward to work with. It doesn't fray particularly badly so I just overlocked my raw edges to control it and pinked the hidden neckline seam allowance. I always finish the edges of my facing before attaching it to the neckline. It's much easier to handle.
One great thing about it is how well it presses. You can get lovely crisp hem lines which was a real bonus when creating this back detail so that v shape and straps have lovely flat, straight edges. The facing is really skinny so I was concerned about it wanting to flip out to the right side but a good press and some under stitching has eradicated that possible problem. As the pattern was new to me (and at that time Named patterns in general) I made up a muslin of the top in a polyester and had real trouble with the shape of the sleeves and getting them to sit correctly around the arm despite really liking the small amount of ease in the sleeve head. I omitted the cuff band on this version as I wanted the back to be the stand out feature, instead just doing a tiny turned up hem. I think this coupled with the quality of this fabric and how well it stands to be shaped by the iron got rid of these issues this time around.
Both of these garments were a big hit on holiday and were worn as part of various outfits throughout my break. I'll be back soon to show you my handmade holiday wardrobe as a whole if you'd like to see what else I made and how I wore these!


The top turned out great. Such a cute idea with the straps in the back.
ReplyDeleteThank you! It was a bit of an experiment but I was really happy with how it turned out
DeletePerfect summer vacay outfit!!
ReplyDeleteThanks Sonja! We've been having a bit of a mini heatwave in London at the mo and it's come in very handy!
DeleteLove the shorts
ReplyDeleteThank you! It's such a great fabric!
Delete