Denim and Copper Hampton Jean Jacket
I love sewing outerwear. I'm not sure if it is the challenge of a big sew and complex techniques or the thought that this garment will be one I can get endless wear out of but I just love it. I have loved every minute of sewing this Hampton Jean Jacket and already know it is going to be one of the most worn items in my handmade wardrobe.
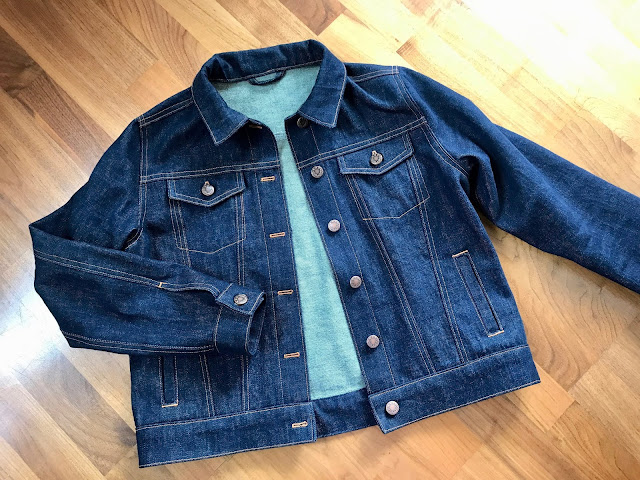
The pattern is from Alina Sewing & Design Co and it was my first time using a pattern from them. I cannot emphasise enough how impressed I was with both the instructions and pattern itself. Considering what a lengthy project this is, the instructions are packed with detail and advice without seeming overwhelming and the illustrations are all clear and helpful. There wasn't a single moment when I found myself scratching my head over the next step and the end result is beautiful. The pattern is well thought out and packed with detail which produces a true classic denim jacket. I love that all four front pockets are functional and the addition of elements like the back tabs on the waistband elevates the design to the next level. I can't think of anything else I'd add, there is even a hanging loop. I particularly love the seaming on the front and how the breast pocket sits within that which is highlighted by the double lines of topstitching.
Speaking of topstitching, I'm really proud of how mine turned out. It is one of my favourite sewing techniques as I think it makes a garment look more professional and I enjoy doing it. The pattern does include instructions on how to flat fell your seams but also recommends a faux flat felled seam, particularly in areas with a lot of layers of the denim. I went with the faux flat fell as I thought I would get a tidier finish on the outside with this method and also for speed. To faux flat fell a seam you finish the seam allowances together (I overlocked mine) then press to one side and topstitch twice.
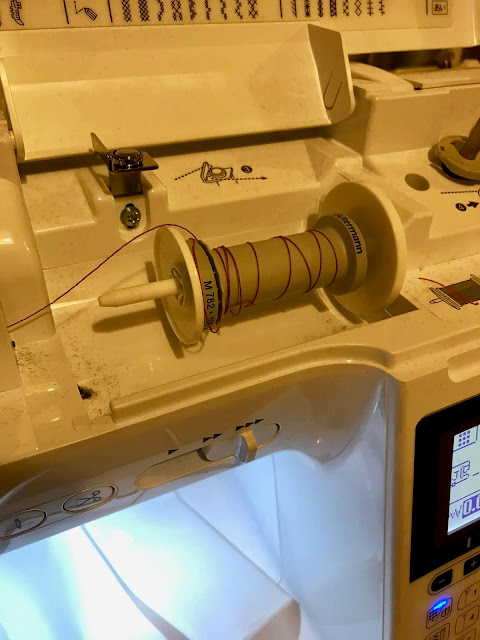
I was hesitant about using topstitching thread as I had some trouble with it snarling up when I made my Ginger Jeans and have tended to avoid it since. Then I picked up a tip on Instagram about using Gutermann Extra Strong thread instead and it has changed my life! It is a fraction finer than top-stitching thread and I actually prefer the less bulky effect once sewn. I encountered much less tangling of thread on the rear side than I had before, although that might partly be down to the machine. I chose this lovely coppery tone thread (Col. 448) to match the copper buttons from Prym I had picked out. Hammering those buttons in at the end is always a tense moment as you don't want to do irreversible damage to your garment in the final moments but not as tense as I felt sewing the final bits of topstitching! I messed up one of the buttonholes and had to unpick (never fun) and then realised I was running out of top-stitching thread! A particularly stressful game of thread chicken ensued and I couldn't believe it when I finished with less than a metre of thread left. In case you were wondering one 100m reel of Extra Strong thread is JUST enough for this jacket, allowing for a few mistakes!
There are some fairly tricky elements involved that seem a little daunting but the instructions guide you through no problem and I enjoyed the opportunity to work with some nice stable denim. I've had this denim in my stash for a while now and can't remember if it came from Mood Fabrics or The Fabric Store. It is a nice sturdy mid-weight denim with a rich inky colour that is slightly more blue than shows up in photos. The copper thread and buttons show up so beautifully against it. I love it looking crisp and new as it is but also can't wait to see how it wears in and softens up.
I was uneasy about tackling the welt pockets on the front of the jacket as they are so visible with contrast topstitching and are also one of the first things you sew. I haven't sewn a huge amount of welt pockets and need to build up my confidence and skill but am really pleased with these ones! The method is a little different to those I have sewn before but I didn't question it and followed the instructions to the letter, taking particular care to sew the sides accurately to achieve a nice clean rectangular opening. A large chunk of the instructions are given to the welt pockets, breaking them downing small steps. I thought they were brilliant. To line the pockets I used scraps of cotton ikat left over from my Tofo Summer Jumpsuit.
Whilst part of me can't believe I haven't sewn a denim jacket before now (it such a wardrobe staple and sewing achievement!) I'm pleased I didn't attempt it before I had my shiny new Brother Innov-is F420 machine. Whilst I adored my very basic Janome the process of making this would have been a lot more challenging and a lot less enjoyable. When working with layers of denim as thick as this I would have had to hand crank through a lot of it to the detriment of my topstitching. If you're struggling to get your machine going on the edge of a particularly thick area of fabric you can fold up another piece of fabric or card to put under the back of the foot and level things out. Think about it like the machine trying to sew up hill, it is much easier to run on the flat!
I was particularly nervous about the instructions to sew very visible bar tacks through quite thick areas of fabric as my old machine did not get on with these at all. This Brother machine was an absolute trooper and has produced a beautiful finish. There are a couple of areas on the long ones at either end of the welt pockets where there is a little wobble but that was operator error rather than the machine. I assumed that as the layers were so thick the garment might need a little encouragement through the machine and as the stitching is so dense it is hard to judge whether it is moving cleanly through the machine or not. I should have trusted the machine and left it to it's own devices because it was doing just fine without me! This machine does have a setting to sew bar tacks to a given length but I chose to use the zig zag stitch on a 2.5mm width and 0.4mm length.
Another thing the machine needed no help with was buttonholes. I love, love, love the one step buttonhole on this machine. So quick and easy, it even tidies and cuts the thread for you. I also love that the machine comes with the choice of several styles of buttonhole. For this project I went with a keyhole shape with a bar tack on the end for extra strength in this tough fabric (stitch setting no.64 if you're interested!). It looks so professional I am delighted. I do recommend that you try out a couple of buttonholes on a scrap piece of fabric first so you can get used to the placement and check the size.
The most difficult part for me was surprisingly the simple task of top-stitching around the armhole. As it is right towards the end of the process you are dealing with a lot of fabric and weight at that point. I found as I moved the jacket around to allow me access around the armhole as I sewed sometimes the fabric shifted slightly under the foot so my topstitching is a little less even in that area than elsewhere. I'm being really pernickety thought! I was thinking I should have increased the pressure of the presser foot at this point to hold the garment in place but perhaps I should get into the habit of keeping the needle down. There is a function on this machine to finish stitching with it down so I could have just turned that on in hindsight...I'm not used to all these bells and whistles!
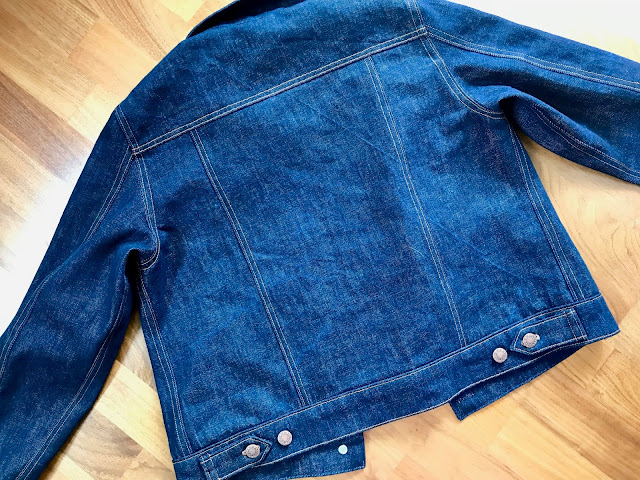
The only element I wasn't sure about the construction method for was the back tabs on the waistband as interestingly the pattern pieces aren't that shape but are square once sewn together and you have to poke the top corners inside to create the point. I thought it would be difficult to achieve a nice sharp and even point and then was concerned about the bulkiness of this area when sewing the buttonhole. But it turned out really nicely and my machine had no problems. I do infect think the extra bulk helps hold a nice crisp shape and you eliminate the risk of frayed edges if you trim and turn through that point too aggressively.
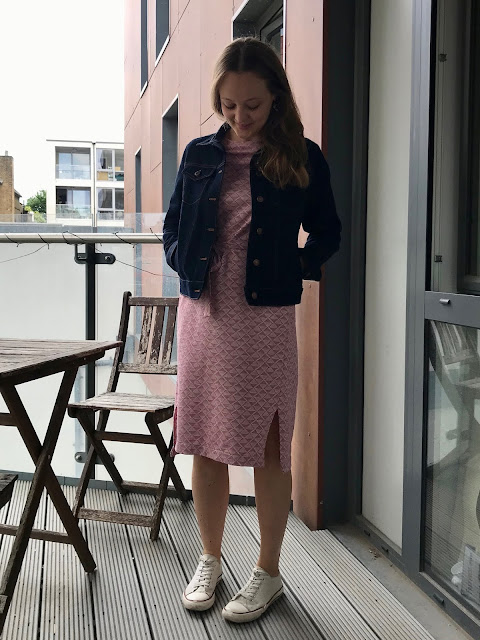
The only thing I would potentially change about the jacket is the length of the sleeves. I think they look a touch long (not unusual for me) but then again I quite like long sleeves for warmth on outerwear. I'm more than happy with the fit and length overall, although it isn't as tailored or cropped as I might have previously chosen. However, I think this slightly boxy cut has a contemporary feel and is ideal for my current wardrobe. It is going to look great with cropped trousers or slung over summer dresses. I cut the size 6 which matches my measurements and whilst I could have gone down a size for a snugger fit I think this is perfect as it will layer well over sweaters on chilly evenings.
I am incredibly happy with this project and glad I took my time over it. I knew it was going to be a big sew so it took me a while to get started on it as I felt like I wanted a good clear day of sewing which over the last few months has been non-existent. I constructed the jacket in small stints in the evenings which actually prevented stupid mistakes when I got tired. I think there is always at least one mistake or element that you wish you could have done better on any project but the slow pace and care I put into making this has produced sewing I'm incredibly proud of. This pattern is a great one to sew in small bursts as there are lots of little elements that you can tick off so you still feel satisfied at the end of each session. Approaching it in small chunks makes it feel less overwhelming. Sewing this has taught me how much you can achieve in limited amounts of sewing time and that you don't need a whole day or weekend to try and sew something start to finish.
This project also cured my recent sewing slump. I've been working so much over the last few months that when I have had time at home it has been hard to motivate myself to sew. I'd always thought a quick and satisfying tee or camisole project is best to kickstart the sew-jo as you can achieve that satisfaction of a completed project quickly. However, I so enjoyed every step of making this that I couldn't wait to get back to my machine and sew some more! Looking at the result achieved with this machine I can't wait to sew a pair of jeans now. Next on the list is a pair of Megan Nielsen Dawn Jeans in dark denim.






This is an amazing make and I can only hope to get to half your standard in the future, many thanks for sharing it and inspiring us all.
ReplyDeleteAh that's such a lovely compliment thanks Sheila! I've just kept practicing and am a bit of a perfectionist! It is all totally achievable with the right pattern and instructions!
DeleteAbsolutely beautiful! Your topstitching is impeccable as usual-I'm wondering if you ever did a post on your method? Enjoy years of wear!
ReplyDeleteThank you, topstitching is my favourite thing to do! I hadn't thought about doing a post before but I'm sure I've got some tips to share, great idea!
DeleteWhat a lovely job you did! Super professional looking.
ReplyDeletelauraborealis
Thank you very much! I really took my time with this project and I think it shows in the final finish
DeleteThis is sooo impressive, I am in awe. I am very glad of your suggestions of faux fell seams to reduce bulk and using the Strong Gutterman thread as these will be so useful for a project I am about to start.
ReplyDeleteThanks very much! Not only do those faux flat fell seams reduce bulk but they make the whole project a lot quicker!
DeleteI highly recommend the Gutermann strong thread, it's fab and didn't snarl up once
I love the Hampton jacket! Used the pattern once to make a jacket for an art show, and then finally made one for myself. It's one of those things that really makes people go wide-eyed when you say you made it yourself.
ReplyDeleteIt is a really terrific pattern! I have certainly experienced the wide eyed reaction with this one! Which amuses me a lot as although it is a length project with lots of bits to complete I didn't find it all that difficult! I think it looks much more complex than it is
DeleteThat is a fantastic piece of sewing, and your buttonholes look superb, what a great jacket! Su
ReplyDeleteI am soooo pleased with the buttonholes! I think they might be my favourite thing about my machine! I would have been so unhappy if the buttonholes let me down after all the work I've put into this!
DeleteAmazing, such a professional finish. No wonder you're proud of it, you should be!
ReplyDeleteThanks ever so much Helen. I think it is probably my favourite thing I've ever made. I wear it nearly every day
DeleteThis looks amazing! So professional looking, I love the buttons.
ReplyDeleteThanks very much! I feel like I've completed a real wardrobe staple which will be with me for years, if not decades to come!
DeleteThat looks like such a professional job! Well done, thank you for the tip with the cotton I had the same experience with topstitching cotton and ended up using regular. My denim jacket was topstitched black on black though so it didn't really show. Your details are just perfect.
ReplyDeleteO yes that extra strong thread is a real life saver, the topstitching thread is just too thick for my machine to cope with and I hate ruining a project with knotted up topstitching thread on the reverse. I have often used regular thread for topstitching when I'm using a matching colour thread or am not bothered about the contrast effect
DeleteWow! That is SUCH a beautiful job you've done! How did you do your topstitching so nice and straight?
ReplyDeleteThank you very much! Lots of practice! I make sure at the start of the project to chose a clear mark to line my seam up to for each of the two rows of topstitching (such as the inside and outside of the edge of my presser foot) then make sure to go nice and slowly and stick to those marks throughout. It is harder around corners but gets much better the more you do it!
DeleteI also leave the needle down and pivot when I get to an angled point
Wahoo! Stunning top stitching! Wonderful garment, congratulations.😊
ReplyDeleteThank you very much!
DeleteWow. It's beautiful.
ReplyDeleteThank you, I think one of my proudest makes to date! And definitely one of my most worn
DeleteThis is so great. Thanks for sharing. You and the clothes look amazing! Such an inspiration. Love from Fabrics World USA
ReplyDeleteThanks so much!
DeleteThis is such a good review of the pattern, and the extra details (such as the colour number for the top stitching thread) are so useful. I'm just about to start cutting my Hampton out and hope it turns out as well as yours!
ReplyDeleteThank you, I'm so pleased you find my post helpful! It is a whopper of a project but a great pattern and so satisfying. I hope you enjoy sewing yours!
Delete