White Linen In The Folds Wrap Top from Peppermint Magazine
The project I'm sharing with you today was so enjoyable to make. I don't know about you but I haven't had the concentration of late to get stuck in to an all day or even all afternoon sewing sessions. This project turned out to be the perfect antidote to feeling frustrated with that and I sewed it up across a number of half-hour/hour stints. As I've become more experienced and confident with sewing I think I've developed a tendency to dive right in and speed through things. But this pattern (despite being straightforward and not particularly taxing to construct) made me stop, think and try something new. Trying something new and enjoying the process always makes me fall a little bit in love with sewing all over again. Plus at the end of the process I've made something I'm really proud of and I think improved my techniques slightly too.
This Wrap Top Pattern is one of the impressive selection of In The Folds patterns free to download from Peppermint Magazine. I'd heard really good things about Emily's drafting and instructions and after making this I would certainly agree with them! I'm kind of gobsmacked that this is a free pattern along with so many other gorgeous and well thought out designs. I'm particularly tempted by the Wide Leg Pants. The new patterns released with the magazine are now being produced by other indie designers but most of the back catalogue are Emily's.
For my first try of this pattern I opted for a classic white linen from The Fabric Store. If you're after a good supplier of quality linen I can't recommend them enough. The range of weights, colours and yarn dyed patterns is amazing. This is their standard mid-weight linen and is a great choice for this top. It would sew up equally beautifully in a drapey fabric like a viscose crepe but I love that the line provides a bit of structure. The rumpled quality suits the wrap style I think and is already softening up so nicely with wear. It was also an absolute joy to work with.
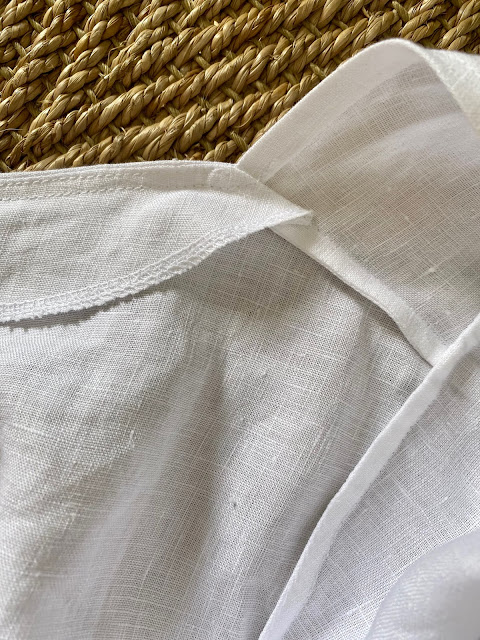
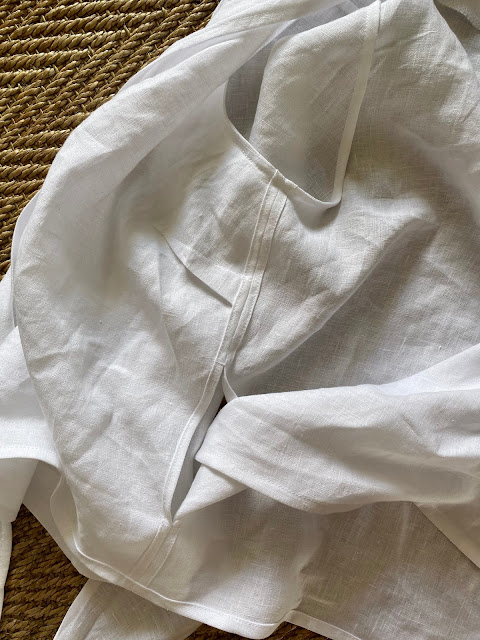
As I've said I loved that the instructions and construction techniques really encourage you to slow down, enjoy the process and create a beautifully finished garment. I've tried to include a section of clear close up photos of the inside in particular so you can appreciate the level of finishing the instructions provide. There is no need for an overlocker for this project as french seams are instructed throughout where possible; even the armholes are french seamed! Indeed the only place I did use my overlocker was to finish the raw edge of the back neckline facing but this could easily have been turned under and stitched instead. How the facing is attached cleanly at the shoulder is a different technique to those I have used before and I love it.
I really liked that the finishing is coherent across the garment. Where you can't french seam the side seam which needs an opening for the wrap ties you are given the option to turn them under and stitch down instead (option B). This looks so smart and I think ties in with the french seams nicely. You are directed to french seam he other side seam to match the seams on the rest of the top but I used the same turn under and stitch finish as I preferred matching topstitching on both side seams.
My only niggle with the instructions is that I got a bit confused with the size of the seam allowance. It varies throughout and rather than being stated at the start says it is noted in each step. Sometimes it wasn't clear, particularly when sewing french seams. I thought this might be because you are pointed towards a 'Seam Finishes' download when sewing french seams. A great informative document but it still left me a bit worried that I was taking too big or small a seam allowance. I came to the conclusion that the french seams have a 1.2cm seam allowance TOTAL (1/2") after spotting notches on the pattern pieces marking the stitching line seam allowance size.
I am really impressed with the drafting. Everything came together just as expected. The fit is really nice too. It isn't a close fitting wrap top if that is what you are after. There is quite a bit of ease around the bust but the shoulders fit neatly and the cut of the sleeves I think really balance out the proportions. The only thing I might tweak is to shorten it ever so slightly through the body as once the wrap is tied there it feels like it rides up a little and there is slightly too much excess fabric in the back.
Looking at the sample garment I felt like the neckline was a little too high for me personally so I lowered it by an inch. I took an inch off all the way along the centre front which meant adjusting the back and back facing pieces too as it creates a wider neckline. I also continued the inch reduction all the way along the front ties to make them a little skinny as that is more aesthetically pleasing to me and I didn't want to much bulk around the waist. I was worrying while I sewed it up that this would now be too low but it has turned out spot on for me. For a wrap top I'm so impressed with how this sits across the front. I don't feel at risk of exposure at all.
Making this has definitely made me more inclined to make a purchase of an In The Folds pattern. (That is after I've sewn up my next version of this top which I've already cut out!) I've often been intrigued by the interesting style lines and clean, wearable design aesthetic. The Acton Dress really appeals to me but the Flynn Jacket has also grabbed my attention. If you've made any In The Folds patterns I'd love to hear which and what you made of them to help me make my choice!


Your top is beautiful and looks really well made, goes lovely with your shorts x
ReplyDeleteThanks very much! I'm really proud of how it turned out
DeleteI have this top printed and trimmed just waiting to be pasted together on my desk behind me as I'm reading your post :) I love yours in linen and that was my plan exactly - LINEN. I've fallen so in love with it all over again as I seem to every year :) There is a whole instruction video on youtube which directs the viewer through the whole construction process https://www.youtube.com/watch?v=qpQq3NPKaCU&list=PLUemGvnDalLTO7QQs_yuUwmv5GDl0fYiN&index=98&t=0s and it's especially helpful re the changing seam allowances throughout. Thanks for another inspiring blog post :) and a reminder too re the Fabric Store and their linen selection and quality - out of this world!
ReplyDeleteO I do hope you enjoy making it as much as I did! Thanks so much for the video link, I'll definitely give that a watch before the next version!
DeleteI've had my eye(s) on this top, and I love your modifications! I plan to print it at the library when it reopens soon - oh happy day! (And I'm hoping that the changes that you made to the front will make sense once I do print the directions out full size... so I can actually read them!)
ReplyDeleteCan't recommend the pattern enough! I just took 1" off all the way along the front edge and continued right along the tie pieces if that makes sense? You've then made the neckline a bit wider so need to tweak the back and back facing pieces slightly to match at the shoulder seam.
DeleteI just made the Acton dress and love it so much. I haven't tried her patterns before but I was so impressed with the pattern. Beautiful instructions, interesting seam lines, and she has put up some great tutorials too for fba and sba if needed. I think I'll make 100 more!
ReplyDeletelove your blog so much!! Will have to check out the wrap top it looks lovely.
O this is great to read! I'm a sucker for interesting seam lines and construction! Definitely tempted by the Acton.
DeleteThanks for the lovely comment!