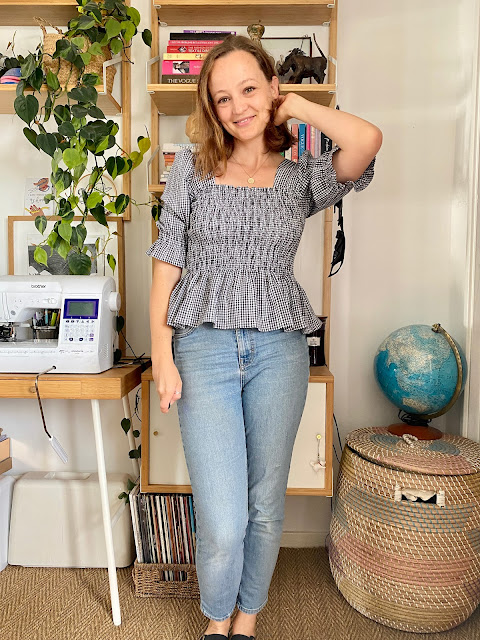
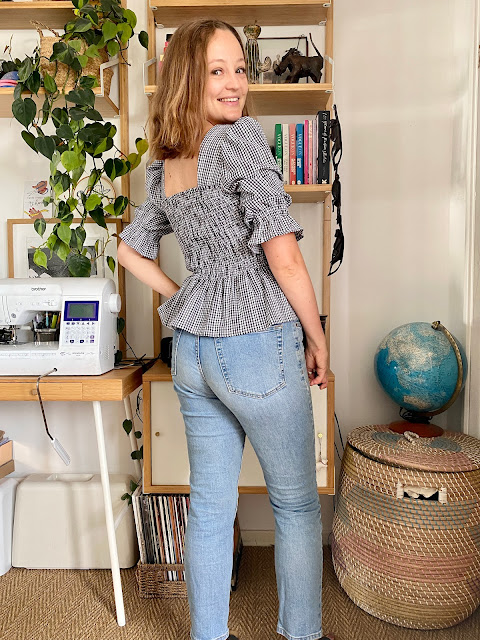
I made this top a while ago and it has swiftly become one of my favourites. It has been particularly good for that late summer into autumn season when I find it tricky to know what to wear. It looks great with jeans or wide legged trousers. The pattern is the Sofia from Victory Patterns which I've used once before to make a dress but I wanted something a little different from it this time.
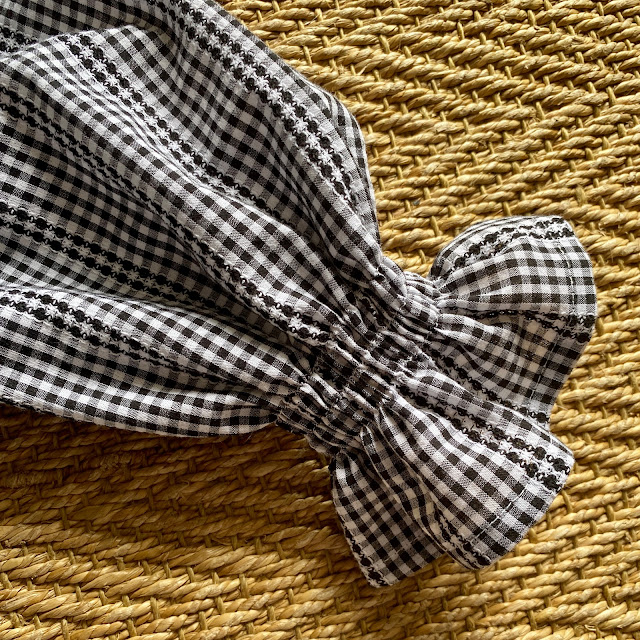
The fabric I bought from the Fabric Godmother stand at the Stitch Festival in the spring. I'm always excited to see their stand at one of the shows as they have so many great fabrics but I much prefer shopping in person to online. I really must make it to one of their open days at some point...although my bank balance probably wouldn't thank me! I'm a sucker for a slightly unusual fabric and was immediately drawn to this cotton gingham which has beautiful embroidered stripes running through the fabric every inch or so. It feels a little like a broderie anglaise but in a stripe rather than repeated motif. I think the black & white colour combination prevents it from becoming too twee - particularly when used for this very feminine style of top.
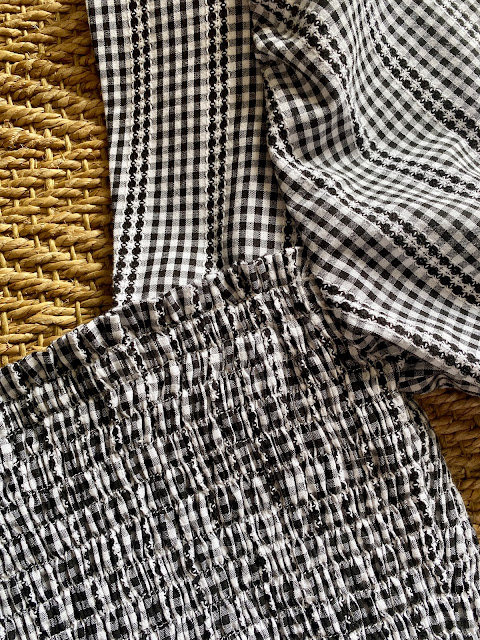
The crisp hand of the fabric works so well for this top. It emphasises the shape of the sleeves and makes the peplum and sleeve ruffles stand out giving the whole top a great shape. Being cotton it presses beautifully and I'm really pleased with the clean finish. It is also the ideal kind of fabric for shirring. Lightweight so not too bulky and also already has obvious lines in the fabric to follow when trying to keep all those stitching lines straight and even!
I wanted to use the shoulder strap pieces this time to make the top more bra-friendly than my other version. However, the flutter style sleeves included with this version of the pattern didn't really appeal. So I winged it and hoped that the sleeve style 2 (the elbow length puff) would gather into the armhole ok rather than using the intended elasticated finish. I concentrated the gathering of the sleeve head towards the centre and am happy to report that it turned out just fine!
I'm all about high waisted trousers nowadays so the crop top variation did appeal but I did want this to be a very wearable everyday type of top so opted for the peplum style to avoid any midriff flashing. I'm sometimes a little wary of peplum styles not suiting my proportions so thought quite carefully about the length of the top and also where the shirring ended so that the peplum kicked out at just the right point. I actually ended up following the marking for the end of the shirring for the crop top which is a couple of inches lower than the shirring for the dress and peplum style top. I prefer the shape of this on me and the reduced length of the peplum.
This was my second time shirring - the first time being for the dress version I made of this pattern! I enjoyed the process a lot more this time. In my blog post about the dress I talked about my issues getting my Brother machine to shirr correctly. This time I knew to take the bobbin case out and tighten up the tiny screw a little before starting. Bobbin tension is everything!
The instructions for the Sofia Dress include a lot of great shirring tips if it is a technique you've not encountered before. I did need to sew up quite a few little swatches again to get the tension and stitch length just right so that it reduced the size of the fabric by the right amount. This is a little fiddly and frustrating to do when you just want to get on with sewing your garment but worth getting right if you want your garment to fit! Once you get going the shirring is quite an enjoyable repetitive process and I love the little ruffle effect created along the top edge by folding that down before you shirr.
I made sure to use the technique of sewing my shirring as one continuous line of stitching rather than starting and stopping at the end of each row and to reinforce the side seams by sewing them twice. I've worn my dress version of this pattern a lot now and some of the shirring has started to come undone at the side seams which is frustrating. I guess the tension on the thin elastic when worn makes it susceptible to snapping or unravelling.
One of the construction elements I like about this pattern is the narrow piece of elastic threaded between the top two rows of shirring across the front and back. This helps prevent that top edge stretching out too much and keeps everything sitting securely. I followed the pattern directions for the length of this elastic although my instinct felt it was perhaps a little small. I should have listened to my instincts as I think it feels a tad too snug in this area. It didn't on the dress but that didn't have the shoulder strap pieces so I think it is to do with losing a bit of stretch across the front where those pieces attach.
The finished top feels so secure and comfortable to wear. It is definitely going to be a hit in the Spring and thanks to the mild Autumn we're having here so far I'm hoping to get quite a bit more wear out of it this year yet.


No comments:
Post a Comment
I love hearing from readers of my blog so please feel free to leave a comment letting me know what you thought about this post/make! Any hints or tips to improve my sewing are always much appreciated too!
Note: only a member of this blog may post a comment.