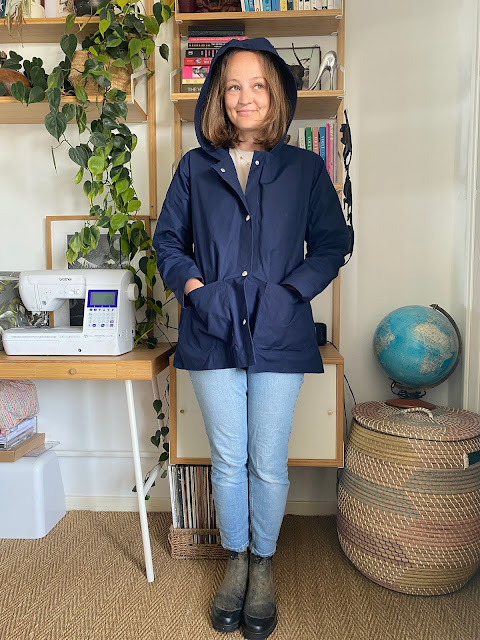
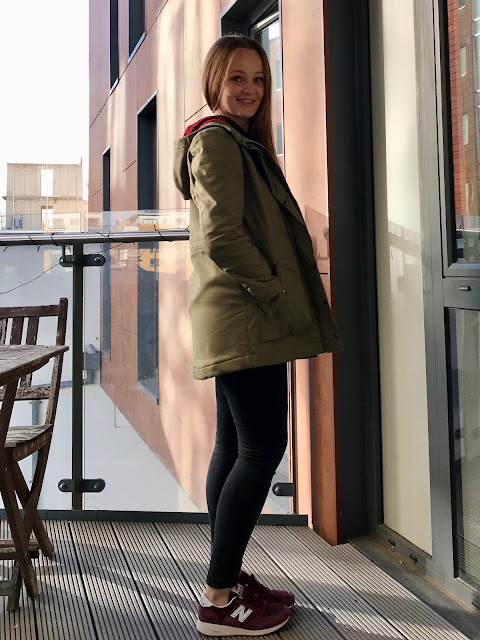
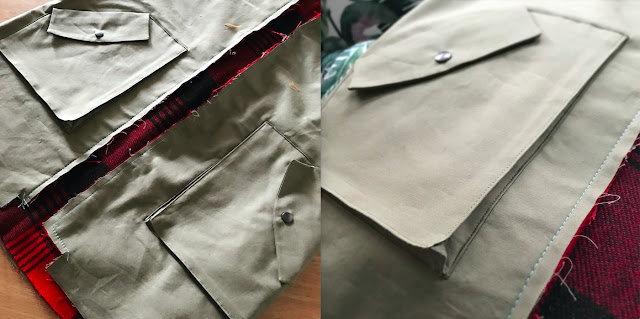
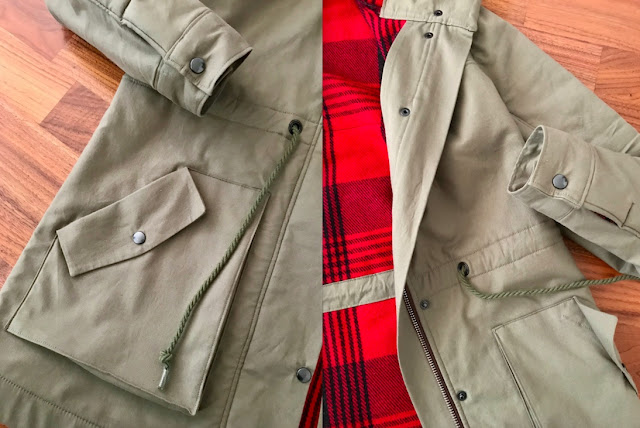
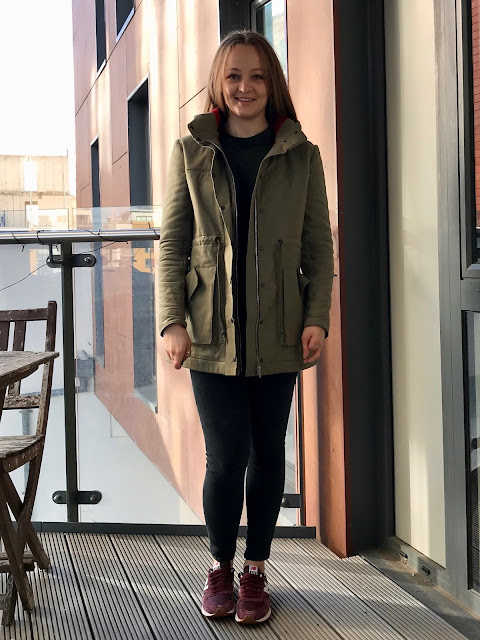
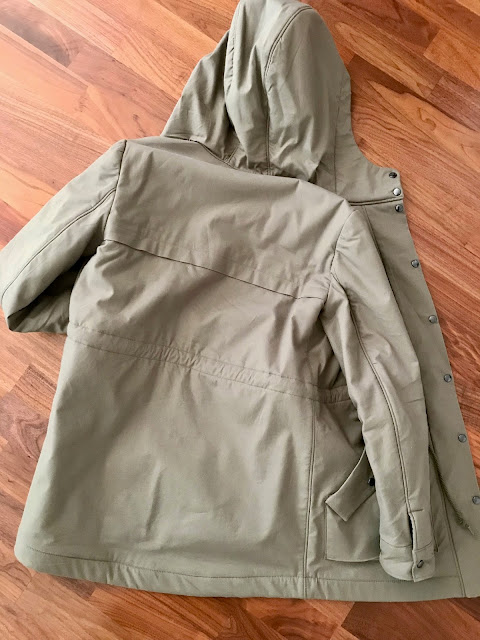
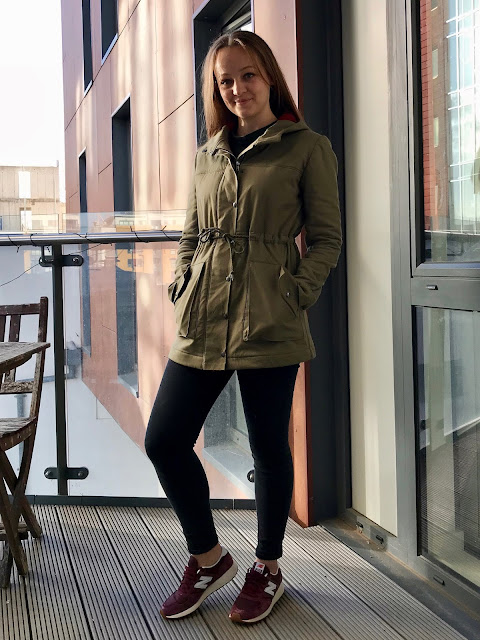
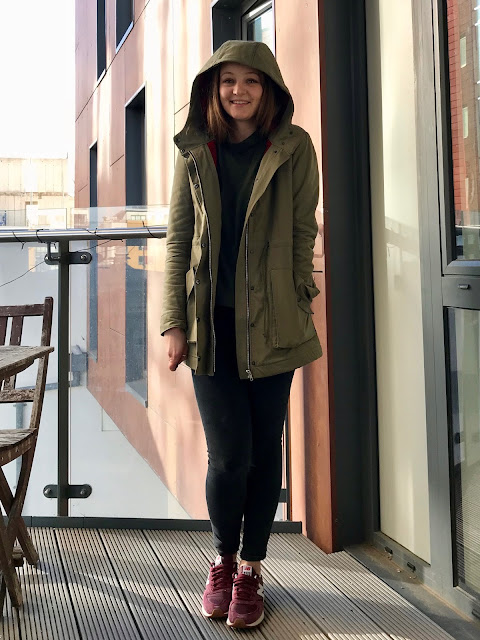
I made this jacket back in about April. I didn't expect it to be getting quite as much wear during this very wet summer here in the UK! I was in need of a practical jacket for walking the dog when it was wet but not that chilly. I absolutely adore my Kelly Anorak for winter but I lined the whole thing in cosy wool flannel so for damp spring walkies it gets a bit too warm. While I'm on the subject, I just realised I made my Kelly over 5 years and after a lot of wear it's still going strong. It must be one of my most worn garments so definitely worth all the effort I put into making it.
Saturday, 5 August 2023
Sunday, 29 January 2023
Camel Wool Melton Traveller Coat
Those of you who follow me on Instagram may have seen on my stories that I spent a large chunk of December working on a new coat. I've been meaning to make one for the last couple of winters but never seem to find the time. This year I planned ahead and got the fabric early (I think back in August!) and the forecast of a very cold spell here in the UK before Christmas motivated me to get going.
Saturday, 6 February 2021
Quilted Sienna Maker Jacket
After my little stint of sewing quick jersey palate cleansers I was up for a more challenging project but still wanted to make something cosy, comfortable and appropriate for our current lockdown lifestyle. I've had this amazing cloudy quilted fabric from The Fabric Store stashed away awaiting the perfect project for a while and decided it was time for me to get my head down and put it to good use. It is so beautifully soft and spongy that I was tempted just to hem it and use it as a throw but in the end I kept coming back to the idea of turning it into a (hopefully!) sophisticated quilted jacket.
Sunday, 24 February 2019
Faux Suede Ulysses Trench
I spent a long time looking for the fabric as I didn't want faux suede with stretch but the slightly weightier non-stretch kind. I had in my mind that I was looking for a berry or rust colour but couldn't find it anywhere, even after ordering samples online. I ended up being quite taken with this dusky purple/pink which I came across in Classic Textiles on Goldhawk Road. It perhaps a fraction lighter in weight than what I was looking for but that actually worked out for the best and the drape is a dream match for the waterfall front.
I originally thought that using faux suede I'd want to use slightly different finishes to the pattern instructions, particularly for the pockets and rear overlay which are lined. However this faux suede is quite fine and sewed up much like a mid-weight woven fabric despite being more dense. Lining turned out to be the best way to get a nice clean finish and I'm pleased I went with it as I'm not sure the belt loops (which are actually part of the rear overlay and the reason why I fell so hard for this pattern!) would have turned out so nicely. The visible seam allowances are all finished with bias binding which you make from your lining fabric...but I got lazy and ordered my binding from The Fabric Store! This is made of a Liberty Tana Lawn called Belmont Ivy and they also stock the same fabric by the metre so it matches my lining! The ultimate sewing cheat. Buying the binding ready made saved me so much time. Their bindings are so easy to work with.
For a coat, and quite an involved project with lots of elements, this was surprisingly speedy to make. Once I had all the pieces cut out and prepped I had it pretty much finished in a day! This was definitely helped a huge amount by my Brother sewing machine which is packed with lots of features which shave time off here and there; each little bit really adds up over the course of a project like this.
As well as being super fast to thread when I was switching between black for the binding and lilac for the main sewing the knee lift in particular is my new favourite thing. It allows you to line everything up under the foot super accurately using both hands rather than having to release one hand to lower the presser foot with the lever. I wouldn't have had it on my list of essential features but in combination with the thread cutting button it noticeably speeds things up. This magic little function pulls the thread tails through to the back of the fabric and leaves two short little tails. So much faster than reaching for your scissors at the end of ever seam and a game changer for someone like me who likes to pin multiple pieces and seams and then sew them all production line style. It is possible to set the machine to backstitch and cut the threads automatically but I'm sticking with using the button while getting used to the machine! For basting or anything you want a longer thread tail for there is still a manual thread cutter on the side of the machine.
This was the first time I had sewn with faux or real suede and I was nervous about it as it behaves so differently to a lot of other fabrics. I was expecting problems with skipped stitches and fabric sticking and shifting as it ran through the machine but the F420 handled it like a dream. The machine produces such neat, even stitches. Even on a potentially tricky fabric like this! The only change I made to the regular stitch settings was to reduce presser foot pressure slightly on thicker areas as I didn't want to mark the fabric. I chose a size 80 microtex needle so it was super sharp but still had a bit of heft to push through the suede. I used the regular machine foot and had no trouble, but if your fabric is sticking you could try the Teflon coating foot to help your project glide through. If I had problems I was going to first try my walking foot but didn't need to. I know some sewers keep there walking foot on their machine all the time and mine has certainly got me out of a sticky situation or two but I find it quite hard to sew accurately with the reduced visibility created by attaching that chunky piece of kit to your machine. I prefer to save it for when I've got real shifty fabric issues and use the functions of the machine itself to handle everything else. Looking at the photos there are a couple of areas along the longer seams where things aren't perhaps hanging as well as they could but I think it is less noticeable in real life.
The worst thing about the faux suede was it wanting to stick to itself when you lay the pieces out to pin seams. Ironing was surprisingly no problem at all. I had a press cloth to hand but discovered directly applying a medium heat with no steam softened up and smoothed out the fabric a treat! No unwanted sheen or weird markings. However because you can't use a high heat it is difficult to get nice crisp pressed edges and corners and I think I would have got a better result on areas like the pocket flaps and epaulettes if using a traditional woven fabric. Topstitching is essential to achieve a nice clean edge with faux suede and the needle up/down button on the machine helped hugely with the accuracy of this on all the small elements which require sharp corners. I could effectively sew one stitch at a time until I was right at the point where I wanted to pivot.
Speaking of accurate stitching, I'm slowly getting used to the markings on the needle plate and presser feet and what the seam allowance is when the needle is in different positions. This pattern uses a variety of seam allowance sizes throughout so it is important to follow the instructions carefully instead of assuming you know the correct technique. 3/8" is used quite a lot, the marking for which I found quite hard to see on the machine as it is kind of hidden when using the regular presser foot. I got used to it with practice though. When topstitching I used the central groove on the presser foot to line my seam/fabric edge up with.
The pattern is a dream. The instructions are excellent, incredibly thorough with clear illustrations. Each part of the process is broken down into lots of little steps at that means that each element (even sewing the vent) feels straightforward and like it comes together without much effort. The instruction booklet is quite overwhelming at first glance because of it's size and detail but quite a lot of the steps are to do with the binding as the whole process of four separate steps is repeated each time a seam needs binding. I think being more detailed rather than less is a good thing and this is definitely a project you could take your time over and tackle one little step at a time. I definitely recommend taking your time sewing on the pockets and pocket flaps as getting these looking nice on the outside with even topstitching is important, but as there is no lining you can also see this stitching inside your coat! Using faux suede forced me to slow down too. I didn't want to unpick anything as it would leave permanent little holes.
The only thing I did differently to the pattern instructions was to leave the collar and front edge un-hemmed as the faux suede doesn't fray. I may go back and hem this later though as I think I could do with reducing the size of the waterfall a touch. It feels a little overwhelming on me. I did hem the bottom of the coat to give it a bit of weight and also enclose the bottom edges of the interior binding neatly. I love the effect of the binding and the fact that when you apply it the pattern cleverly tells you to end it before the hem allowance of the body and sleeve to reduce bulk when you turn it up. Little touches like this told me the pattern had been really well thought out and that the company really knows their sewing!
I adore the fact that this is a real timeless style but features some subtle and clever contemporary design elements. In particular the angled pockets and belt running through loops in the the back overlay really elevate this coat. The resulting project feels very elegant. Classic, yet modern and unique without being over-designed.
I wish I hadn't let my apprehension of possible fabric problems put me off of tackling this project for so long. I enjoyed every step of making it and am delighted with the finished garment. It has given me the confidence to try out some more unusual fabrics and make the most of my machine's features. Any suggestions as to what I try next?
Friday, 9 March 2018
Army Green Kelly Anorak
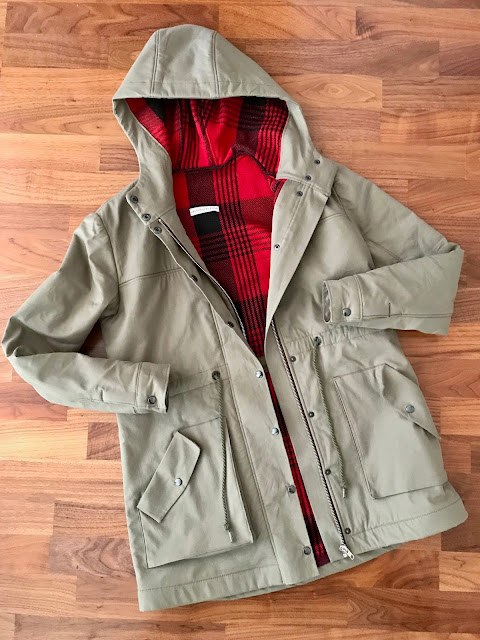
I've wanted a classic army green anorak/parka style coat for a long time and actually bought the cotton twill for the shell way back in April 2016, before the Kelly was even released. I had in mind the Papercut Patterns Waver Jacket as I'd seen some lovely versions of this being sewn. I changed my mind as all the extra details and hardware on the Kelly lured me in. I found the cotton in Mood Fabrics when I was in NYC on holiday. It is a nice mid weight and isn't waterproof but has a slightly crisp coated feel and has held up well in any rain showers I have been caught in so far. The red plaid underlining is a wool flannel and also came from Mood but was bought online at a much later date. Both fabrics no longer seem to be available as this was SUCH a long time ago! I'd had this fabric pinned for some time but didn't know what to make with it when shortly after the Kelly release Heather Lou posted about how she underlined one of the samples in a checked flannel and I loved how this looked. I thought my combo of army green and red plaid would look really cool and timeless. Also, living in the UK, adding a layer of warmth to a raincoat sounded like a very good idea!
To give me an added motivation to get this made I added it to my 2017 #makenine challenge grid on Instagram, then treated myself to the paper pattern at the spring Knitting & Stitching show. It is my first time using a paper version of a Closet Case pattern and I absolutely loved it. It has a sturdy envelope with beautiful illustrations, a decent instruction booklet with a clear, clean layout and pattern printed on to tissue. I actually got the pattern cut out the weekend following the show (no mean feat when you consider there are 19 pattern pieces many of which needed cutting in interfacing or underlining too!) and was ready to get sewing! But I got crazy busy with work and could only snatch the odd hour of sewing time here and there which didn't seem the right way to get stuck into this kind of project. Before I knew it it was summer and in the heat I couldn't find the motivation to sew a jacket underlined in wool flannel. Then I got busy again and suddenly it was the end of the year and my pattern pieces had been waiting in a little pile under my desk for over 8 months. I took a bit of time off in January to get back on top of life and that solid bit of clear sewing time was what I needed to finally put needle to fabric. I sewed the anorak up over the course of a week with a couple of quick and satisfying knit projects in the middle to break up the intense concentration needed for this.
Shortly after I'd cut my pattern the lining expansion pack was released! I did kick myself a little but now I'm really glad I went with the underlining as the wool flannel makes it so warm and cosy and I love the effect of the bright red plaid used this way. Heather Lou has done a good tutorial on how to underline this pattern if you'd like to do the same; its very straightforward and just involves cutting particular pattern pieces from the underlining fabric as well as the shell and basting them together before construction. She suggests using something more slippery for the sleeve so you can get your arm in and out easily but I stuck with my wool flannel and have had no trouble. You can choose to use both underlining and lining together if you'd like the warmth but the finish of a full lining.
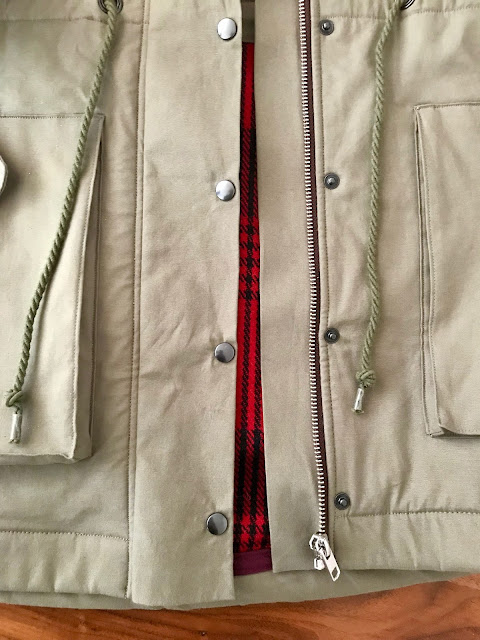
Keeping the project on the back burner for so long did give me plenty of time to get all the notions together, of which there are many! The cost of these can really add up but are worth it as they make the finished coat look so professional. I got my metal zip from John Lewis on Oxford Street as they tend to have a good variety and I like that they are returnable if it turns out to be the wrong length! My snaps and grommets are Prym brand so they work with the tools I own (I love using this tripod tool and a hammer rather than the vario-pliers as it gets them set in really firmly and doesn't need to be used near an edge). I bought them from MacCulloch and Wallis. I also got the olive green drawstring cord and lightweight fusible woven interfacing from them. I chose the lightweight as I wanted to keep this nice, soft and malleable and the thick wool flannel was already adding a fair amount of structure to the shape.
Closet Case Patterns do sell a hardware kit for this pattern which is good value for money and would save you the faff I had of trying to hunt down all the bits and pieces in the same colour. The hardware kit includes cord stoppers for the ends of the drawstring and spring cord locks which secure the tie in place at the waist. I'm just tying it and using knots and tape at the moment so I'd love to get hold of these as I think it would finish the jacket off beautifully. I haven't been able to track any down in the dark pewter finish I chose. Does anyone have any ideas?
I cut the straight size 6 which is pretty much spot on my measurements aside from a tad smaller in the hip. I probably should have graded up a size in that area as I could stand to have a little more room around the bum when its done up but it doesn't overly bother me. It has quite a neat fit in general, especially as the wool flannel I underlined it with is fairly thick. If you're going to underline yours and are between sizes I'd defiantly go for the larger size as there is less ease than you would find in a commercial pattern. I love how snug it is around the shoulders in particular as I don't like feeling overwhelmed by a coat. The sleeve length is spot on and the coat itself feels shorter than I expected which I like as its bit more modern and youthful. If you're tall I'd give the length of the pattern pieces a quick measure and check that against yourself. When I've got the drawstring pulled in tight the coat is just covering my bum.
I really like the slim sleeve and slight shaping in the body which can be exaggerated by pulling the cord tighter. Many people have commented on the lovely shape of the hood and this is defiantly one of may favourite things about the coat. It is a good size and just sits really comfortably on the head. When you've got the coat fully done up with the poppers you feel well covered and like it won't go anywhere and when not worn it holds a nice shape on the back too. I think I like a three-piece hood as much as I like a two-piece sleeve! Which incidentally this pattern has FYI.
I also love the front fastening with the placket that poppers over the zip and guard behind. Its surprisingly straight forward to put together and as well as being really functional against the cold and wet is one of the many features that elevates the garment above looking handmade.
The trickiest element of the construction (aside from topstitching down the assembled sleeve seams which is just plain fiddly) I found to be the gusseted pockets. It was the only time I didn't feel confident in what I was doing when following the instructions. I'm so proud of them now through! I've not sewn anything like these before and found it hard to visualise what I was trying to do. It requires some very accurate stitching. I heavily relied on the sew-along to reassure myself I was doing it right. The sew-along is really thorough and packed with great tutorials to help you with the many aspects of making this that might be new to a lot of people such as how to install grommets (new for me!) and how to install snaps. It only went live on the website in January so its a good job I held off for so long on making it hey?!
The pattern instructions themselves are impeccable. There is A LOT to the construction of this coat and some quite complex aspects to put together with lots of pattern pieces. Although the sewing process felt long I didn't feel confused or lost at all (with the exception of those pockets which are a real mind bender!) and by carefully following each step I achieved beautiful results. With a design this involved there is a lot of potential for things to go wrong but the pattern is so well drafted and thought out that I had no issues with pieces not quite matching up at markings and notches. I can't even begin to imagine the patience Heather Lou must have had when drafting and testing this!
It is a really satisfying project to tackle but it did test my patience purely because it takes so long! When I'm sewing I break everything down into parts to make the project seem more manageable and achievable. For example with a simple tee I'll be thinking 'ok I've just got to sew the shoulder seams, do the neckband, sew side seams, set in the sleeves and hem it'. With this project that didn't really work as firstly there were SO many of those little steps on that list and then each little step took a really long time! I spent a good few hours just on trying to make those pockets perfect. I've learnt to relax my 'perfect' over my years of sewing and focus instead on the enjoyment of making. But with something I'm investing as much time and money into as this I REALLY want it to be as good as it can be and will get the stitch ripper out more than usual.
Hammering in those snaps and eyelets at the end sure was therapeutic. Although it was probably the most stressed I have ever felt about setting in hardware. Once those babies are hammered in there is no getting them out. I really didn't not want to ruin all that work I was so proud of by getting a snap positioned wrong!
The instructions are so good you don't need to be a hugely experienced sewer to take this on but I'd definitely recommend having some confidence in your swing skills before you tackle it. Heather Lou expertly steers you through how the garment comes together so you don't need to fall back on prior knowledge of this but you do need to be able to stitch accurately and handle a number of layers of fabric at the same time. Some elements of this were a lot more straightforward than I imagined but some parts were really fiddly. There's a lot of visible stitching and topstitching which you'll want to be as neat as possible.
I think it will be a long time before I'd want to tackle this time consuming pattern again but I did love making it and it feels like such an accomplishment. There were so many new to me elements of this it was really satisfying to see it come together. I am tempted to make a lightweight fully waterproof version at some point as I've seen some great fabrics recently and Heather Lou has done some brilliant tutorial posts on how to work with waterproof fabrics and seal your seams with tape. Its always these new skills that lure me in to trying out a pattern or project!
Tuesday, 28 November 2017
Charcoal Cashmere Blend Oslo Coat
The description of this coating sounded so irresistible I went on an immediate quest to find the perfect coat pattern. A quick hunt through my pattern stash (which includes a surprising amount of coats for someone who has only made a couple!) didn't turn up quite what I was after; not that I knew exactly what that was at that point. I turned to The Foldline's sewing pattern database for inspiration, which was a great way to whittle down the kind of style I was after. The coat I made last year I am still completely in love with but it does feel like quite an occasion coat as it is smart and very structured plus the pale grey of the coating makes me a little nervous out and about in London. What I really needed was something with more of a relaxed fit that could be worn over the majority of my wardrobe and would replace my favoured Zara coat that saw me through the last few years.
A couple of pages into the database, up popped the Oslo Coat from Tessuti. I remembered being very taken with this style when it was released (especially made up in the beautiful blue check of their sample!) and it immediately seemed like an obvious choice. Its got a slight cocoon shape to it which would fill a good gap in my wardrobe yet the effect is subtle enough to remain a classic for years to come. I also so enjoyed making their Lois Dress and was already keen to try another of their patterns. I posted a few construction pictures on Instagram and from the response I got I'd say we're going to be seeing a lot of this pattern over the next few months! It seems like almost everyone has got this lined up in their sewing queue.
 |
| Huge thanks to Tom for taking some lovely pictures and please excuse the wrinkles! The coat has had a lot of wear already and this was mid day out at Eltham Palace |
The fabric turned out to be the perfect match for this style of coat. It is the ideal weight as it has a soft, beautiful drape yet still has a bit of structure to show off that shape. It has an incredibly soft and spongy touch and a brushed nap on both sides which turns it into something really special. The nap does mean that you need to cut all your pattern pieces out in the same direction so that it runs down the length of the coat and I laid my pattern pieces out on the floor to double check how much fabric I needed before ordering. I actually got away with 2.25m with plenty to spare when the pattern requests 2.5m and the lining I only ordered 1.5m of and had plenty when the pattern suggests 1.65m. But more on the lining later! The cashmere is simply stunning to both work with and wear. I made good use of my clapper to get nice crisp edges but to be fair the cashmere made this easy. It responded so well to pressing and shaping with steam. The instructions are really clear about making sure to use a press cloth and never press directly on to the coating and this could not be more important with this particular type of napped coating as pressing it directly ruins the pile.
I'm now delighted that it's dark grey as it works with everything. I'm going to wear it to absolute death. Plus even if the charcoal grey feels a little dull...theres a party going on inside to perk things up! One of the best things about making your own coat is that you can go wild with the lining and really make it your own. This is a Liberty Silk Crepe called Khan which I actually ended up choosing as I was sent a swatch with my last order. The geometric print is quite a bold choice for me but I love the vintage tones of the colour and slightly art deco vibe. The Fabric Store manage to pick a really contemporary and interesting selection of Liberty prints to stock yet whenever I order I find myself browsing through the Liberty section wishing I could think of a garment I'd like to make and wear out of them. Prints aren't really my thing a lot of the time and while the Liberty ones grab me on the bolt and are a joy to sew with, in all honestly I'm not dying to wear them. Lining is the perfect way to take advantage! Silk is a real treat as a lining so thanks so much to The Fabric Store for giving me the opportunity to use it. Not only does it feel absolutely amazing to wear but silk is a surprisingly tough and durable fabric and also its natural fibres do a great job retaining heat whilst still allowing you to breathe. (FYI having said all that about wearing Liberty - I've 100% got my eye on the entire swimwear range that TFS are currently stocking!)
My measurements placed me between the size 6 and 8 and as I am slightly wary of these looser fitting, cocoon styles on my petite frame I opted for the smaller of the two. I could not be more delighted with the fit. I don't feel swamped or overwhelmed by it at all and love how neat it is around the shoulders. I thought the collar might feel quite big but I like the proportions of it. I had expected to need to shorten it (I'm around 5ft 3) but I'd say this was exactly the length I was after. I was actually nervous at one point in construction about the sleeves turning out too short but they are spot on. If you're tall and like your coat sleeves long like me I'd definitely recommend giving yourself some extra length to play with.
I'd say a good amount of sewing experience is necessary to make this as you need to have some confidence in your abilities and understanding of how things come together. However, I wouldn't say you need to have made a coat before. For a first one this would be great as the raglan sleeves omit shoulder pads e.t.c and makes the process a bit simpler and quicker. The instructions I think are fantastic. I know some people have mentioned that they struggle with Tessuti instructions as the steps are photographed rather than illustrated but I love them. These instructions in particular are jam packed with annotated photos and tips that I think explain things really clearly. I love that they don't skimp on the words and each and every step explains the right seam allowance size to use, when and which way to press seams...you can move forward confidently without worrying that you've forgotten to do something important or whether you should have tried a different technique.
As with the Lois Dress some of the techniques felt a little different to what I had done previously, but no less right and I really enjoy the construction process as it is new and unusual for me. Perhaps the techniques are a little more fashion industry based than home sewing? Some steps felt a little strange as they were new and also it's incredibly difficult to explain clearly with photos or words some of the fiddlier aspects of making a coat but at no point did I feel like I was guessing at the right method. I can't emphasise enough how delighted I am with the resulting finish. In particular the seaming in the area around the neckline and the way the sleeve slots into the front panel as it turns into the collar is just beautiful. There are a couple of corners to pivot around to achieve this so I'd highly recommend using a fairly soft coating to make this easier. A thick, sturdy coating would make this challenging and very bulky.
The only thing I thought missing from the instructions, but not essential, was advice on grading seams and trimming down corners of seam allowances to reduce bulk. I actually didn't do much grading given the weight of this coating but I did make sure to get in there and trim down the ends of the seam allowances where they crossed around the neckline of the coat so that area and in particular the edge of the collar didn't get too lumpy. A touch I did love was the switch of under-stitching from one side to the other at the point where the front facing turns into the shawl collar. I had wondered about how well that collar would sit given that there is no pad stitching or roll line to encourage it to lay nicely but its clearly just really well cut as once I had under-stitched and pressed it fell naturally into place!
As much as I love the patterns and instructions I'm not a massive fan of the Tessuti PDFs. There seems to be a lot of wastage in the layout and this one (I know it's a coat so as a lot of big pattern pieces) came in at a whopping 108 pages! I decided to try out the print at copy shop option for the first time as I couldn't face sticking together that many pages and it may have changed my life a little bit... so quick and easy although not inexpensive.
Its a great pattern to choose for a first coat as I don't think you'd need to do any further research into tailoring techniques to make it. You could certainly add in all the pad stitching e.t.c if you wanted to but I really don't think it needs it. I certainly found this straightforward as I've already made a couple of coats and have a bit of tailoring knowledge but making it as a beginner to tailoring I don't think you would struggle. The instructions require fusible interfacing in particular areas very similar to what I opted to do with my Butterick coat. Make sure you use a good quality interfacing. You don't want horrid, cheap, bubbling stuff running your lovely coating and lines over time. I used a lightweight cotton fusible from MacCulloch & Wallis as I wanted to maintain the drape and not add too much structure.
The pockets are possibly just a fraction low for me although I think that probably has more to do with the size and depth of the pocket bags rather than the openings themselves. They are huge and my little hands get lost in them! Its great that they can hold so much but I wouldn't want to put too much in there as it would ruin the beautiful lines of the coat. I really enjoyed the pocket construction method which is different to what I am used to for inseam pockets. The wool facing is a lovely touch so you don't get an unwanted flash of lining and ooo does it feel nice hiding cold hands in pockets lined with gorgeous silk! The only issue I do have with them is that the pocket bags tend to get pulled to the outside of the coat whenever I take something out of them so I wish I'd done little swing catches to keep them caught to the front edge like I did on my Butterick coat. Its a bit late to get inside now the coat is bagged out so I might have to try and do something by going through the pocket.
Starting a project with bound buttonholes is always unnerving and I have to say these are probably the only thing I'm not completely happy about with this coat. After following pattern instructions for them on my V1537 dress coat I returned to the instructions from Couture Sewing: Tailoring Techniques as I prefer the accuracy of this method. It's a good job I did a practice one though and didn't get too cocky and dive straight on in there! I totally messed up my first one and ended up with raw edges instead of folded ones forming my welts. That would have been a disaster if I'd sliced right into my front pattern piece! I still really don't enjoy the technique for finishing the back of a bound buttonhole. Turning under and hand stitching such a small amount of a thick coating is really fiddly and I'm a bit concerned about how well they'll last. I made a covered button for the outside of the coat to continue the clean look and the flat button inside was just an odd one from my button box.
The perfect marriage of fabric and pattern has made this one of my most enjoyable and successful projects to date and one I'm really proud of. Its really worth investing in good quality fabrics and also investing some time into your pattern and fabric choices before jumping right on in. I had such a good time sewing it that its almost a shame my wardrobe doesn't need another one! After making this and the Lois Dress I'm now a total Tessuti Patterns convert. I think what I've enjoyed about them most are that the designs are clean, classic and apparently simple but there's a lot more clever cutting and construction involved than you realise. I'm off to mooch through the rest of their collection...not that I need anything else to make at the moment! I should be getting my head down and trying to plough through the rest of my huge sewing queue!
Friday, 12 May 2017
The Vogue Cocktail Hour Sew-Along! - Floral Brocade V1537
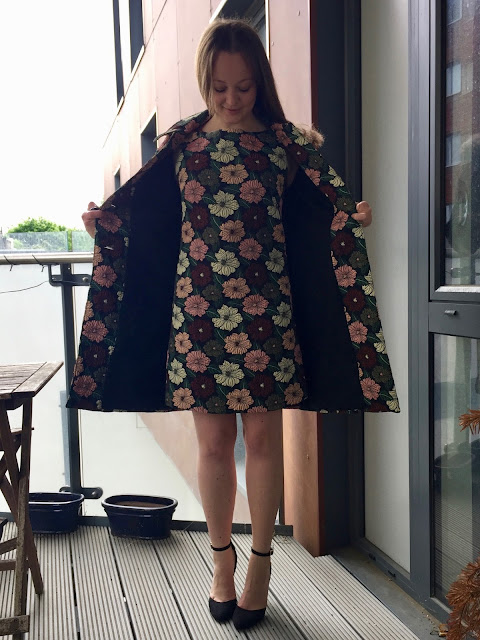
So this is the maddest outfit I've ever made and I LOVE it! I chose the pattern before the fabric and then had real trouble deciding what I wanted. I often sew with soft and drapey fabrics so the fact that this requires fabric with a bit of structure which is also occasion appropriate was a nice challenge. The idea of using a jacquard/brocade like the sample garment appealed to me but everything I was coming across seemed a bit home dec/old fashioned/something I'd use for a period costume at work! I was after something fun and contemporary. I decided to hit Goldhawk Road and after not much success finally spotted a roll of this amazing floral brocade hidden away in Classic Textiles. Just after buying it I discovered that Fabrics Galore also stock it and have seen it pop up on social media a few times since. Rumana took full advantage of the amazing inverted colour-way on the reverse and made a great reversible sweatshirt style top out of it!
This brocade has an amazing texture to it which appears slightly crinkled and almost quilted in the way that the flowers seem to rise out of the black background. The texture means the fabric has a bit of give in it as the texture can be flattened out which makes it interesting to sew and also very forgiving to fit! I'm not sure what the content is but there's definitely a bit of poly in there so I kept my iron on a mid rather than high temperature but it washed well at 40 degrees. The only thing I didn't like about this fabric is how much it frayed. Big fluffy chunks come off the moment you cut into it and my floor was more thread than carpet by the time I was done! Luckily both dress and coat and fully lined so it's not a problem now it's done but it certainly made the more fiddly construction elements tricky.
I cut a size 12 which is a size down at the waist and hips from what the pattern recommends but my experience with these patterns has told me that there's more ease built in than I personally like and a 12 does just fine. To make doubly sure I checked the finished measurements which are printed on the pattern pieces themselves at the waist, bust and hip lines rather than the envelope. I'm VERY pleased with the fit and am glad I sized down. The dress has the perfect amount of ease for a shift and I like that it still gives you a figure and has great shape through the back. When I first put it on it seemed a little roomy in the shoulders but has settled into place with wear. If I made it again I'd probably take a smidge of length off the shoulder rather than width as I think the problem is to do with where it sits rather than the size of the neckline. For the first time in a long time I did absolutely nothing to the length of the pattern! Being 5ft3 I normally have to shorten things by an inch or two but I love this as is. It is quite a short style and looks much more youthful for being that length but if I was any taller I think I'd feel a bit concerned about bending over!
This was certainly a challenging and time consuming project but a very enjoyable one. There are huge number of techniques and steps to work through and no less than 28 pattern pieces! Just the cutting took me a day. The coat wasn't as complex as the winter coat I made myself back in January as I wasn't contending with a thick wool but it contains pretty much the same number of techniques and elements. Luckily as it was only a few months ago that I made that one the method felt quite familiar so I went into it with confidence. To make the process a little speedier I actually tackled the instructions in all the wrong order and did the coat and dress simultaneously so I could pin lots of pieces, sew lots of pieces then press lots of pieces without having to move around too much. I assembled all the little bits and pieces like the pockets, sleeve tabs and collar first so they were just ready to attach when I got to that point in the instructions.
To my surprise I discovered that the trickiest part sewing wise was in the dress rather than the coat. The finishing techniques on this pattern are to die for and one of my favourite things is the facing and lining combination inside the the dress. Attaching that shaped lining to the facing a sewing the deep v of the centre back was definitely a challenge that required accuracy and patience! I'm really delighted with the way it turned out though and almost want to wear the dress inside out. It's such a stunning feature.
This design is labelled as advanced but I wouldn't class myself as an advanced dressmaker and wouldn't say you need to be to tackle this one. If you break it down into small chunks and take your time it's entirely manageable. You definitely do need a bit of dressmaking and basic coat making experience under your belt though as I think you'd benefit from an understanding of how these kind of garments come together. The instructions are very thorough and clear but do rely on you having a bit of sewing knowledge.
Always daunting when sewing a coat is the fact that you start with your bound buttonholes! The method in the pattern instructions is different to the one I followed when I made my coat but I decided to go with the pattern instructions this time. I think I'll go back to the method from 'Couture Sewing Techniques' next time as I didn't get as clean a finish this way and it was difficult to get crisp and even welts in this textured fabric. The fraying of the brocade made them particularly difficult, especially when it came to slashing and turning in the edges inside the coat to finish off. I didn't enjoy that part at all!
I pretty much stuck to the instructions all the way through as they're great. I was confused by the ease stitching instructions for the front and back princess seams as it said to ease stitch the centre front and back pieces when I would have thought it should be the side pieces as that is the larger curve that you are trying to fit into the smaller. As it was I had no trouble easing in those areas by hadn't without gathering stitches.
The only other time that things got confusing was attaching the coat lining to the facing as you are meant to sew down to the small circles near the hem but I couldn't see any small circles! There was a notch but that seemed quite high up from the hem. I sewed to that point anyway figuring if the gap was bigger than usual I'd just have to sew more by hand. There's A LOT of hand stitching involved in the coat. You could avoid a lot of it by bagging out the lining but I quite enjoyed sitting by the tv and closing everything up nice and accurately!
I love that the coat includes top-stictching. It's another of those little details that really elevates a project. It doesn't really show much on my bonkers brocade but looks great up close. I added topstitching to the side and shoulder seams even though the instructions don't indicate too as it seemed odd to leave them out. The shoulder seams I pressed open and topstitched on both sides. The side seams I pressed towards the back and just topstitched on that side of the seam.
I chose a plain black cotton lawn to line it as I thought this was a good match for the weight and structure of the brocade and I'm not a fan of wearing those more traditional 'silky' lining fabrics against the skin. I used a lightweight fusible cotton interfacing on both the coat and dress. I was concerned about how the brocade would fuse because of the texture but it actually moulded to the ridges of the fabric beautifully. The buttons came from my stash. I figured plain black and simple would do just fine with a fabric this loud!
Both the coat and dress are packed with little details that elevate this design to real 'special project level'. The swing catches between the lining and dress at the hem to keep everything in place are a lovely touch, as is the fact that the patch pockets are lined. Next time I'd probably trim down the lining pieces slightly though so that they are encouraged to roll to the inside of the pocket.I had a hard time pressing those curved corners and getting the lining hidden away.
My favourite features are the bracelet length sleeves of the coat and that amazing back detail on the dress. I really enjoyed the process of sewing a totally new design detail and love how it looks. It's just the right depth and width to be slightly sexy without being one exposed and I was delighted to discover that the lower strap is in the perfect place to hide my bra band!
The instructions recommend adding ribbon hanging loops inside the shoulders of the dress which I decided against as I didn't want them to peek out when wearing. I'm actually tempted to add smaller ribbon piece inside the shoulders with poppers to connect them so they can act as bra strap carriers as well as keeping the dress on the hanger. It's totally possible to wear a bra with this style but the straps could do with a little help to stay hidden.
I was a little sceptical about how this style would suit me but I feel surprisingly comfortable and 'like myself' in it. I think it's a great look for petite ladies and the shape of the dress is totally timeless; when can't you wear a shift?! The bracelet length sleeves of the coat and it's cut have a slightly sixties vibe (especially in a flower power brocade!) but the combination of shift and jacket is also giving off a nineties feel too.
It feels so 'fashion' to wear both pieces together but I'll be honest and say that it's unlikely I ever will. I adore the dress on it's own and definitely can see me getting a lot of wear out of it but I absolutely love the coat paired with a simple ensemble of skinny jeans and a white tee with black stilettos. I've never had a statement piece of outerwear before and I'm really enjoying it! I do have a friend's wedding to attend in November which the full ensemble might make it to if I pluck up the courage. Speaking of winter weddings, I never know what to wear and this combination of coat and dress is perfect. If my choice of fabric is a little bit much for you I think it would look amazing in a solid, vivid colour of beautiful wool crepe!

