Camel Wool Melton Traveller Coat
Those of you who follow me on Instagram may have seen on my stories that I spent a large chunk of December working on a new coat. I've been meaning to make one for the last couple of winters but never seem to find the time. This year I planned ahead and got the fabric early (I think back in August!) and the forecast of a very cold spell here in the UK before Christmas motivated me to get going.
I had in mind a classic camel coloured coat. Such a lot of work and time goes into making a coat I wanted to be sure it would end up being something I could get a lot of wear out of for years to come. After a lot of research I finally settled on the Bella Loves Patterns Traveller Coat. I hadn't used any of Bella's patterns before so it felt like a bit of a risk embarking on such a big project with a pattern I wasn't sure on the drafting or instructions of but I read SO many good reviews I took the plunge. This pattern is 100% worth all the hype; beautifully drafted, fantastic construction methods and there is a mind blowing level of detail in the instructions.
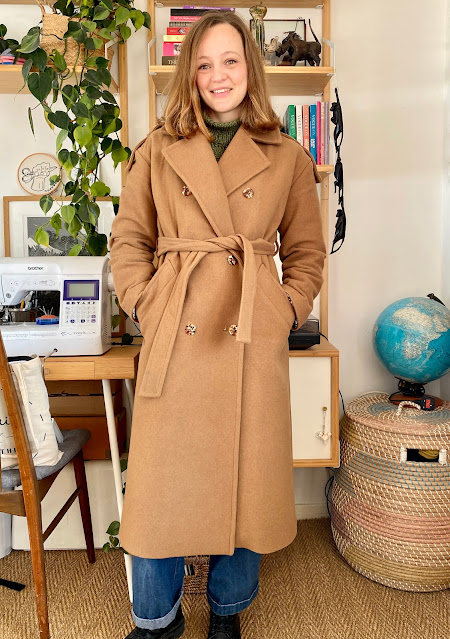
Perhaps my favourite thing about the whole pattern is that it is available for two heights - 5ft3" and 5ft7". There are so many pattern pieces involved in a coat like this that trying to change the proportions can be a huge job, it's not as simple as taking a bit of length off the hem and sleeve. I'm 5ft3" so was over the moon to realise I didn't need to do anything! I actually made no alterations or adjustments at all, this is the coat sewn completely as intended.
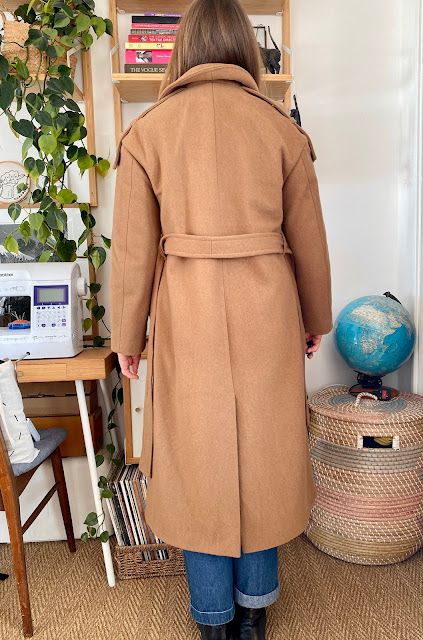
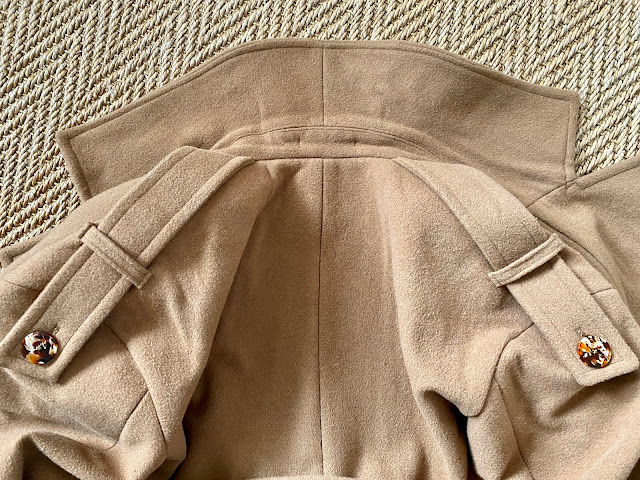
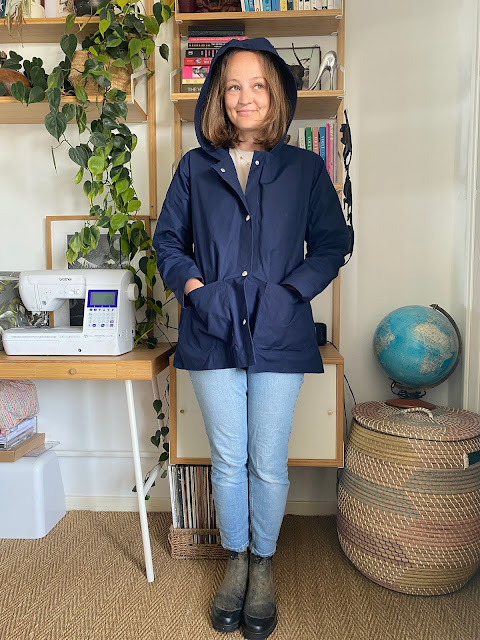
I cut the size 10 at the bust and waist and graded out to a size 12 at the hip. Given that this is an oversized style I could probably have gotten away with a straight 10 but as it is quite a straight cut didn't want it too tight over my bum. I'm really pleased I did this as I like how it sits. Overall I'm really happy with the fit. it is oversized but doesn't dwarf me and is really comfortable and practical to wear. The only slight irk that I have is that shoulder bags get easily tangled up in the epaulettes which are a unique design feature. Traditionally an epaulette is inserted into the shoulder seam and secured with a button near the neck but these are inserted into the neck and button on the sleeve after threading through a loop on the shoulder. A fun modern twist. As I was aiming for a very classic coat I considered leaving these off (as I saw one or two other people have on Instagram) but the fun of sewing is to do things a little differently isn't it and I felt like I would have missed this detail.
It is an epic project right from the start, even assembling the PDF is a mammoth task! I thoroughly enjoyed every moment of making it though and learnt so much. I can't recommend this pattern enough for a first foray into tailoring. Every single aspect has been so well considered. It's not full tailoring (there's no pad-stitching and the interfacing is all fused) but it was a real step up from the other outerwear I've sewn so far. The oversized style means the shoulders are slightly dropped which negates the need for shoulder pads of sleeve heads (thankfully, given how much else goes into making this!).
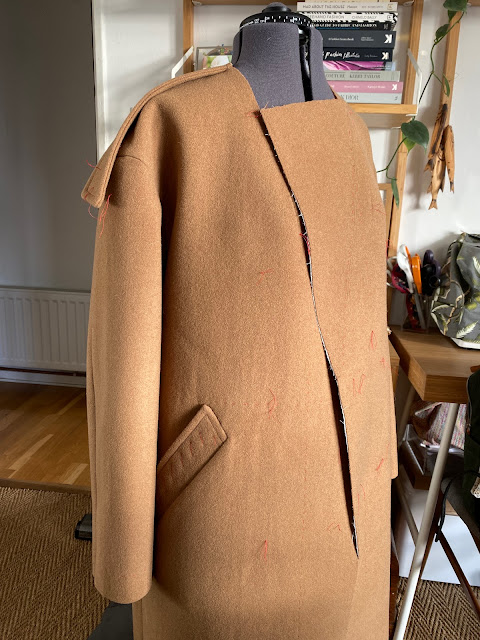 |
| In progress... |
My fabric is a wool blend melton in the 'malt' colour from The Fabric Store. I ordered quite a few samples before plumping for this choice in the end. I loved the richness and warmth of the colour and it has a thickness to it without being too bulky and heavy. I wanted a fabric which would give the coat structure but be soft and comfortable to wear. I'm so pleased with my final choice. It is equally wonderful to sew with and wear. I've been wearing it day in, day out since I finished it and it is still looking sharp.
 |
| Collar guts - graded seam allowances pressed with a clapper |
It did take a bit of work to get nice sharp corners, purely because of the thickness of the fabric. I graded the seams quite heavily, used a point turner and a good firm press (I took the pattern advise to press under a scrap of the same fabric rather than apply the iron directly to the right side of the coat). The fabric does press beautifully and keeps a lovely clean edge, especially when topstitched. It also responded really well to steam which is a huge plus when tailoring. I was able to shape aspects like the collar really nicely with a good steam. I loved Bella's method of pinning the collar and under collar to a tailors ham and then shaping with steam and leaving to 'set'.
I used Vilene G700 fusible interfacing which I would say is on the lighter end of a mid weight. When using a thick wool coating like this it is tempting to go for a heavy interfacing to match but I wanted to keep some softness and movement in the wool. I'm pleased with my choice in that respect as it adds a little structure where required but doesn't change the properties of the melton. However, I had an absolute nightmare getting it to fuse! I thought it might be the combination of fabric and interfacing not playing well together but I actually think it might have been my iron. I've got one of those tank ones that detects the best heat setting and I think because it was wool and poly it wasn't getting hot enough to fuse. Then again, I tried fusing it interfacing side up and also with a piece of cotton laid over the top and neither did the trick. I have ended up with a bit of bubbling which is incredibly frustrating but it seems to have settled in with some wear. Also...coats need a lot of interfacing and decent interfacing is crazy expensive! Well worth the investment when you're making something like this but the interfacing can end up almost more expensive than the fabric.
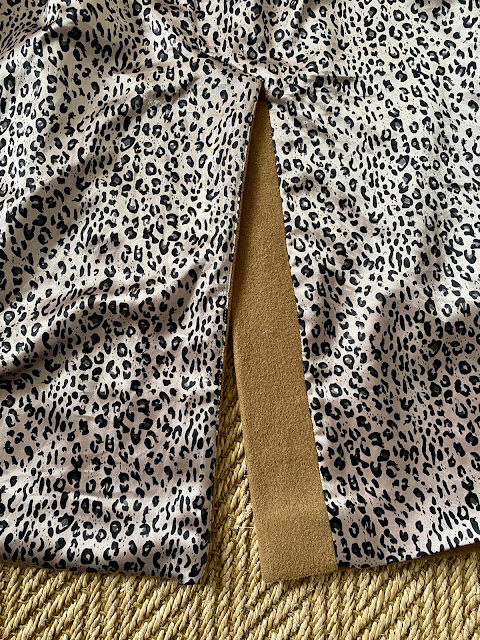
I considered using a special fabric for the lining as it was such a special project. However, I used a silk lining in my previous coat which felt super luxurious and I adored but also completely fell apart after a couple of winters. No more phones and keys falling through holes in pocket bags for me! This time I opted for a robust poly lining, still satin though as it makes the coat easy to slip on and off and feels nice when you put your hands in the pockets. It is this taupe leopard poly satin lining, again from The Fabric Store.
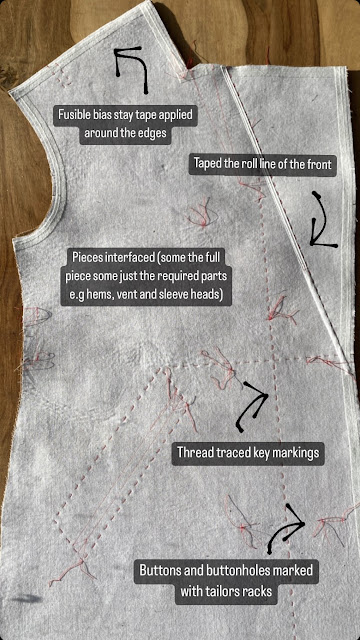
This is definitely not a project for the faint of heart and if you take it on I recommend that you don't set yourself a deadline and allow lots of time! The instructions are 50 pages long and just cutting out and preparing the pattern pieces took over a day. There's lots of interfacing and stay tape and then a lot of markings to thread trace onto most pieces. I did feel like a real pro once all that basting was done though! That hand sewing flat at the table is really therapeutic too and it is all 100% worth it as it makes future steps easier or clearer.
After doing a bit of research I opted to sew a narrow twill tape to the roll line of the collar rather than use the fusible stay tape as instructed. It felt a bit more substantial but I partly did it because I just love how those two little rows of stitching under the collar look when the coat is complete!
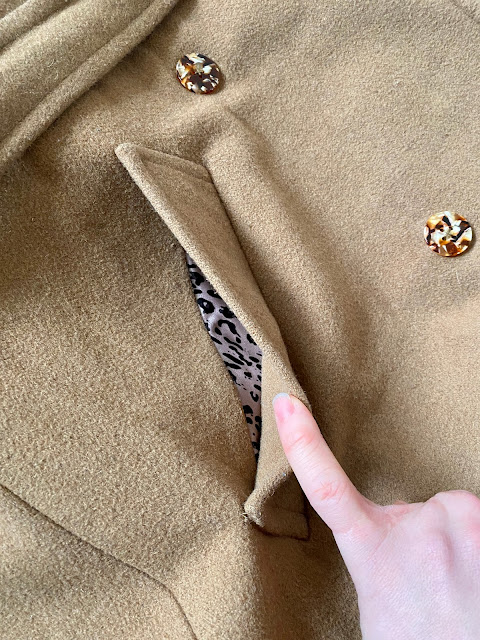
One of the hardest parts of making this coat is the very first sewing step. Welt pockets! The instructions for these are fab, even if you haven't sewn one before. Bella does suggest practicing on a spare piece of fabric first and I 100% agree. It gave me a lot more confidence when doing the two 'real' pockets - even then despite the practice going well is was still mildly terrifying to slash a big hole in the front pieces! I'm so delighted with how mine turned out, think it is some of my best sewing. Take your time and make sure you have marked everything up thoroughly and accurately before you start.
Speaking of marking things up, I tried a few different marking tools on scraps before I got going as there was so much marking on the right side of the fabric. I was going to go down the classic route with chalk but wasn't getting a very clean line on the texture of this melton with the chalk I had and I found it hard to completely rub it out after. In the end I went for a frixion pen as you can mark fine lines so accurately with it. Make sure to test how well the marks iron away on your fabric first though. I was left with a little bit of white residue but it did brush away.
There are so many little details in the steps which make a world of difference to the finished garment. Too numerous to really mention but they include: the darts at the neckline, the method for hand-stitching down the pocket welts, shoulder and sleeve seams needing to be eased together to create shape, details on how to press, grade and clip seam allowances at every step, how to press the front edges so that the lapels roll out and everything sits correctly and 'stoppers' to catch the lining to the coat around the armhole. Some of it I didn't understand the purpose of as I did it but now do. So clever. I love the clean finish of the vent, it wasn't that complicated to achieve either.
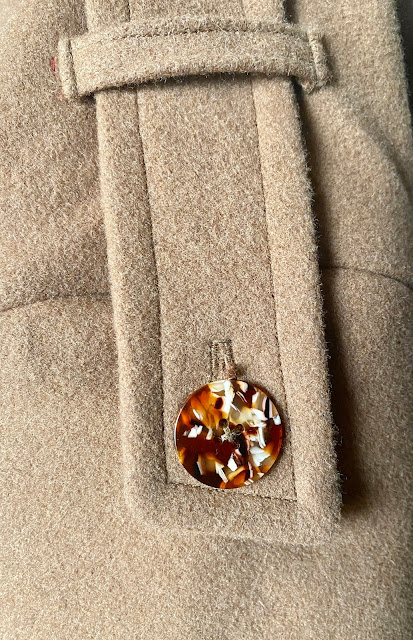
The gorgeous buttons are from Pigeon Wishes. I've been looking for an excuse to use some of their bio resin buttons for such a long time and am so pleased with how they work on this coat. I had a hard time choosing between a few styles but opted for 'Chai Latte'. The pattern does suggest using slightly smaller buttons for the epaulettes but the Pigeon Wishes buttons only come in this or shirting size so I stuck with the same size as the front of the coat and think that works just fine. They also sent me some of the buttons from their recent collaboration with La Petite Maison Couture which come in such exquisite little satisfying packages. What a treat!
My god, was sewing those buttonholes nerve wracking! I didn't want to ruin the coat at the final hurdle. Luckily my machine absolutely loved this fabric, the stitches sink in really nicely and even in the bulky areas it didn't struggle at all. There are actually only five buttonholes to sew which was a nice surprise.
I sewed the coat in a mixture of small and large chunks over the course of about three weeks. The nice thing about a project like this is that there are so many elements you can break the sewing down into nice little chunks here and there. Writing this post has actually made me want to make another one haha. With the exception of the sleeve lining being a fraction too long I wouldn't change a thing about it...which is a relief after so much sewing! I feel like there is just the right amount of topstitching, the pockets are just the right height and the proportions work well.









Comments
Post a Comment
I love hearing from readers of my blog so please feel free to leave a comment!