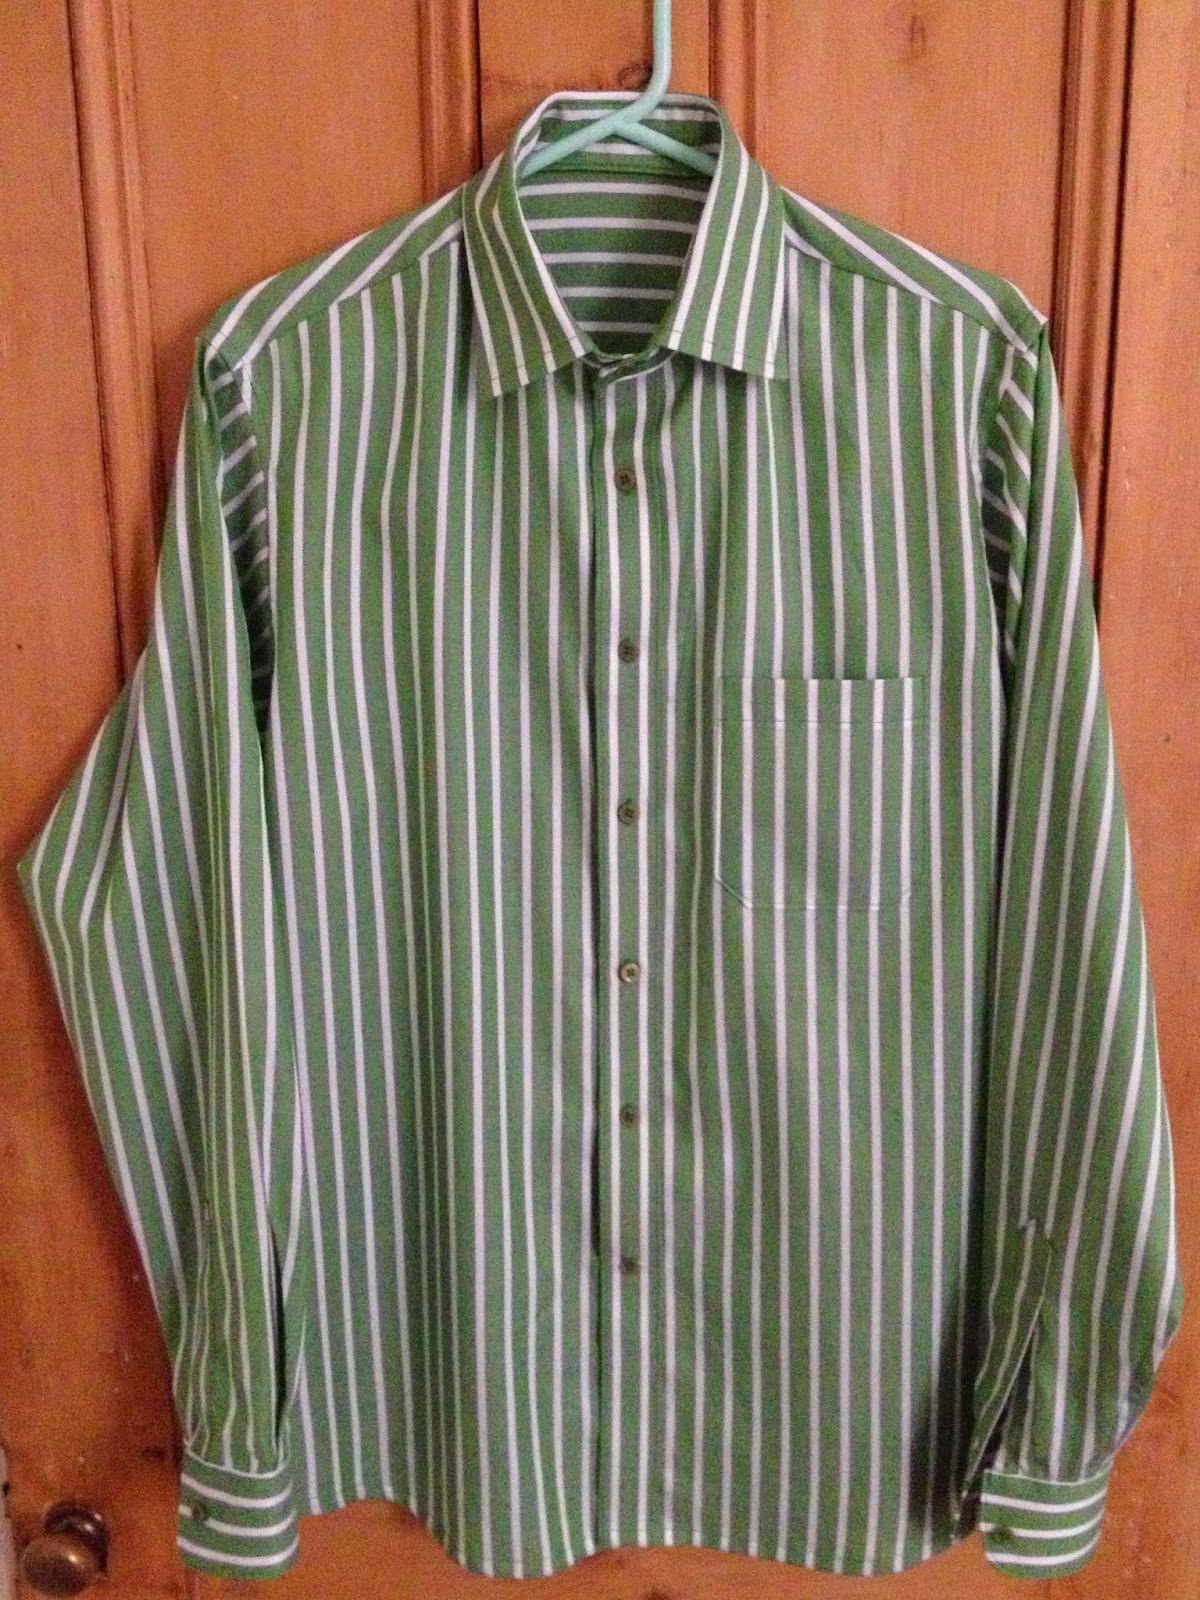
He picked out this gorgeous Italian cotton shirting from the Mood Fabrics website and it was a brilliant choice. It's great quality and so lovely to work with. The green is actually a bit brighter than it came out in photos. I'm not going to lie the stripe matching was another big reason for my nervousness about even getting started with this project but I enjoyed the extra challenge and it turned out to be really motivating and satisfying to work with a fun fabric rather than a plain colour or basic white.
I haven't done a lot of pattern matching before, especially not in wovens and with such a bold stripe. I spent a long time staring at the fabric and moving things around. I cut everything that needed matching on a single layer and pieces that were to be cut on the fold I traced out into one large piece so I could cut it flat. It took a bit of maths to work out the spread of the stripes across the two front pieces and placket but I got there in the end. I'm really pleased with how it turned out with the exception of the sleeve plackets which I didn't attempt to match at all. I hadn't made enough of them to be able to even begin to fathom what stripe was going to end up where once they were folded and turned through!
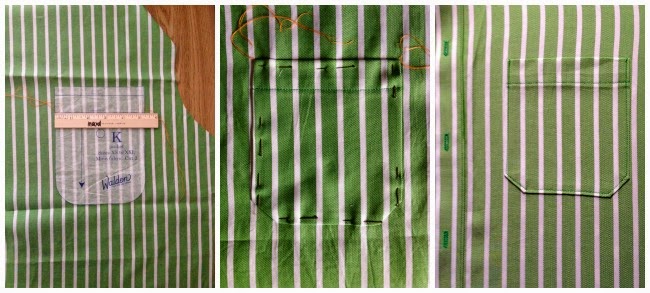
I am so pleased with how the pocket lines up. I cut this piece by laying the paper pattern piece onto the fabric shirt front piece, lining it up with the placement markings and factoring in the seam allowance. Then I used a pencil to mark where each of the stripes were around the top and bottom edges of the pocket. I could then simply match up these marks with the stripes of the fabric as I laid out out to be cut. It worked out perfectly and the pocket almost disappears into the shirt front! I picked up this pattern matching tip from Sew Busy Lizzy's post on her gorgeous waterfall coat.
 |
| I love the burrito method for constructing the lined yoke! |
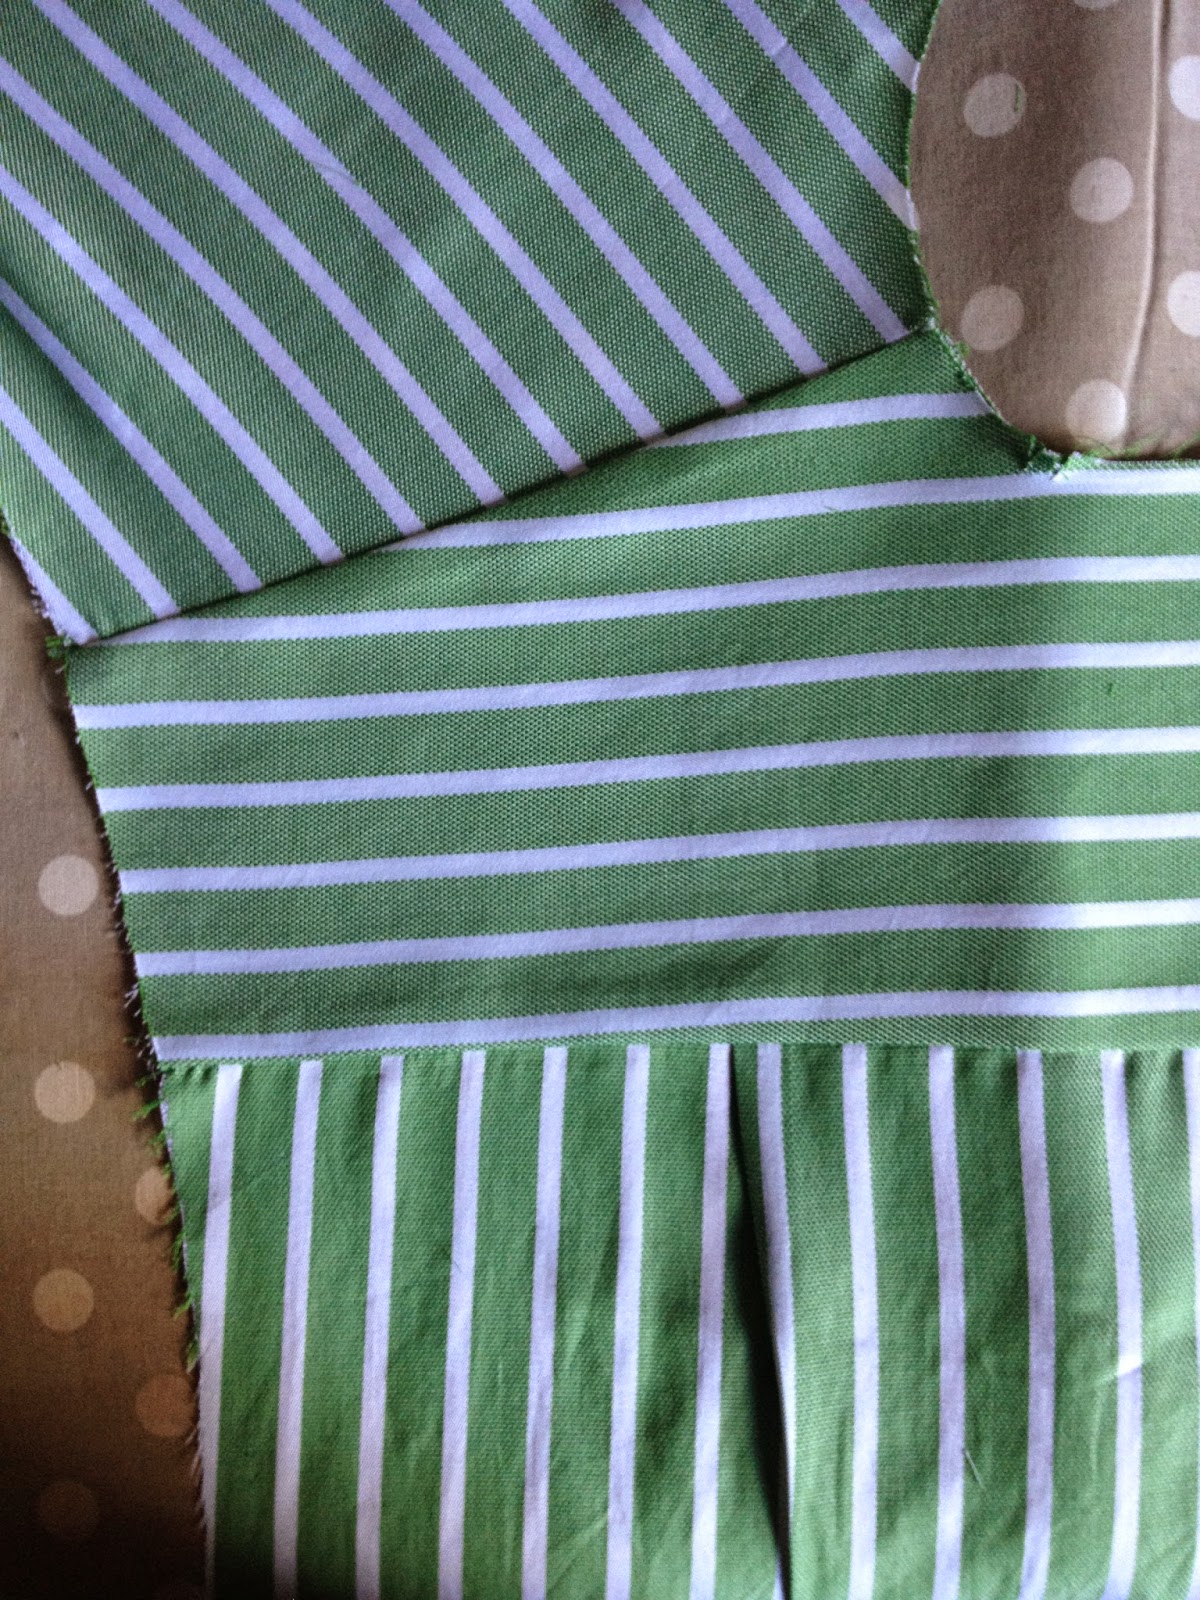
The other bit of pattern matching I did was to have the stripes running across the yoke and continuing down the sleeves. I had done a lot of looking at RTW striped shirts to help me decide on placement of the stripes but, although I knew I wanted to cut the yoke on the cross-wise grain, when it came to cutting out the sleeves I couldn't think of what exactly I was trying to match. With a ladies top I might match stripes where they intersect at the front and back of an armscye and use a notch to do so but for the life of me I couldn't work out the best thing to do with the shirt. I was watching a bit of Modern Family that evening when I suddenly spotted the stripes running across the yoke and down the sleeves of Cam's shirt! I literally jumped up out of my seat and Ste thought I'd gone a bit nuts. I was thinking 'thank goodness I've over-ordered on the fabric and still have enough to cut new sleeves'...but when I checked the sleeve pieces I had cut I realised by very happy accident they were just about going to match up anyway!
 |
| The seams are all flat felled or concealed as part of the construction |
I asked my stepdad to let me borrow a shirt which he was happy with both the fit and collar style of. It came in so handy to have a shirt next to me throughout the entire construction process; both to check fit and what certain elements should look like when complete. So I highly recommend you have one to hand if making your first shirt. To begin with I measured this shirt against the main pattern pieces and found that the Colette size medium appeared to be a good match. I just took 1/2" off the sleeve length. I didn't have the luxury of having my stepdad around or even close by enough to try on the shirt throughout construction so measuring it up in this fashion was a nice reassurance that it wouldn't end up miles too small or big!
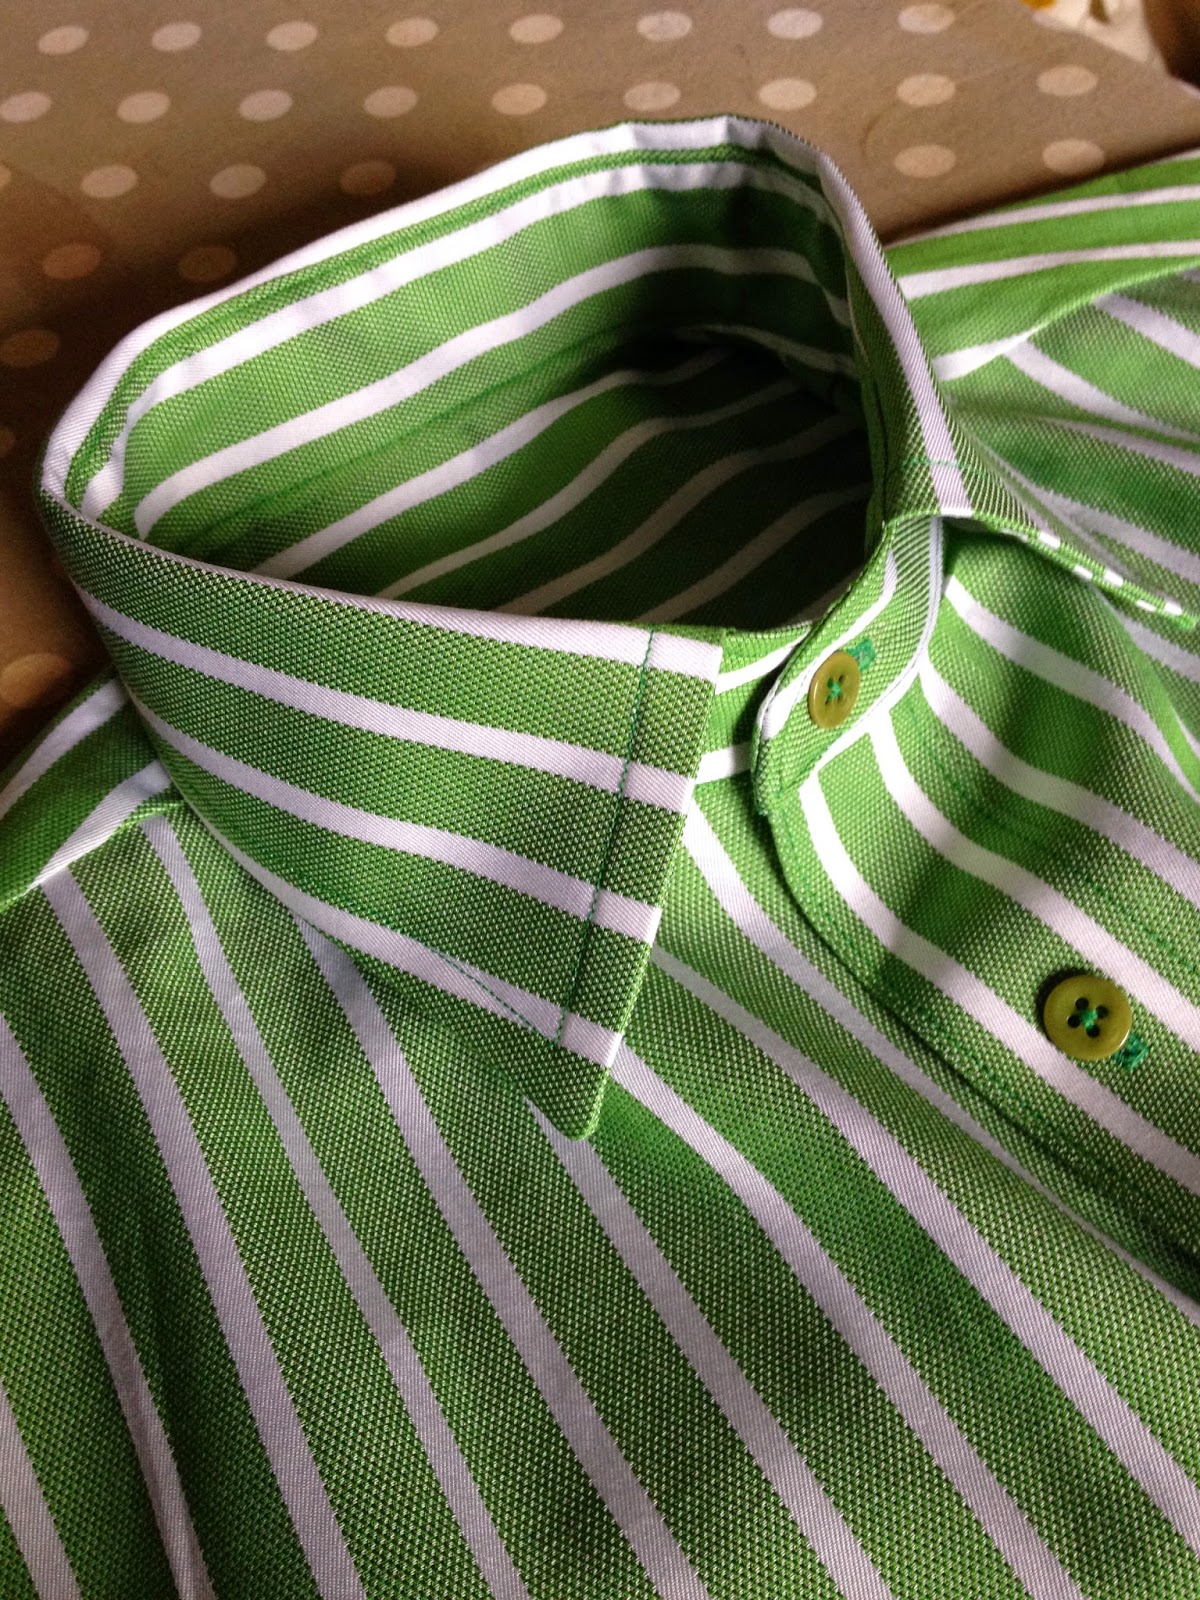
The next thing I used the RTW shirt for was to draft my new collar and collar stand. Following Peter's instructions you basically trace the collar and stand pieces of the shirt onto paper and then add seam allowances all around. I did a quick check to make sure that these pieces would fairly closely match the neckline of the Negroni and thankfully everything was looking good. I don't imagine, if you have chosen the pattern size based on the size of the RTW shirt as I did, that you would end up with much of a difference as the collar size increases on the Negroni in tandem with the chest size as it generally does in RTW. I was really apprehensive about the new collar the first time around but it worked out great with that shirt so I felt entirely confident in this method this time. After all, if you've lifted the collar size and shape directly from a shirt which fits you're pretty much guaranteed to get a result if you stick accurately to your seam allowances. I also followed Peter's instructions to draft and construct the left and right front plackets which was super simple as it's basically two long rectangles of the right width.
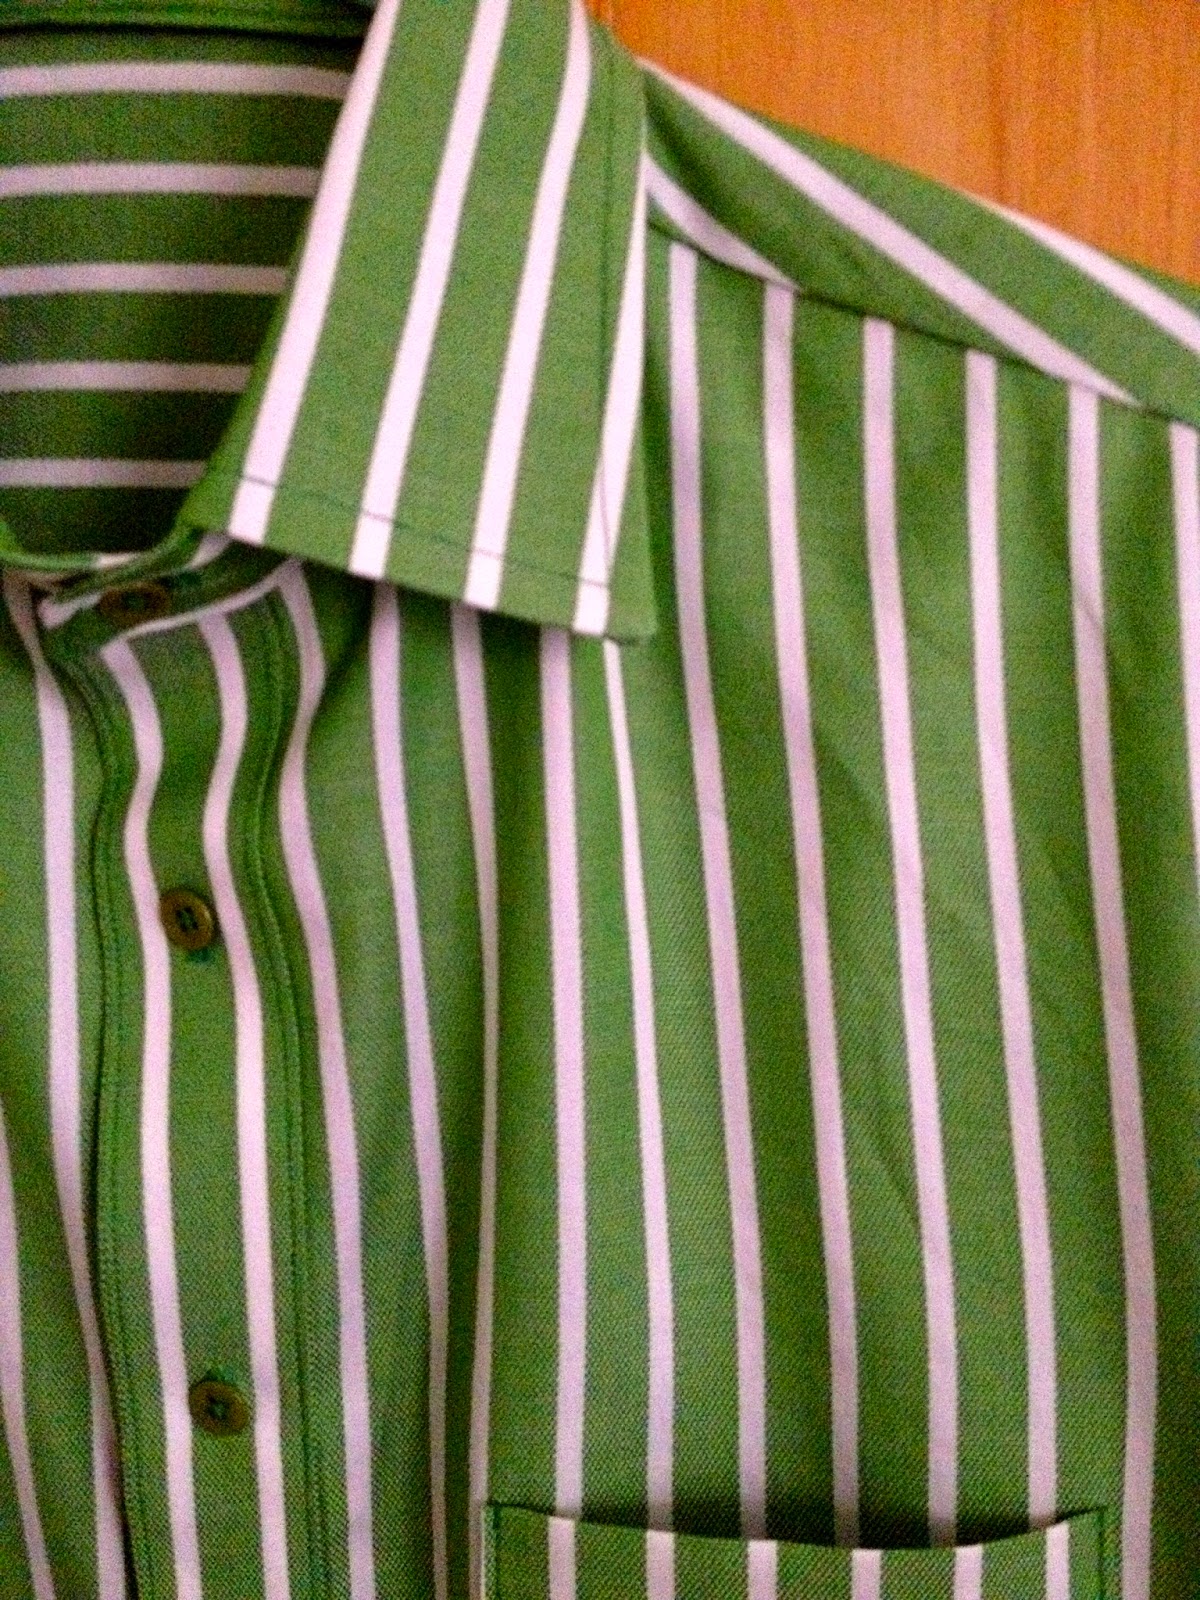
One more change I made was to add slots for collar stiffeners (or stays/bones if that's what you call them!) to the underside of the collar. This was actually pretty straightforward and I worked out how to do it by looking at the collar of the borrowed shirt. These need to be added before you start assembling the collar and involve using a second under collar piece. I'm thinking about doing a brief tutorial about it if anyone is interested? I'm so, so pleased with how this feature turned out. In fact it may be my favourite thing about the whole garment! As with my Archer Shirt I used Andrea from Four Square Walls' tutorial to guide me through the construction of the collar and this is absolutely my neatest one yet. All her little tips such as trimming down the interfacing and the under collar before construction really make such a difference to the finished result.
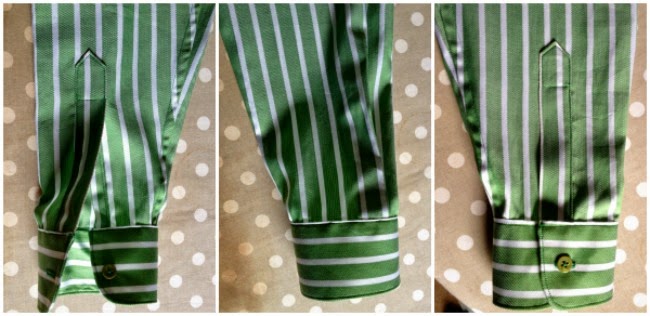
Another feature I'm really pleased with (despite the lack of stripe matching!) are the sleeve plackets. Now I get why Lauren says that she uses the Negroni placket pieces and construction method on all of her own shirts; the instructions are awesome, the process is much less fiddly than my other placket experiences plus all six I've done have turned out pretty fantastically with no unpicking. These are again my best yet, no doubt helped by how crisply this fabric pressed.
The one element I'd like to work on next time are the cuffs. I'm fairly pleased with them but think they could be a little neater, plus I really struggled when attaching them to the shirt to get the corners to meet the placket neatly. I'd like to try trimming down the inside cuff pieces just by 1/8" as I did with the under collar and inner collar stand as I think this would keep everything tight and flat and help the seam line roll away from the outside. Does anyone know of any wonderful shirt cuff tutorials which will improve my construction of them as much as Andrea's advice has improved my collars?!
To finish it off I considered using a bias facing to hem the curved edge as I've seen this mentioned a few times recently and on my archer is ended up a little twisted. However I found the curve of this hem shallow enough that the hem pressed in nice and flat when turned and stitched. The buttons Peter bought when he was with my Mum at a local sewing/craft fair which he said he was lucky to make it out of alive as everyone was going so crazy over fabric...sound familiar to anyone?! I sewed the bottom buttonhole horizontally and with white thread instead of green for a bespoke touch and dotted a little bit of fray check onto them once cut open to increase their durability. I ended up unpicking and redoing quite a few of the buttonholes to get them just right, I wasn't about to let down a good job with an uneven buttonhole!
I'm foreseeing some more menswear sewing in my future; I'll definitely be making some more shirts as I've enjoyed the experience so much. I picked up some light blue Paul Smith shirting from Fabrics Galore at the Knitting and Stitching Show a couple of months ago which feels so smooth on the skin so I can't wait to make that up. Just got to decide who the lucky recipient will be this time!




Personally, I would love to see a collar stay tutorial! Do it!!
ReplyDeleteExcellent! Hopefully I'll get one put together this week, it's really simple!
DeleteBeautiful beautiful job on the shirt! I love the green fabric he chose! It is a shirt I know he will be proud to wear - and probably tell everyone he meets that you made it for him. =) The details and stripe matching are fabulous!
ReplyDeleteI absolutely love the fabric too, it was really great to work with and a fun challenge. It's so lovely to be able to sew someone something like this!
DeleteBeautiful shirt, I am sure your step-dad will be so thrilled with his custom made shirt.
ReplyDeleteThanks, I think he's pretty happy with it and it feels so great to be able to give a gift like this!
DeleteIt looks so professional and amazing fabric. It's a true labour of love! I think what makes it look even more professional are the collar stays, which I've never come across doing in handmade shirts ( never occurred to me that it was an option). I'd be interested in seeing more about them from materials used, sources, to the sewn process, if you are happy to share!
ReplyDeleteIt will be a pleasure Winnie! It's super simple with a bit of forward planning. It hadn't actually crossed my mind until I was measuring up the RTW shirt and spotted that feature!
DeleteReally lovely. Nice job and great stripe matching! I love the off the cuff blog for anything shirt related. She is a custom shirt maker and has great tips on every aspect of shirt making!
ReplyDeleteAwesome tip thanks Jo, I've just spent ages having a good look through so hopefully my next shirt will be even better!
DeleteThis is the type of present you wear with pride, knowing what it took to produce it! Congratulations! I am in awe of all the stripes lining and the neat finishes! I wish I could practise more (lack of time, overwhelming job) to manage such good results!
ReplyDeleteIt does take a bit of time because of how many fiddly parts and pattern pieces there are. But that does mean you can break break the construction down into little pieces to do here and then when you have a moment! It's well worth the time and effort and I found it very enjoyable. Thanks for the lovely comment!
DeleteI'm just about to embark on this shirt too... I would definitely like to see your tutorial for collar stays - I really love your version of this shirt, it has made me even more eager to start my own!
ReplyDeleteO have fun with it! I really enjoyed the process. Hopefully I'll get a little tutorial for the stays done this week!
DeleteThis is a beautiful shirt Fiona, I bet your step dad loves it. Excellent job on the stripe matching! It all looks very professional :)
ReplyDeleteThanks Kelly! The stripe matching took some time to figure out and cut but is so worth it! I'm really pleased
DeleteVery lovely job! You reminded me how much I like shirt-making, so satisfying. Unfortunately Josh says he has more than enough now and I don't think my dad would be interested :( But I'd be very interested in the collar stiffener tutorial anyway for the future.
ReplyDeleteI've been thinking about who else I can make shirts for as I enjoyed this one so much! I love sewing that means you need to be accurate and a cotton shirting is so nice to work with.
DeleteThis is gorgeous! What a lucky stepdad! I have never made a mens' shirt, so I am duly impressed with your results.
ReplyDeleteThank you! I definitely recommend giving it a try at some point, I learnt a lot from it and it's a great way to practice topstitching!
DeleteThis is a gorgeous shirt. And those buttonholes are a thing of beauty.
ReplyDeleteI love a good buttonhole! My machine can be a little temperamental about them but it loved this shirting! Thank you :)
DeleteThis is a very very good looking well made shirt.
ReplyDeleteThanks so much Carmen! I really took my time with it and it was very enjoyable!
DeleteYour finish is amazing, so professional. I think of shirt making as very demanding, so I'm really impressed.
ReplyDeleteYes there's a lot to it but it's not overly complicated once you break it down into the small parts. Thanks very much!
DeleteBeautiful work! This is lovely!
ReplyDeleteThanks Sonja! My stepdad wore it on our Christmas Day and I felt so proud every time I looked at him!
DeleteCongrats, Fiona - this is a wonderful shirt! The stripe matching is great and I love the addition of stays in the collar - a nice, professional touch.
ReplyDeleteThanks Claire, I'm super proud of those collar stays! I can't wait to make another shirt now!
DeleteBeautiful shirt, Fiona! I love the idea of a "signature buttonhole"! When I started making my husband's shirts, I used the tutorial Liana (http://sewintriguing.blogspot.com/2006/11/shirtmaking-information.html) wrote. She has a lot of good information, well presented.
ReplyDeleteCynthia
What a wonderful and super interesting post Cynthia, thanks so much for pointing me in Liana's direction. I've bookmarked it to go back over at a later date. Thank you!
Delete