
Another winter, another coat and another huge long blog post to go with it! I hadn't actually planned to make a coat this year but, unusually for me, I was taken with a piece of fabric rather than a pattern and couldn't get the thought out of my head. I was browsing through The Fabric Store website trying to decide what to get with this month's allowance as a brand ambassador and found myself in the woven wools section. Each time I've had the opportunity to choose fabric from this gorgeous company I've literally gone through every page of the site with a fine tooth comb in case I miss anything extra special. There are some real gems there, although you can't really go wrong with whatever you order. Anyway, their double faced cashmere blend coating caught my eye. At first I was disappointed to discover that a particularly stunning shade of powder blue only had a metre left in stock, and the camel too but it must have been fate as I'll get so much more wear out of the classic charcoal.

The description of this coating sounded so irresistible I went on an immediate quest to find the perfect coat pattern. A quick hunt through my pattern stash (which includes a surprising amount of coats for someone who has only made a couple!) didn't turn up quite what I was after; not that I knew exactly what that was at that point. I turned to The Foldline's sewing pattern database for inspiration, which was a great way to whittle down the kind of style I was after. The coat I made last year I am still completely in love with but it does feel like quite an occasion coat as it is smart and very structured plus the pale grey of the coating makes me a little nervous out and about in London. What I really needed was something with more of a relaxed fit that could be worn over the majority of my wardrobe and would replace my favoured Zara coat that saw me through the last few years.

A couple of pages into the database, up popped the Oslo Coat from Tessuti. I remembered being very taken with this style when it was released (especially made up in the beautiful blue check of their sample!) and it immediately seemed like an obvious choice. Its got a slight cocoon shape to it which would fill a good gap in my wardrobe yet the effect is subtle enough to remain a classic for years to come. I also so enjoyed making their Lois Dress and was already keen to try another of their patterns. I posted a few construction pictures on Instagram and from the response I got I'd say we're going to be seeing a lot of this pattern over the next few months! It seems like almost everyone has got this lined up in their sewing queue.
The fabric turned out to be the perfect match for this style of coat. It is the ideal weight as it has a soft, beautiful drape yet still has a bit of structure to show off that shape. It has an incredibly soft and spongy touch and a brushed nap on both sides which turns it into something really special. The nap does mean that you need to cut all your pattern pieces out in the same direction so that it runs down the length of the coat and I laid my pattern pieces out on the floor to double check how much fabric I needed before ordering. I actually got away with 2.25m with plenty to spare when the pattern requests 2.5m and the lining I only ordered 1.5m of and had plenty when the pattern suggests 1.65m. But more on the lining later! The cashmere is simply stunning to both work with and wear. I made good use of my clapper to get nice crisp edges but to be fair the cashmere made this easy. It responded so well to pressing and shaping with steam. The instructions are really clear about making sure to use a press cloth and never press directly on to the coating and this could not be more important with this particular type of napped coating as pressing it directly ruins the pile.

I'm now delighted that it's dark grey as it works with everything. I'm going to wear it to absolute death. Plus even if the charcoal grey feels a little dull...theres a party going on inside to perk things up! One of the best things about making your own coat is that you can go wild with the lining and really make it your own. This is a Liberty Silk Crepe called Khan which I actually ended up choosing as I was sent a swatch with my last order. The geometric print is quite a bold choice for me but I love the vintage tones of the colour and slightly art deco vibe. The Fabric Store manage to pick a really contemporary and interesting selection of Liberty prints to stock yet whenever I order I find myself browsing through the Liberty section wishing I could think of a garment I'd like to make and wear out of them. Prints aren't really my thing a lot of the time and while the Liberty ones grab me on the bolt and are a joy to sew with, in all honestly I'm not dying to wear them. Lining is the perfect way to take advantage! Silk is a real treat as a lining so thanks so much to The Fabric Store for giving me the opportunity to use it. Not only does it feel absolutely amazing to wear but silk is a surprisingly tough and durable fabric and also its natural fibres do a great job retaining heat whilst still allowing you to breathe. (FYI having said all that about wearing Liberty - I've 100% got my eye on the entire swimwear range that TFS are currently stocking!)

My measurements placed me between the size 6 and 8 and as I am slightly wary of these looser fitting, cocoon styles on my petite frame I opted for the smaller of the two. I could not be more delighted with the fit. I don't feel swamped or overwhelmed by it at all and love how neat it is around the shoulders. I thought the collar might feel quite big but I like the proportions of it. I had expected to need to shorten it (I'm around 5ft 3) but I'd say this was exactly the length I was after. I was actually nervous at one point in construction about the sleeves turning out too short but they are spot on. If you're tall and like your coat sleeves long like me I'd definitely recommend giving yourself some extra length to play with.

I'd say a good amount of sewing experience is necessary to make this as you need to have some confidence in your abilities and understanding of how things come together. However, I wouldn't say you need to have made a coat before. For a first one this would be great as the raglan sleeves omit shoulder pads e.t.c and makes the process a bit simpler and quicker. The instructions I think are fantastic. I know some people have mentioned that they struggle with Tessuti instructions as the steps are photographed rather than illustrated but I love them. These instructions in particular are jam packed with annotated photos and tips that I think explain things really clearly. I love that they don't skimp on the words and each and every step explains the right seam allowance size to use, when and which way to press seams...you can move forward confidently without worrying that you've forgotten to do something important or whether you should have tried a different technique.

As with the Lois Dress some of the techniques felt a little different to what I had done previously, but no less right and I really enjoy the construction process as it is new and unusual for me. Perhaps the techniques are a little more fashion industry based than home sewing? Some steps felt a little strange as they were new and also it's incredibly difficult to explain clearly with photos or words some of the fiddlier aspects of making a coat but at no point did I feel like I was guessing at the right method. I can't emphasise enough how delighted I am with the resulting finish. In particular the seaming in the area around the neckline and the way the sleeve slots into the front panel as it turns into the collar is just beautiful. There are a couple of corners to pivot around to achieve this so I'd highly recommend using a fairly soft coating to make this easier. A thick, sturdy coating would make this challenging and very bulky.

The only thing I thought missing from the instructions, but not essential, was advice on grading seams and trimming down corners of seam allowances to reduce bulk. I actually didn't do much grading given the weight of this coating but I did make sure to get in there and trim down the ends of the seam allowances where they crossed around the neckline of the coat so that area and in particular the edge of the collar didn't get too lumpy. A touch I did love was the switch of under-stitching from one side to the other at the point where the front facing turns into the shawl collar. I had wondered about how well that collar would sit given that there is no pad stitching or roll line to encourage it to lay nicely but its clearly just really well cut as once I had under-stitched and pressed it fell naturally into place!

As much as I love the patterns and instructions I'm not a massive fan of the Tessuti PDFs. There seems to be a lot of wastage in the layout and this one (I know it's a coat so as a lot of big pattern pieces) came in at a whopping 108 pages! I decided to try out the print at copy shop option for the first time as I couldn't face sticking together that many pages and it may have changed my life a little bit... so quick and easy although not inexpensive.

Its a great pattern to choose for a first coat as I don't think you'd need to do any further research into tailoring techniques to make it. You could certainly add in all the pad stitching e.t.c if you wanted to but I really don't think it needs it. I certainly found this straightforward as I've already made a couple of coats and have a bit of tailoring knowledge but making it as a beginner to tailoring I don't think you would struggle. The instructions require fusible interfacing in particular areas very similar to what I opted to do with my Butterick coat. Make sure you use a good quality interfacing. You don't want horrid, cheap, bubbling stuff running your lovely coating and lines over time. I used a lightweight cotton fusible from MacCulloch & Wallis as I wanted to maintain the drape and not add too much structure.

The pockets are possibly just a fraction low for me although I think that probably has more to do with the size and depth of the pocket bags rather than the openings themselves. They are huge and my little hands get lost in them! Its great that they can hold so much but I wouldn't want to put too much in there as it would ruin the beautiful lines of the coat. I really enjoyed the pocket construction method which is different to what I am used to for inseam pockets. The wool facing is a lovely touch so you don't get an unwanted flash of lining and ooo does it feel nice hiding cold hands in pockets lined with gorgeous silk! The only issue I do have with them is that the pocket bags tend to get pulled to the outside of the coat whenever I take something out of them so I wish I'd done little swing catches to keep them caught to the front edge like I did on my Butterick coat. Its a bit late to get inside now the coat is bagged out so I might have to try and do something by going through the pocket.

Starting a project with bound buttonholes is always unnerving and I have to say these are probably the only thing I'm not completely happy about with this coat. After following pattern instructions for them on my V1537 dress coat I returned to the instructions from Couture Sewing: Tailoring Techniques as I prefer the accuracy of this method. It's a good job I did a practice one though and didn't get too cocky and dive straight on in there! I totally messed up my first one and ended up with raw edges instead of folded ones forming my welts. That would have been a disaster if I'd sliced right into my front pattern piece! I still really don't enjoy the technique for finishing the back of a bound buttonhole. Turning under and hand stitching such a small amount of a thick coating is really fiddly and I'm a bit concerned about how well they'll last. I made a covered button for the outside of the coat to continue the clean look and the flat button inside was just an odd one from my button box.

The perfect marriage of fabric and pattern has made this one of my most enjoyable and successful projects to date and one I'm really proud of. Its really worth investing in good quality fabrics and also investing some time into your pattern and fabric choices before jumping right on in. I had such a good time sewing it that its almost a shame my wardrobe doesn't need another one! After making this and the Lois Dress I'm now a total Tessuti Patterns convert. I think what I've enjoyed about them most are that the designs are clean, classic and apparently simple but there's a lot more clever cutting and construction involved than you realise. I'm off to mooch through the rest of their collection...not that I need anything else to make at the moment! I should be getting my head down and trying to plough through the rest of my huge sewing queue!

The description of this coating sounded so irresistible I went on an immediate quest to find the perfect coat pattern. A quick hunt through my pattern stash (which includes a surprising amount of coats for someone who has only made a couple!) didn't turn up quite what I was after; not that I knew exactly what that was at that point. I turned to The Foldline's sewing pattern database for inspiration, which was a great way to whittle down the kind of style I was after. The coat I made last year I am still completely in love with but it does feel like quite an occasion coat as it is smart and very structured plus the pale grey of the coating makes me a little nervous out and about in London. What I really needed was something with more of a relaxed fit that could be worn over the majority of my wardrobe and would replace my favoured Zara coat that saw me through the last few years.

A couple of pages into the database, up popped the Oslo Coat from Tessuti. I remembered being very taken with this style when it was released (especially made up in the beautiful blue check of their sample!) and it immediately seemed like an obvious choice. Its got a slight cocoon shape to it which would fill a good gap in my wardrobe yet the effect is subtle enough to remain a classic for years to come. I also so enjoyed making their Lois Dress and was already keen to try another of their patterns. I posted a few construction pictures on Instagram and from the response I got I'd say we're going to be seeing a lot of this pattern over the next few months! It seems like almost everyone has got this lined up in their sewing queue.
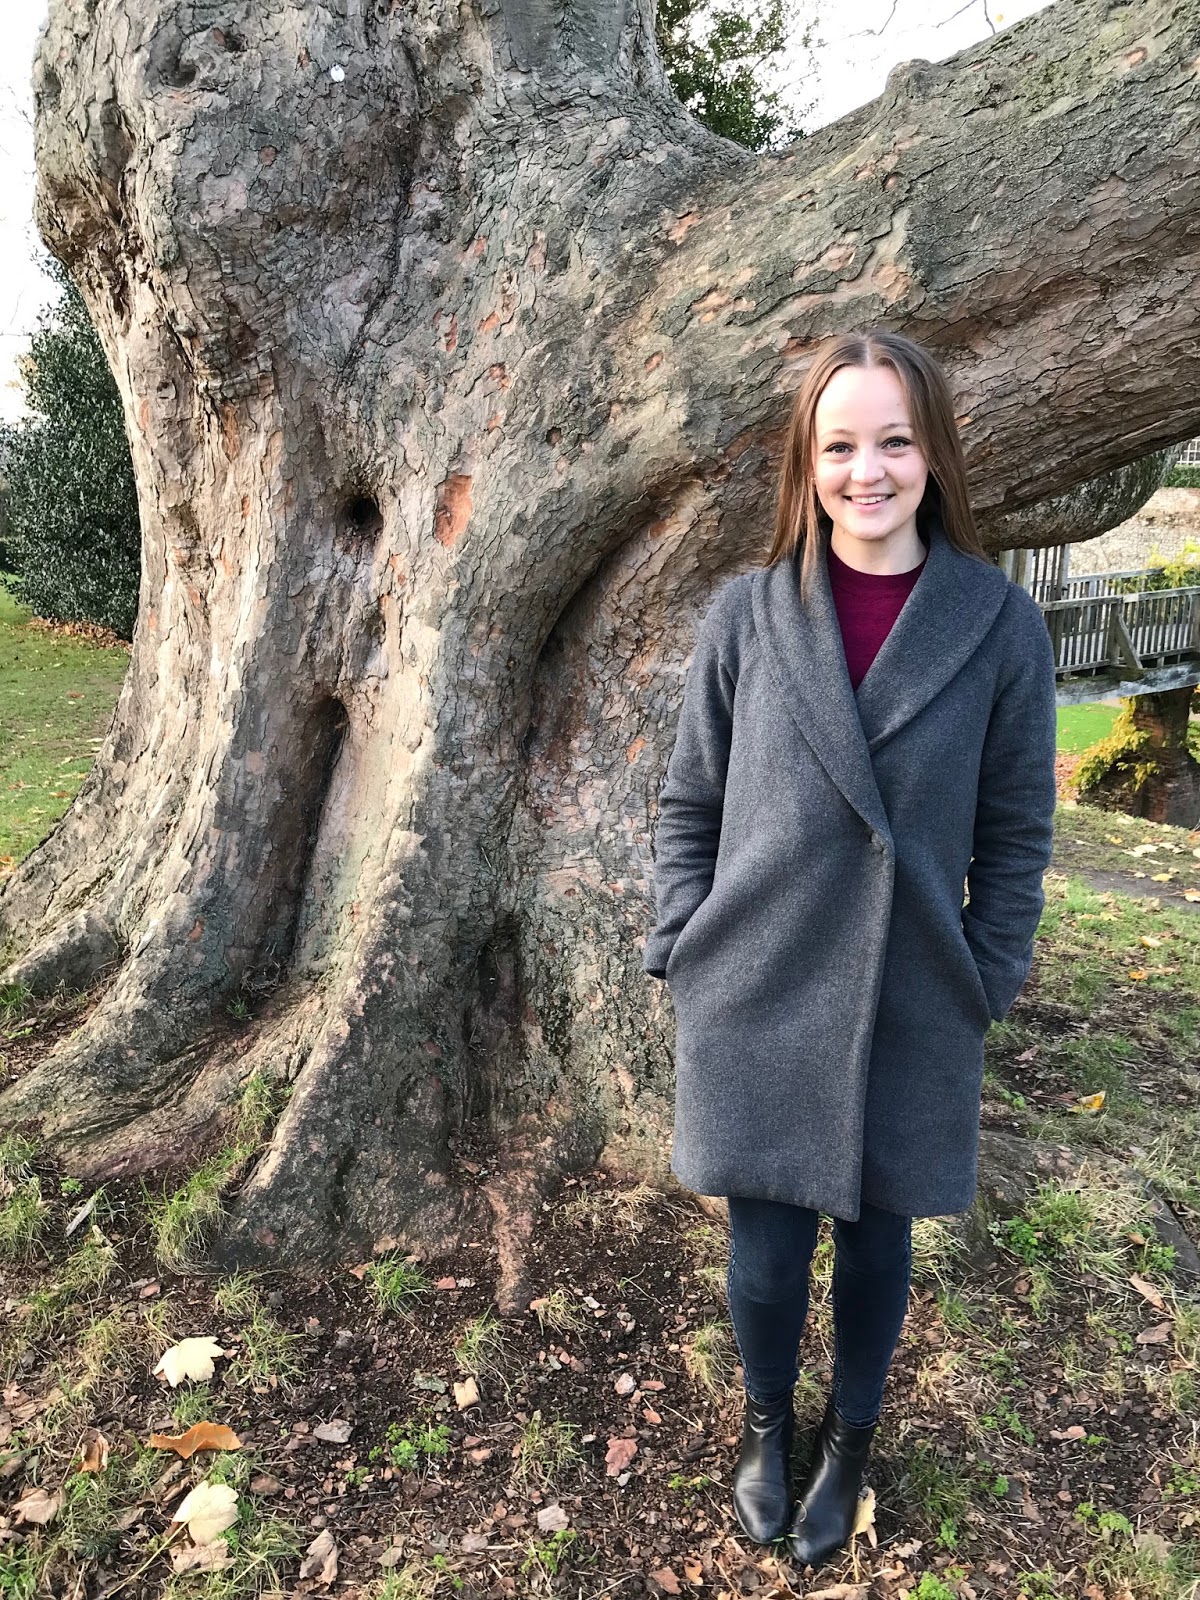
 |
| Huge thanks to Tom for taking some lovely pictures and please excuse the wrinkles! The coat has had a lot of wear already and this was mid day out at Eltham Palace |
The fabric turned out to be the perfect match for this style of coat. It is the ideal weight as it has a soft, beautiful drape yet still has a bit of structure to show off that shape. It has an incredibly soft and spongy touch and a brushed nap on both sides which turns it into something really special. The nap does mean that you need to cut all your pattern pieces out in the same direction so that it runs down the length of the coat and I laid my pattern pieces out on the floor to double check how much fabric I needed before ordering. I actually got away with 2.25m with plenty to spare when the pattern requests 2.5m and the lining I only ordered 1.5m of and had plenty when the pattern suggests 1.65m. But more on the lining later! The cashmere is simply stunning to both work with and wear. I made good use of my clapper to get nice crisp edges but to be fair the cashmere made this easy. It responded so well to pressing and shaping with steam. The instructions are really clear about making sure to use a press cloth and never press directly on to the coating and this could not be more important with this particular type of napped coating as pressing it directly ruins the pile.

I'm now delighted that it's dark grey as it works with everything. I'm going to wear it to absolute death. Plus even if the charcoal grey feels a little dull...theres a party going on inside to perk things up! One of the best things about making your own coat is that you can go wild with the lining and really make it your own. This is a Liberty Silk Crepe called Khan which I actually ended up choosing as I was sent a swatch with my last order. The geometric print is quite a bold choice for me but I love the vintage tones of the colour and slightly art deco vibe. The Fabric Store manage to pick a really contemporary and interesting selection of Liberty prints to stock yet whenever I order I find myself browsing through the Liberty section wishing I could think of a garment I'd like to make and wear out of them. Prints aren't really my thing a lot of the time and while the Liberty ones grab me on the bolt and are a joy to sew with, in all honestly I'm not dying to wear them. Lining is the perfect way to take advantage! Silk is a real treat as a lining so thanks so much to The Fabric Store for giving me the opportunity to use it. Not only does it feel absolutely amazing to wear but silk is a surprisingly tough and durable fabric and also its natural fibres do a great job retaining heat whilst still allowing you to breathe. (FYI having said all that about wearing Liberty - I've 100% got my eye on the entire swimwear range that TFS are currently stocking!)

My measurements placed me between the size 6 and 8 and as I am slightly wary of these looser fitting, cocoon styles on my petite frame I opted for the smaller of the two. I could not be more delighted with the fit. I don't feel swamped or overwhelmed by it at all and love how neat it is around the shoulders. I thought the collar might feel quite big but I like the proportions of it. I had expected to need to shorten it (I'm around 5ft 3) but I'd say this was exactly the length I was after. I was actually nervous at one point in construction about the sleeves turning out too short but they are spot on. If you're tall and like your coat sleeves long like me I'd definitely recommend giving yourself some extra length to play with.

I'd say a good amount of sewing experience is necessary to make this as you need to have some confidence in your abilities and understanding of how things come together. However, I wouldn't say you need to have made a coat before. For a first one this would be great as the raglan sleeves omit shoulder pads e.t.c and makes the process a bit simpler and quicker. The instructions I think are fantastic. I know some people have mentioned that they struggle with Tessuti instructions as the steps are photographed rather than illustrated but I love them. These instructions in particular are jam packed with annotated photos and tips that I think explain things really clearly. I love that they don't skimp on the words and each and every step explains the right seam allowance size to use, when and which way to press seams...you can move forward confidently without worrying that you've forgotten to do something important or whether you should have tried a different technique.

As with the Lois Dress some of the techniques felt a little different to what I had done previously, but no less right and I really enjoy the construction process as it is new and unusual for me. Perhaps the techniques are a little more fashion industry based than home sewing? Some steps felt a little strange as they were new and also it's incredibly difficult to explain clearly with photos or words some of the fiddlier aspects of making a coat but at no point did I feel like I was guessing at the right method. I can't emphasise enough how delighted I am with the resulting finish. In particular the seaming in the area around the neckline and the way the sleeve slots into the front panel as it turns into the collar is just beautiful. There are a couple of corners to pivot around to achieve this so I'd highly recommend using a fairly soft coating to make this easier. A thick, sturdy coating would make this challenging and very bulky.

The only thing I thought missing from the instructions, but not essential, was advice on grading seams and trimming down corners of seam allowances to reduce bulk. I actually didn't do much grading given the weight of this coating but I did make sure to get in there and trim down the ends of the seam allowances where they crossed around the neckline of the coat so that area and in particular the edge of the collar didn't get too lumpy. A touch I did love was the switch of under-stitching from one side to the other at the point where the front facing turns into the shawl collar. I had wondered about how well that collar would sit given that there is no pad stitching or roll line to encourage it to lay nicely but its clearly just really well cut as once I had under-stitched and pressed it fell naturally into place!

As much as I love the patterns and instructions I'm not a massive fan of the Tessuti PDFs. There seems to be a lot of wastage in the layout and this one (I know it's a coat so as a lot of big pattern pieces) came in at a whopping 108 pages! I decided to try out the print at copy shop option for the first time as I couldn't face sticking together that many pages and it may have changed my life a little bit... so quick and easy although not inexpensive.

Its a great pattern to choose for a first coat as I don't think you'd need to do any further research into tailoring techniques to make it. You could certainly add in all the pad stitching e.t.c if you wanted to but I really don't think it needs it. I certainly found this straightforward as I've already made a couple of coats and have a bit of tailoring knowledge but making it as a beginner to tailoring I don't think you would struggle. The instructions require fusible interfacing in particular areas very similar to what I opted to do with my Butterick coat. Make sure you use a good quality interfacing. You don't want horrid, cheap, bubbling stuff running your lovely coating and lines over time. I used a lightweight cotton fusible from MacCulloch & Wallis as I wanted to maintain the drape and not add too much structure.

The pockets are possibly just a fraction low for me although I think that probably has more to do with the size and depth of the pocket bags rather than the openings themselves. They are huge and my little hands get lost in them! Its great that they can hold so much but I wouldn't want to put too much in there as it would ruin the beautiful lines of the coat. I really enjoyed the pocket construction method which is different to what I am used to for inseam pockets. The wool facing is a lovely touch so you don't get an unwanted flash of lining and ooo does it feel nice hiding cold hands in pockets lined with gorgeous silk! The only issue I do have with them is that the pocket bags tend to get pulled to the outside of the coat whenever I take something out of them so I wish I'd done little swing catches to keep them caught to the front edge like I did on my Butterick coat. Its a bit late to get inside now the coat is bagged out so I might have to try and do something by going through the pocket.

Starting a project with bound buttonholes is always unnerving and I have to say these are probably the only thing I'm not completely happy about with this coat. After following pattern instructions for them on my V1537 dress coat I returned to the instructions from Couture Sewing: Tailoring Techniques as I prefer the accuracy of this method. It's a good job I did a practice one though and didn't get too cocky and dive straight on in there! I totally messed up my first one and ended up with raw edges instead of folded ones forming my welts. That would have been a disaster if I'd sliced right into my front pattern piece! I still really don't enjoy the technique for finishing the back of a bound buttonhole. Turning under and hand stitching such a small amount of a thick coating is really fiddly and I'm a bit concerned about how well they'll last. I made a covered button for the outside of the coat to continue the clean look and the flat button inside was just an odd one from my button box.
The perfect marriage of fabric and pattern has made this one of my most enjoyable and successful projects to date and one I'm really proud of. Its really worth investing in good quality fabrics and also investing some time into your pattern and fabric choices before jumping right on in. I had such a good time sewing it that its almost a shame my wardrobe doesn't need another one! After making this and the Lois Dress I'm now a total Tessuti Patterns convert. I think what I've enjoyed about them most are that the designs are clean, classic and apparently simple but there's a lot more clever cutting and construction involved than you realise. I'm off to mooch through the rest of their collection...not that I need anything else to make at the moment! I should be getting my head down and trying to plough through the rest of my huge sewing queue!
That's an absolutely gorgeous coat and looks like the kind that will be perfect for any winter day. I love it! The lining is especially giving me all the heart-eyes. Great work!
ReplyDeleteThanks so much Katie! I've worn it every day since I've finished it. It works with EVERYTHING! The lining puts a smile on my face every time I take it off. I love that it's vibrant but has a vintage feel to it
DeleteYou've done it again, Fiona! What a nice coat. I've got a piece of charcoal wool Melton and have been wondering whether to be thrifty and adapt my Cascade pattern, or splash out on a new one - really tempted by this pattern having seen your version! Very useful to have your thorough review of it.
ReplyDeleteSplash out Nina! This is a really terrific pattern and really enjoyable to sew. Definitely worth the money for a coat that you will get some solid wear out of, especially if you already have the fabric.
DeleteThanks very much
Wow this is stunning! I love the contrast lining and you're right, you can definitely get lots of wear out of the charcoal colour.
ReplyDeleteI have already been getting so much wear out of it haha! It works with pretty much my entire wardrobe in a way the camel or blue wouldn't have so I'm pleased it turned out that way in the end
DeleteThank you very much!
You did a fantastic job, I love your choice of fabrics. I am sure it will be worn for years. x
ReplyDeleteThank you very much! I'm hoping so! A coat is such a worthwhile investment of time and money because it sees so much wear
DeleteHi Fiona. That coat looks great on you. I had kind of avoided it because I thought the style might swamp me because I am only 5’1 but obviously it works. Tessuti has great patterns. Every single one I have made has turned out a winner for me. Their fabrics are fantastic as well. Really great quality.
ReplyDeleteHi Rebecca, o no I definitely think this style works on a petite frame! I thought I would have to shorten it but it turned out just as I hoped with no adjustments, not even the sleeves!
DeleteGood to hear another rave review of Tessuti! Can't wait to try more now and am definitely going to investigate the fabrics
I love your coat too! That gray cashmere blend is so beautiful and that lining - when I get to making my coat I'm lining it in silk too! It is resilient and warm without being too warm and you can really go crazy with a wild silk print too when it's a lining. Gorgeous. Everything I love in a coat (and I'm a bit of a specialist living in Canada) :)
ReplyDeleteSilk lining is the BEST! Totally worth the investment too as you wear a coat so much! You listed all my favourite things about it there!
DeleteThanks so much for the lovely comment. I don't really have an excuse to make another coat this year but I wish I lived in Canada so I did!
I love this coat! You did an amazing job putting this together.
ReplyDeleteThanks very much Shirley. I really enjoyed it!
DeleteWowsers!! Your coat is fabulous!!!
ReplyDeleteThanks Lynne! I'm completely in love with it
DeleteThe perfect winter coat (style, fabric, fit) is elusive and you've nailed it! Tessuti's printed patterns are lovely. I've had one shipped to the US and it was well worth it to me. (Truth told I despise PDF's for the time, paper and general rattiness of what you store, rather than the pretty package you get to ogle in your stash!) But don't tell anyone because I'm told they don't have too many!
ReplyDeleteAh thanks so much! What a lovely thing to say!
DeleteGreat to hear that about the printed patterns. I'm definitely considering treating myself to one next time. It would absolutely be worth it for a design like this which has such large pattern pieces to print.
Thanks for such a detailed blog. I am starting my Oslo coat this weekend. Timing could not have been better The coat looks beautiful
ReplyDeleteO I hope you've been having a good time making yours! I'd love to see it when its done.
Deletefiona, that's a perfect coat. The size looks spot on your proportions. I tried a different backing method to my last bound button hole making a larger opening by using an oblong of iron on interfacing to create a little window. The method is described on The Colette sewalong for the Anise jacket. The result feels much firmer.
ReplyDeleteThanks so much Mags, I really couldn't be happier with how it has turned out! It is always a worry when you start such big project that you've chosen the right pattern and fabric and I lucked out this time
DeleteThanks so much for the bound buttonhole tip, will definitely try that next time as it sounds a lot stronger and more manageable
Hello there! I have downloaded, printed and cut this pattern. I noticed that the front and front-facing pieces are slightly different and notches don't match. Do you remember having any trouble with that?
ReplyDeleteHi! No I don't remember having any trouble at all with the pattern and in fact seem to remember it all coming together really beautifully. It was such a long time ago my memory of how to make it isn't very clear, perhaps there is a reason for them being different - one edge needs easing in or something? Might be worth checking through the instructions. Have fun sewing it!
Delete