Gingham Linen Aura Dress
Now that I have been sewing for a good number of years it is very rare that I see an item of clothing and think 'I want that, exactly as it is. Same fabric, same cut, same fit, same details, no tweaks necessary.' The inspiration for my sewing projects generally comes from an assortment of places and I like to tweak the details of a pattern to suit the image in my head. However, when I saw on Instagram the Aura Dress that Sandy made I absolutely had to have it. And so I did!
Sandy used paprika gingham linen from The Fabric Store to make her dress and I did exactly the same...even down to the same colour! I'm really drawn to warm and spicy tones like this paprika at the moment and I think the richness of the colour helps to make the gingham feel contemporary rather than twee. I've definitely been sucked right into the gingham trend this summer and have a few pieces waiting to be cut. Linen (in particular this mid-weight linen) is such a great choice for this pattern as it retains a bit of crispness and oomph when washed which is great for this dress as I think you want a bit of structure to hold the clean lines of the front wrap and of course to really make the most of that sleeve shape. I love that the sleeves definitely hit that perfect balance of being a bit statement sleeve which remains very wearable and not too dramatic. I marvelling at how lovely this linen was while I worked. It has such lovely slubs and a beautiful rumply softness and which makes it delightful to wear (and sew with). I can see why Sandy got more of it in a different colour to make her beautiful version of the Hallon Dress which is also on my summer wish-list.
I'd already been considering making an Aura Dress (a design from the most recent collection from Papercut Patterns) as it felt like a really good choice of attire for a summer wedding and combines a number of things I'm feeling drawn to right now; big sleeves, wrap styles and midi lengths. But I felt like it might be a tricky style to get right on my body. I normally find fitting Papercut patterns a little tricky - they're just not drafted for my body shape so usually require more alterations than some other pattern companies. So for this one I assembled my PDF and prepared to put in some work to get this style to suit me. I began with grading between the sizes which best matched my bust, waist and hip. This is quite a fitted style so I wanted it to fit correctly in all three areas. I currently measure 33.5" bust, 27.5" waist and 38" hip - which translates to size 2-3 bust, 3-4 waist and 3-4 hip in Papercut sizing. I opted to cut the 2 at the bust as I'm quite small in the shoulder, 3 at the waist (as there is a bit of extra ease for wrapping in that area) and a 4 at the hip to be on the safe side as I've previously found their patterns to be a little snug in this area.
The next step of fitting for me is always to check the length as I'm 5ft 3" and most patterns are drafted for taller people than I. On a number of occasions I've been able to resolve problems I've had with fit by shortening the pattern so that everything is sitting in the right place. If a dress is tight across the hips and you're short it might be that the widest point of the garment is sitting too low and your hips are trying to fit into the narrower area just below the waist e.t.c. For me it is quite often that a pattern is too long in the upper chest/shoulder as that is where I am short proportionally. For the Aura Dress I looked carefully at the finished garment measures and measured the length of my pattern pieces and was amazed to find that it looked to be the right length for me. It looked like the bust darts would sit at the right height and the waistline. I was really doubting myself but decided not to shorten it at all in the end and am beyond happy with how it turned out!
Looking at the photos it looks like I have a tiny bit of excess above the bust on my right hand side but I actually think that it is to do with the way the dress is sitting as I haven't noticed it otherwise and it feels very comfortable. The dress doesn't fall down off the shoulders but due to the wide v at the front and back it does move around a bit and feel like it might. There is no tension at either the back or front keeping it in place if you get what I mean. To combat this and make it suitable for dancing at weddings (SOON PLEASE SOON!!!) I think I'll add a couple of little loops for my bra straps at the shoulder.
I was worried about the wrap front gaping open if the bodice was too long for me and one of the adjustments I considered was taking it up a little bit at the shoulder. However, I'm pleased I didn't fiddle around with it as I could not be more delighted with the fit of the bodice. Plunging wrap necklines are notoriously hard to fit but this sits nice and snugly against the body and the neckline is the perfect depth for me. I'm really pleased with how smoothly the back v sits against the body too. This linen is quite tightly woven but I was really careful with these bias cut edges so that they didn't stretch out as I worked. It helps that the facing is interfaced and therefore doesn't stretch so when you pin this to the main fabric you can check they are still the same length.
I love every aspect of this design, the length, the size and length of the sleeves, the proportions of the waist tie and the shaping at the ends of them. I've said it before and I'll say it again; I always enjoy sewing a Papercut pattern as there is usually something a little bit unusual about the design and construction which makes me think and often try something new. When I'm sewing I really enjoy learning something about how fabric pieces come together to make three dimensional shapes and I think Papercut are really good at being creative about this whilst still remaining accessible and wearable.
Their instructions are well thought out and give you all the information you need to achieve a lovely clean finish but don't hold your hand through the techniques as some more beginner friendly patterns do. I did get a bit confused about why some areas of the design involve topstitching (the rear facing of the bodice and hem) but then you finish off that long front facing by slipstitching it down by hand. I felt like you should either just topstitch the whole thing or hand sew. If I make enough I think I'll put the time in and hand sew it as it was well worth the effort down the front. The centre front facing is shaped and varies in width so might look a bit odd topstitched. I love the clean finish across the front wrap.
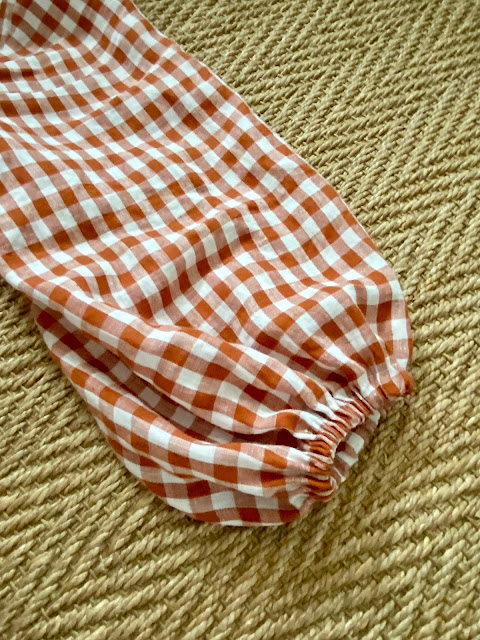
The cuffs of the sleeves are elasticated which I was a little put off by as I never find elasticated elements very comfortable. However, these worked out great! And you really need the tension of the elasticated cuff to get the sleeve to sit high enough up forearm to give the shape.
The pattern also includes a skirt variation which I will definitely be making! Possibly in a winter appropriate gingham... I love the straight cut and the way the wrap crosses over just enough to retain modesty but still flashes a bit of leg when you move. Had I not made this dress I don't think I would have really looked twice at the skirt. This has really made me think about additional variations of patterns that I may have overlooked before... dresses often steal the limelight of a truly beautiful skirt or blouse variation don't you think? I'm going to have to look back through my pattern library to find those hidden gems.


I love it. Lovely fit and great fabric choice (I’ve had my eye on their blush gingham)
ReplyDeleteBeautiful dress and fabric. Fits like a dream!
ReplyDeleteLove this! The proportions are really pleasing and the design elements are interesting without being fussy. It fits you so well too, and the gingham looks great.
ReplyDeleteThis is a great post! I have really enjoyed reading this post and definitely did learn a few new things. I will be sure to try using these next time I start my sewing project.
ReplyDeleteSo beautiful dress!
ReplyDeleteprosphair shop review
This looks great - I'm planning to sew an Aura dress this year and appreciate this in-depth review!
ReplyDelete