Denim Dawn Jean Shorts
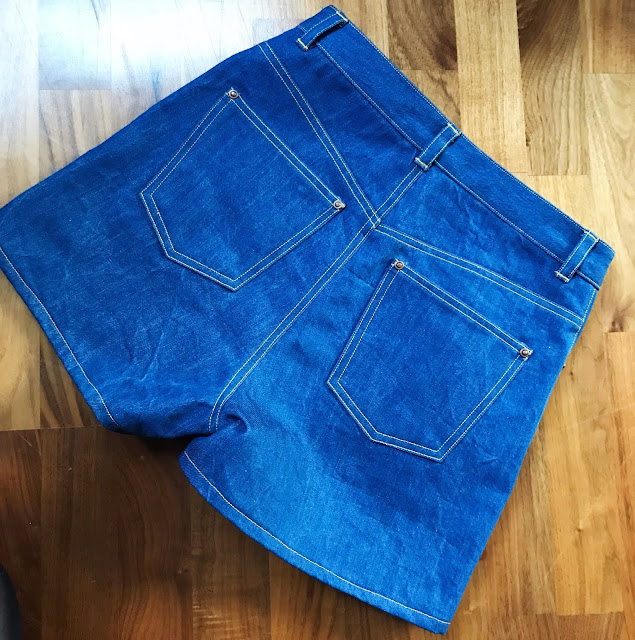
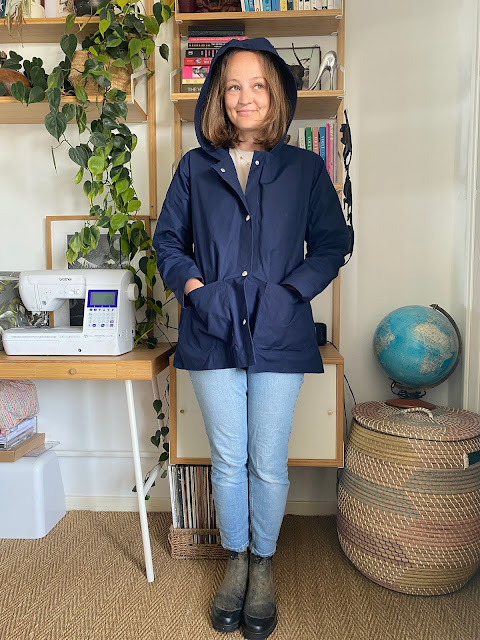
The next item of my travel wardrobe is done and dusted and it is a true staple. These denim shorts are made with the new Dawn Jeans pattern from Megan Nielsen and were an absolute joy to sew. I'd forgotten how much I love getting my teeth stuck into a challenge and a garment with so many little details and techniques to master. I used a denim which I picked up at the last Fabric Godmother open day, I believe it was this 12oz Raw Denim if my memory serves me right! I actually managed to squeeze these out of what I had left over from making a pair of Persephone Pants (still awaiting a blog post but there is a sneaky peak at the end of this post!). They don't take much fabric as lots of those little bits and pieces for pockets and fly you can squeeze in around the main pieces. This denim is nice and robust for a pair of jeans or shorts and is the kind of denim which will only get better with wear.
I got so much pleasure out of sewing all those little details particularly as the instructions are well written and thorough, making it really clear where and when to use topstitching thread or regular thread and what stitches are best. Despite the many elements to assemble I didn't find myself confused at any point. The attention to detail in the finishing is a dream, adding bar tacks for strength in various places for example. Working with such a well thought out pattern really encouraged me to do my best sewing and I found myself getting out the seam ripper to correct even slightly wobbly topstitching. It has resulted in a finish I am incredibly proud of. I don't know how I'm going to wait until January to wear them!
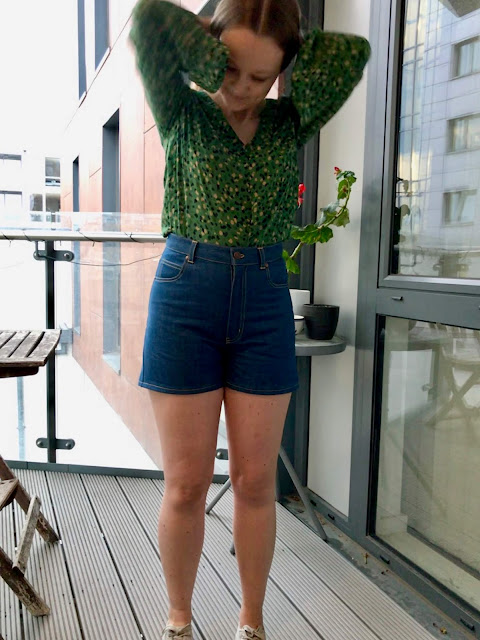
I cut the size 8 which is a fraction larger than my waist measurement and a fraction small on the hip which is exactly as they turned out! So true to size, I couldn’t have asked for a better starting point. I say starting point but I barely tweaked a thing. As well as the general sizing being good the proportions of the design elements (pockets, belt loops, waistband etc) are spot on. The rise and shape of the crotch curve are really comfortable for me. There are a few wrinkles on the front at the moment as these are fresh on and pretty stiff but I know these are going to soften up with wear and fit a treat. I can't wait to see how this denim wears in. I wondered if the cut of the bum flattened me out a bit but I think it is the pocket placement. I’ll move them down a fraction next time. I much prefer the size and shape of these pockets than those on my Ginger Jeans which have always felt a little large and low.
Megan does mention in her introductory posts that the pattern is drafted to be snug like a classic high waisted Mom jean so you might want to consider sizing up if you want a more relaxed fit. This is definitely true but I love the close fit around the waist and hip! The fit actually feels quite similar to the Persephones and the wide leg variation of Dawn (there are four cuts to choose from!) certainly has that vibe. The instructions recommend trying on the shorts and adjusting when it comes to the point of sewing the side seams which is what I did. I reduced the side seam allowance to 3/8”, giving me an extra inch of ease overall, as I wanted a slightly more comfortable relaxed fit for my safari adventures but if I was making jeans I probably would have stuck to 5/8”. If you're concerned about the amount of ease on these and think you might want more I'd recommend giving yourself an extra bit of seam allowance at the side seam when you cut. I'd also suggest not cutting your waistband pieces until you’ve tried the jeans on and adjusted the side seams so you can alter the length of the waistband to match this new measurement. I had already cut my waistband pieces and hand no spare fabric so had to use a much smaller seam allowance at the ends of the waistband to make it fit.
The only other alteration I made was to take 1” off the hem as the length as it was looked slightly odd on me. One of my favourite things about the shorts view of this pattern is that they are not cut super short like ALL RTW versions seem to be. I’ve never been able to buy jean shorts because I constantly feel like my butt is hanging out when I try them on or the circumference of the hem is too small a cuts of the circulation to my thighs when I sit down! No such problem with these. I love a high waist on a short short too, it seems to balance everything out.
I recently got a new sewing machine (the Brother Innov-is F420) which I'll be sharing more about soon) and it definitely copes better with topstitching thread and thick layers of denim. I didn't have too much trouble and in fact the main reason for using the seam ripper was my own error! In the instructions Megan advises that the best way to finish top-stitched seams where the start point will be visible is to pull the thread through to the back and tie a knot rather than backstitch so you don't end up with an odd thick point in your topstitching. My machine made this really easy as the button to cut the thread pulls both thread tails through to the back for you and there is also a button to sew reinforcing stitches on the spot rather than backstitch. The machine also has a bar tack function but it didn't seem to cope well in the very thick areas so I resorted to using a tight zig zag to sew mine. I love how they've turned out.
As I got further through the process without any glaring mistakes I got increasingly nervous about each step! I didn’t want to mess them up with wonky waistband topstitching or a rivet in slightly the wrong place. I almost didn’t put the rivets on the back pockets because I was so proud of the topstitched corners...in fact I left the rivet off the coin pocket for that very reason! I did take a picture of the back pockets before I installed them though so I could remember the work! Finishing a project off with a hammer is just so satisfying isn’t it?!
The only thing my machine had difficulty with was the buttonhole on the waistband. I've had this problem with every domestic machine I have tried them on, does anyone have any tips? I'm presuming it is due to the bulk of various seam allowances in this area causing the fabric to pull through unevenly. The beautiful buttonholes made by the F420 are actually my favourite thing about it but with this one everything went a little out of line at the end and I had to unpick and finish by hand. I'm hoping it will hold up. It is a shame as I was excited to be able to choose the buttonhole style with a rounded end one side and bar tack at the other for strength.
The fly instructions included in the paper pattern booklet are for a button fly but I wanted to use a zip. I loved sewing the button fly on my Persephone Pants and it is a great feature but I was after a real classic pair of denim shorts with these and to me that meant a zip. The PDF pattern includes instructions for sewing both a zip fly and exposed button fly (which I might try on jeans!) and I believe if you own a paper copy you can download these additional instructions from the website. These instructions were a slightly different method to what I have sewn before and they seemed to make more sense to me. I don't know if that is just down to experience or Megan's way with words and instructions! Topstitching the curved shape of the fly on the front before closing the crotch seam felt straightforward and I like that the method used leaves you with basting stitches to follow to get a nice shape.
I love that the pattern requirements include different lengths of zip for the different sizes. So often big four patterns list one length of zip for all and when you get to that step you realise it is too long or short. Do be careful when sewing on the waistband if your zipper is a little long, you don't want to ht any metal teeth with your needle! I choose to hand crank the machine over these points.
This was my first time using a Megan Nielsen paper pattern as opposed to a PDF and I was so impressed with the quality. The design of both the envelope and instruction booklet is fresh, clean and very clear whilst being packed with information and I really liked the robust quality of the pattern tissue. I'll be treating myself to paper versions from now on.
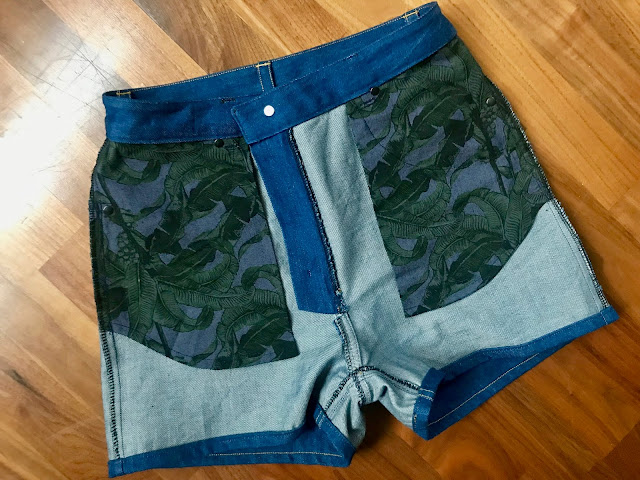
It is a testament to the instructions and construction method that the only point I free-styled was to finish the bottom edge of the pocket bags with french seams. This is a tip I picked up from sewing the Ginger Jeans and has stayed with me. It is so easy to do and I like the clean finish rather than overlocked edge plus it is really strong. I used some tropical print scraps I had left over from these Holly Shorts I made a couple of years back. I love a pop of interest inside my clothes!
This a complete Megan Nielsen designed outfit as I’m wearing the shorts with my second version of her Dove Blouse which I finished a while back but didn’t see the point in blogging as I made version 2 exactly the same as before! My first version of this pattern has to be one of my most worn handmade garments and I’ve repaired it a couple of times. This one is made with a silk remnant I picked up in Misan Textiles on Berwick Street in Soho and I’m hoping its going to prove as wearable as the first.
I am absolutely delighted with these, they’ve taught me a lesson in how having patience and not rushing can pay off. I had given myself a stupidly quick self imposed deadline to finish there but I’m so glad I let that go and instead focused on doing the best job I could. I'm defiantly going to make myself some full length jeans from this pattern, likely a black or charcoal tapered pair. Here’s hoping the rest of my holiday wardrobe is as much of a success!
I got so much pleasure out of sewing all those little details particularly as the instructions are well written and thorough, making it really clear where and when to use topstitching thread or regular thread and what stitches are best. Despite the many elements to assemble I didn't find myself confused at any point. The attention to detail in the finishing is a dream, adding bar tacks for strength in various places for example. Working with such a well thought out pattern really encouraged me to do my best sewing and I found myself getting out the seam ripper to correct even slightly wobbly topstitching. It has resulted in a finish I am incredibly proud of. I don't know how I'm going to wait until January to wear them!
I cut the size 8 which is a fraction larger than my waist measurement and a fraction small on the hip which is exactly as they turned out! So true to size, I couldn’t have asked for a better starting point. I say starting point but I barely tweaked a thing. As well as the general sizing being good the proportions of the design elements (pockets, belt loops, waistband etc) are spot on. The rise and shape of the crotch curve are really comfortable for me. There are a few wrinkles on the front at the moment as these are fresh on and pretty stiff but I know these are going to soften up with wear and fit a treat. I can't wait to see how this denim wears in. I wondered if the cut of the bum flattened me out a bit but I think it is the pocket placement. I’ll move them down a fraction next time. I much prefer the size and shape of these pockets than those on my Ginger Jeans which have always felt a little large and low.
Megan does mention in her introductory posts that the pattern is drafted to be snug like a classic high waisted Mom jean so you might want to consider sizing up if you want a more relaxed fit. This is definitely true but I love the close fit around the waist and hip! The fit actually feels quite similar to the Persephones and the wide leg variation of Dawn (there are four cuts to choose from!) certainly has that vibe. The instructions recommend trying on the shorts and adjusting when it comes to the point of sewing the side seams which is what I did. I reduced the side seam allowance to 3/8”, giving me an extra inch of ease overall, as I wanted a slightly more comfortable relaxed fit for my safari adventures but if I was making jeans I probably would have stuck to 5/8”. If you're concerned about the amount of ease on these and think you might want more I'd recommend giving yourself an extra bit of seam allowance at the side seam when you cut. I'd also suggest not cutting your waistband pieces until you’ve tried the jeans on and adjusted the side seams so you can alter the length of the waistband to match this new measurement. I had already cut my waistband pieces and hand no spare fabric so had to use a much smaller seam allowance at the ends of the waistband to make it fit.
The only other alteration I made was to take 1” off the hem as the length as it was looked slightly odd on me. One of my favourite things about the shorts view of this pattern is that they are not cut super short like ALL RTW versions seem to be. I’ve never been able to buy jean shorts because I constantly feel like my butt is hanging out when I try them on or the circumference of the hem is too small a cuts of the circulation to my thighs when I sit down! No such problem with these. I love a high waist on a short short too, it seems to balance everything out.
I recently got a new sewing machine (the Brother Innov-is F420) which I'll be sharing more about soon) and it definitely copes better with topstitching thread and thick layers of denim. I didn't have too much trouble and in fact the main reason for using the seam ripper was my own error! In the instructions Megan advises that the best way to finish top-stitched seams where the start point will be visible is to pull the thread through to the back and tie a knot rather than backstitch so you don't end up with an odd thick point in your topstitching. My machine made this really easy as the button to cut the thread pulls both thread tails through to the back for you and there is also a button to sew reinforcing stitches on the spot rather than backstitch. The machine also has a bar tack function but it didn't seem to cope well in the very thick areas so I resorted to using a tight zig zag to sew mine. I love how they've turned out.
As I got further through the process without any glaring mistakes I got increasingly nervous about each step! I didn’t want to mess them up with wonky waistband topstitching or a rivet in slightly the wrong place. I almost didn’t put the rivets on the back pockets because I was so proud of the topstitched corners...in fact I left the rivet off the coin pocket for that very reason! I did take a picture of the back pockets before I installed them though so I could remember the work! Finishing a project off with a hammer is just so satisfying isn’t it?!
The only thing my machine had difficulty with was the buttonhole on the waistband. I've had this problem with every domestic machine I have tried them on, does anyone have any tips? I'm presuming it is due to the bulk of various seam allowances in this area causing the fabric to pull through unevenly. The beautiful buttonholes made by the F420 are actually my favourite thing about it but with this one everything went a little out of line at the end and I had to unpick and finish by hand. I'm hoping it will hold up. It is a shame as I was excited to be able to choose the buttonhole style with a rounded end one side and bar tack at the other for strength.
I love that the pattern requirements include different lengths of zip for the different sizes. So often big four patterns list one length of zip for all and when you get to that step you realise it is too long or short. Do be careful when sewing on the waistband if your zipper is a little long, you don't want to ht any metal teeth with your needle! I choose to hand crank the machine over these points.
This was my first time using a Megan Nielsen paper pattern as opposed to a PDF and I was so impressed with the quality. The design of both the envelope and instruction booklet is fresh, clean and very clear whilst being packed with information and I really liked the robust quality of the pattern tissue. I'll be treating myself to paper versions from now on.
It is a testament to the instructions and construction method that the only point I free-styled was to finish the bottom edge of the pocket bags with french seams. This is a tip I picked up from sewing the Ginger Jeans and has stayed with me. It is so easy to do and I like the clean finish rather than overlocked edge plus it is really strong. I used some tropical print scraps I had left over from these Holly Shorts I made a couple of years back. I love a pop of interest inside my clothes!
This a complete Megan Nielsen designed outfit as I’m wearing the shorts with my second version of her Dove Blouse which I finished a while back but didn’t see the point in blogging as I made version 2 exactly the same as before! My first version of this pattern has to be one of my most worn handmade garments and I’ve repaired it a couple of times. This one is made with a silk remnant I picked up in Misan Textiles on Berwick Street in Soho and I’m hoping its going to prove as wearable as the first.
I am absolutely delighted with these, they’ve taught me a lesson in how having patience and not rushing can pay off. I had given myself a stupidly quick self imposed deadline to finish there but I’m so glad I let that go and instead focused on doing the best job I could. I'm defiantly going to make myself some full length jeans from this pattern, likely a black or charcoal tapered pair. Here’s hoping the rest of my holiday wardrobe is as much of a success!


Beautiful work! I'm not sure if this is the solution for your buttonhole problems, but yesterday I read on the Sewing.PatternReview forums about a tool called a "buttonhole compensation plate." It helps you stitch beautiful buttonholes in thick or spongy fabrics, and people were raving about it. Might be worth a try!
ReplyDeleteO great tip! Thanks very much Claire! I'll certainly look at investing in one of those!
DeleteYou did am amazing job, I am really impressed with how they turned out...you are totally going to enjoy wearing these for many years...:)
ReplyDeleteI'm pretty impressed with how they turned out too! Haha! Worth taking it slowly and getting it right for a classic wardrobe piece which, as you say will hopefully last years
DeleteThey're so well made!
ReplyDeleteI've had that issue with every machine+jeans waistbands too :/
What a nightmare hey?! When you are so pleased with the whole project to then mess up at the final hurdle?!
DeleteThanks very much, I'm really pleased with them
Wow! These are gorgeous and incredibly sewn! And, you look adorable per usual.
ReplyDeleteThanks so much Colieen, I'm really proud of them!
Deletefabulous shorts! Buttonhole wise some machines have an extra grip plate to help, best tip I can give is the DM buttons [proffessional buttonholing service to the trade]
ReplyDeleteI have often used DM buttons for work, i don't know why I've never thought to use them for my personal projects! I'm likely to go to them for jeans buttonholes from now on after this disaster!
DeleteFantastic job on those shorts. You look great in them, too.
ReplyDeleteThanks very much!
DeleteThese look fantastic! Great job!
ReplyDeleteThank you! I'm really pleased with them
DeleteThese are amazing! They go perfectly with your top too.
ReplyDeleteThank you! I think long sleeved peasant blouses with shorts might become my go-to look for summer!
Delete