
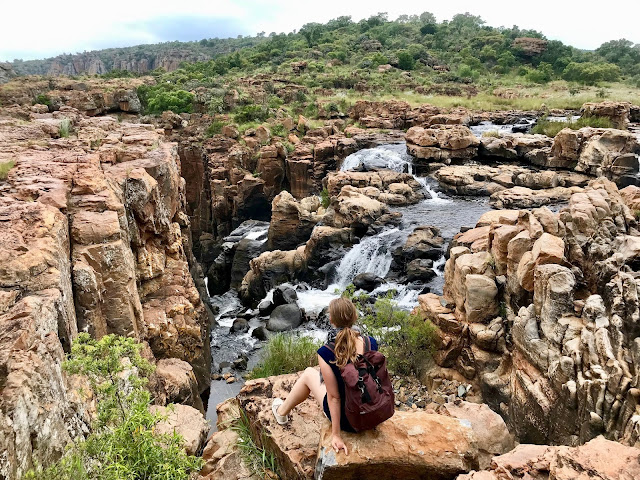
The project I have to share with you today has been on quite the adventure with me over the last couple of months! This is the Desmond Roll Top Backpack from Taylor Tailor and I have definitely tested my workmanship and the pattern to the full, using it almost every day when travelling around Southern Africa and the Philippines. The picture below is at Victoria Falls and further down is another of the pack in use at Blyde River Canyon in South Africa It has also been with me on boat trips and hikes including to the top of the second highest waterfall in the world! Now I am home it is in daily use again travelling around London for work and it has proved to be a great backpack for all purposes.

I chose a lovely warm red waxed cotton from Cloth House on Berwick Street and all the hardware and webbing straps I bought in a kit from Guthrie & Ghani. I'd spotted these kits at the Knitting & Stitching Show in October but been too indecisive about it to buy on the day. Luckily when I emailed them they still had a couple left! The kit is fantastic as it saves a lot of time searching for the correct findings and webbings in the colours and finishes you want. It also includes a 15% discount off the PDF pattern. Taylor does sell hardware kits for the pattern in his online shop too but they ship from the US. It certainly isn't a cheap project once you've assembled all the hardware and the waxed cotton wasn't cheap at £18/m but it was all 100% worth it for a backpack which I love and have been getting so much use out of.

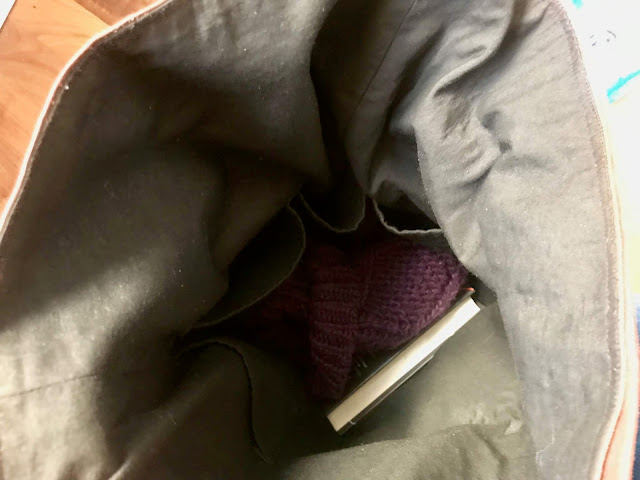
I saved some pennies on the lining and made use of some plain black quilting weight cotton from my stash and fused it with mid-weight woven interfacing to thicken it up. I was questioning how important the mid-weight recommended choice of lining was but you really will benefit from the extra strength and structure and it will make those interior pockets nice and sturdy. I really liked the shape of the interior back pocket piece which has angled sides rather than just being a regular rectangle. This means that wen you sew it on to the rectangular markings you end up with a three dimensional shape and a roomier pocket. Very clever.
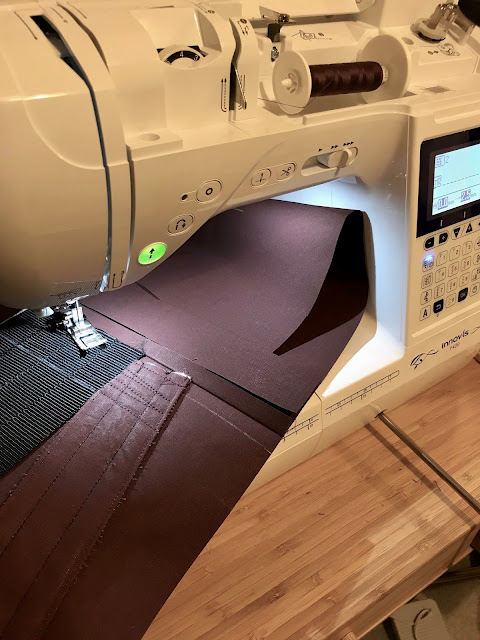
When I'd completed this project I really felt like I'd put my recently acquired Brother Innov-is F420 through its paces! The coating of wax on the fabric makes it very dense and tough and in some areas the layers of fabric got quite thick so your machine needs a bit of oomph to get through it but mine coped beautifully. I started out with a size 90 universal needle following recommendations online but ended up going with a size 80 microtex needle as the larger size was making quite unsightly holes where it punched through. The sharp point of the microtex needle seemed to pierce through the waxed fibres more cleanly. Speaking of unsightly holes, if you are working with wax cotton you want to avoid unpicking anything if you can! I had to in a few places and those holes won't go away! I struggled to get pins through the fabric and worried about holes so resorted to clips for the majority of construction.

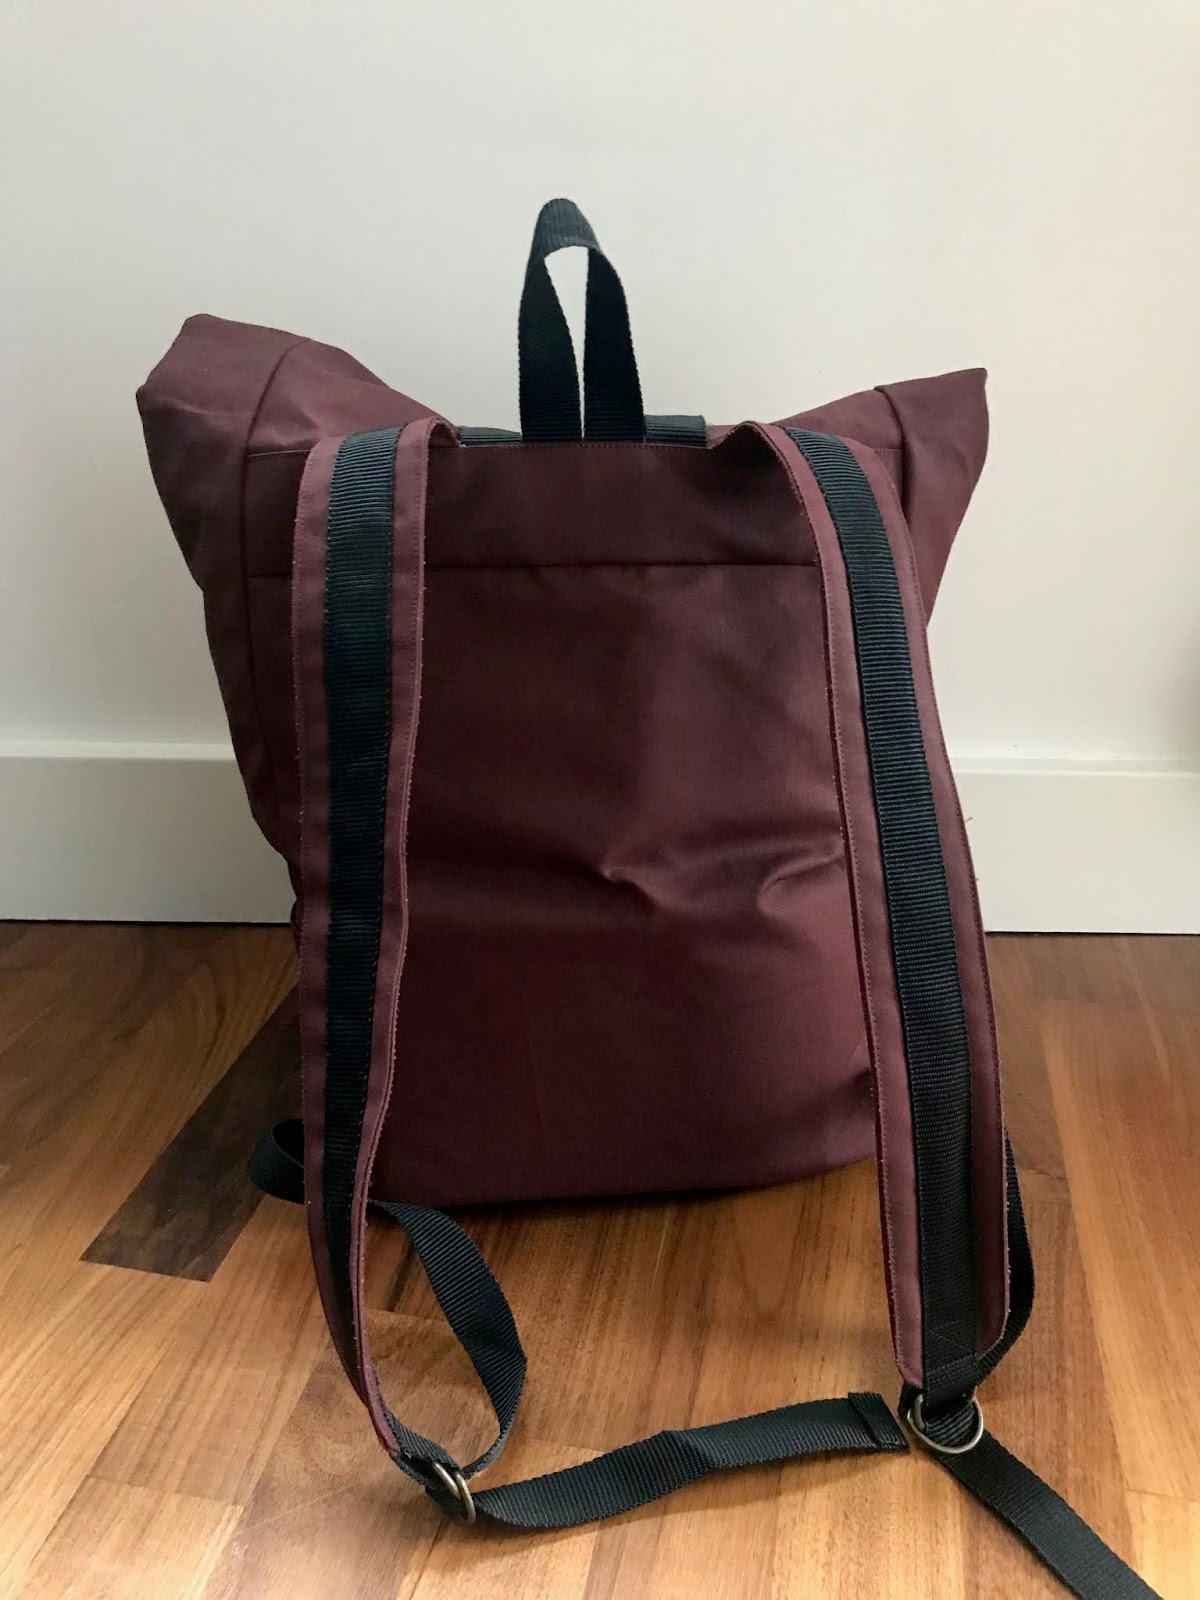
The instructions are detailed and thorough and made complete sense. Despite it being my first backpack I didn't feel lost at any point. Assembly was fairly straightforward but I wouldn't recommend it as a beginner project as it is quite lengthy and involved and some aspects are a little fiddly, especially using heavier weight fabrics which can be tricky to manoeuvre. The most complicated elements were topstitching the edges of the three dimensional front pocket in place neatly and the straps. The straps I made more challenging for myself as my stiff fabric choice made them really difficult to turn through. I'd also opted to add batting inside the straps to give them a little padding which made turning impossible! In the end I gave up and unpicked my stitching around the straps. The holes from the stitching gave me a nice clear line to follow and press under the raw edges so I could place the strap pieces wrong sides together with the batting sandwiched in between and edge stitch them closed. The finished straps are definitely not my neatest sewing but they work! I'd highly recommend adding the padding if you are intending on carrying a bit of weight around in your pack and sort of wish I had added two layers of batting instead of one on full day hikes when my pack was heavy.

I love that the instructions give you a nice clean finish which is also super strong! The band along the top of the backpack is a good example of this. It serves the dual purpose of concealing the top end of the straps and all the extra lines of reinforcement stitching whilst adding a bit more strength. I didn't need to finish the edges of the wax cotton as it doesn't fray. The instructions only have you finish the edges of the patch pocket pieces as all the other raw edges are concealed within the lining. I finished the ends of webbing which would be concealed within the seams with fray check and the other ends I turned in twice and stitched. This particular webbing frays like crazy.
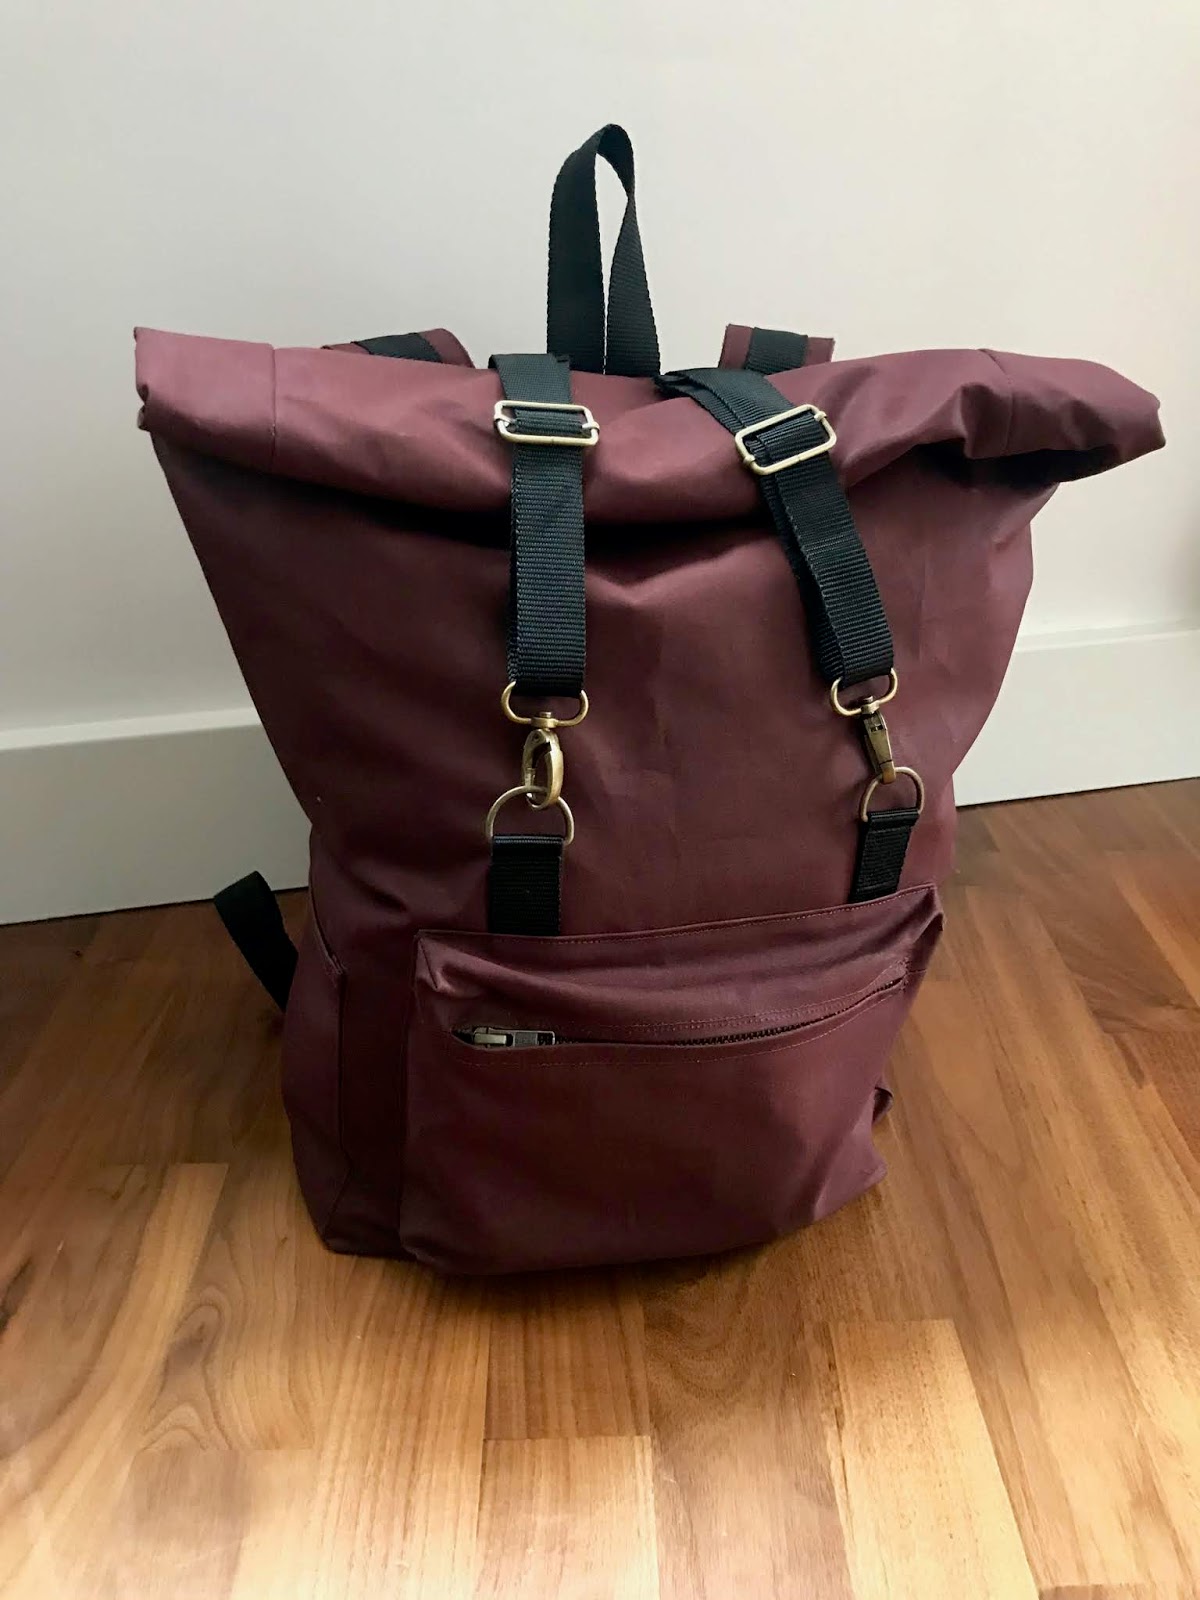
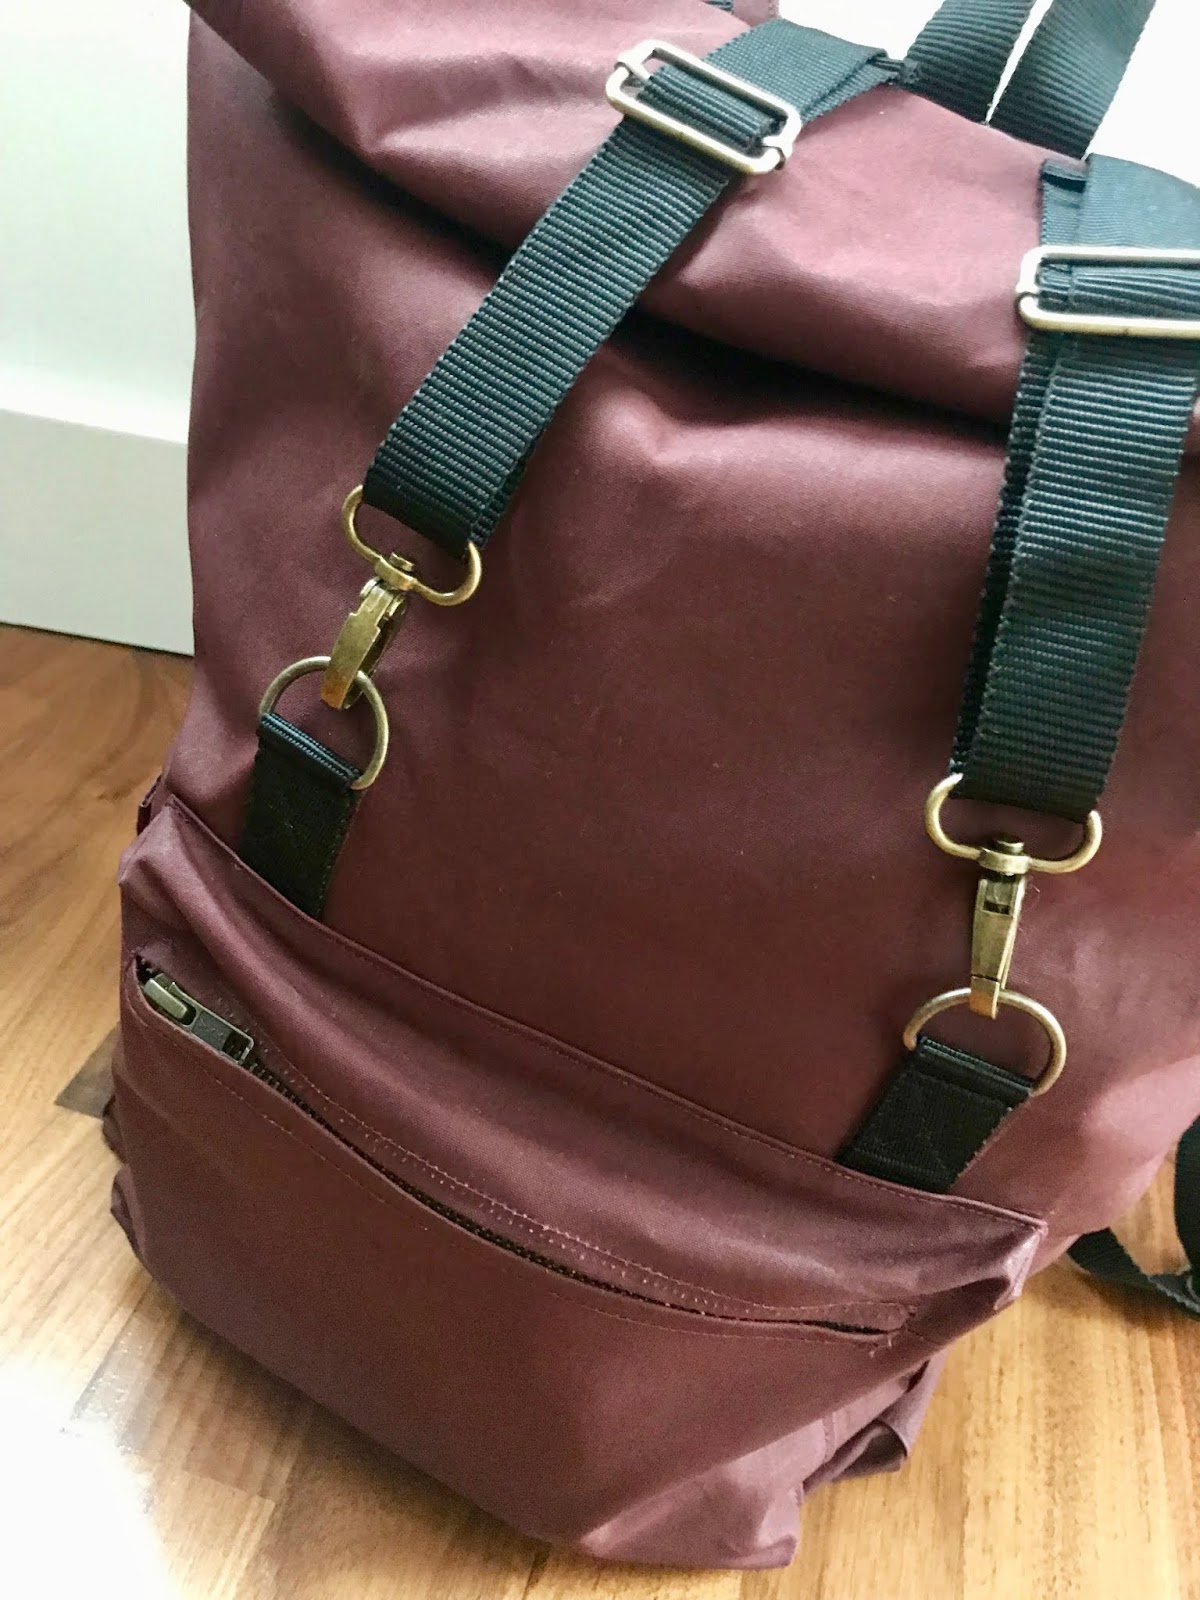
As there were only a couple of hardware kits left I didn't get a choice of colour of webbing and findings. I'm really happy with how the black and brass finish looks in combination with the wine red anyway! Switching between purple thread for the exterior and black for the webbing and webbing was a bit of a pain but luckily the F420 is really fast to thread. Everything in the hardware kit is top quality and the notions are all Prym brand. Initially the fact that the sliders are 30mm wide rather than 25mm like the rest of the kit irked me a little as they looked big on the webbing straps but actually that extra width is really useful when tightening and loosening to adjust the strap length.

A wonderful feature of the waxed cotton is the way it marks and wears. My backpack is now looking really quite weathered in a beautiful way! It had a few flaws in it when I bought it and now has a lot more scrapes and discolouration in it. It has a lovely beaten vintage look which compliments the style of the backpack. I absolutely adore the design, both aesthetically and practically. It has loads of pockets (three external, four internal) and the only thing I wish I had done differently was to check the size of the exterior side pockets before construction and make them a little larger. They are just a fraction too small to hold my water bottle. The interior pockets are really useful to keep small things that would easily be lost in the roomy interior. It is a good size for a laptop and it can be rolled up fairly small or kept quite big. I felt like the roll top makes it really secure and safe but it does also make it quite fiddly to get into in a hurry! I was a little concerned that my fabric choice was going to end up too structured for the roll top but it holds a nice shapely roll and softens up nicely with a bit of use. It won't stay as crisp as you find it on the roll! You definitely need something with a bit of structure for this design to hold the nice boxy bottom shape out and give the front zip pocket shape.
I didn't set out to make my bag waterproof but the combination of the waxed cotton and the roll top design does a great job of keeping everything inside dry...even at Victoria Falls where we got drenched in 'upwards rain'! You could easily make a fully waterproof version of this bag with a properly waterproof fabric and waterproof seam tape. Closet Case Patterns have some great tips on this in a post for their Kelly Anorak pattern.
There are quite a few features of the Innov-is F420 which help with the accuracy of your stitching and these were exceptionally useful for sewing all the tight corners on this and getting topstitching to finish neatly in the right places. I like to have the speed of the machine it cranked up to high speed for long straight lines like the side seams but turn it right down slow for curved edges like the bottom of the straps. The pedal is nice and sensitive so you can get a good variety of speeds and control going on. Being able to control the speed of the reverse stitching really helped too as there is a lot of sewing back and forth over your stitching for reinforcement. On this machine if you press the reverse button it will sew a single backwards stitch. If you press and hold the button it will very slowly slow a line of reverse stitches. If while you are holding the button down you put your foot on the pedal it will sew at the usual speeds but backwards!

I loved putting this bag together as it was so different to what I usually make and working with wax cotton was a new experience too. I am so pleased I took the time to make just the backpack I wanted rather than buying one. It was a really enjoyable project which I highly recommend if you're looking to make something a little bit different.

I chose a lovely warm red waxed cotton from Cloth House on Berwick Street and all the hardware and webbing straps I bought in a kit from Guthrie & Ghani. I'd spotted these kits at the Knitting & Stitching Show in October but been too indecisive about it to buy on the day. Luckily when I emailed them they still had a couple left! The kit is fantastic as it saves a lot of time searching for the correct findings and webbings in the colours and finishes you want. It also includes a 15% discount off the PDF pattern. Taylor does sell hardware kits for the pattern in his online shop too but they ship from the US. It certainly isn't a cheap project once you've assembled all the hardware and the waxed cotton wasn't cheap at £18/m but it was all 100% worth it for a backpack which I love and have been getting so much use out of.
I saved some pennies on the lining and made use of some plain black quilting weight cotton from my stash and fused it with mid-weight woven interfacing to thicken it up. I was questioning how important the mid-weight recommended choice of lining was but you really will benefit from the extra strength and structure and it will make those interior pockets nice and sturdy. I really liked the shape of the interior back pocket piece which has angled sides rather than just being a regular rectangle. This means that wen you sew it on to the rectangular markings you end up with a three dimensional shape and a roomier pocket. Very clever.

When I'd completed this project I really felt like I'd put my recently acquired Brother Innov-is F420 through its paces! The coating of wax on the fabric makes it very dense and tough and in some areas the layers of fabric got quite thick so your machine needs a bit of oomph to get through it but mine coped beautifully. I started out with a size 90 universal needle following recommendations online but ended up going with a size 80 microtex needle as the larger size was making quite unsightly holes where it punched through. The sharp point of the microtex needle seemed to pierce through the waxed fibres more cleanly. Speaking of unsightly holes, if you are working with wax cotton you want to avoid unpicking anything if you can! I had to in a few places and those holes won't go away! I struggled to get pins through the fabric and worried about holes so resorted to clips for the majority of construction.

The instructions are detailed and thorough and made complete sense. Despite it being my first backpack I didn't feel lost at any point. Assembly was fairly straightforward but I wouldn't recommend it as a beginner project as it is quite lengthy and involved and some aspects are a little fiddly, especially using heavier weight fabrics which can be tricky to manoeuvre. The most complicated elements were topstitching the edges of the three dimensional front pocket in place neatly and the straps. The straps I made more challenging for myself as my stiff fabric choice made them really difficult to turn through. I'd also opted to add batting inside the straps to give them a little padding which made turning impossible! In the end I gave up and unpicked my stitching around the straps. The holes from the stitching gave me a nice clear line to follow and press under the raw edges so I could place the strap pieces wrong sides together with the batting sandwiched in between and edge stitch them closed. The finished straps are definitely not my neatest sewing but they work! I'd highly recommend adding the padding if you are intending on carrying a bit of weight around in your pack and sort of wish I had added two layers of batting instead of one on full day hikes when my pack was heavy.
I love that the instructions give you a nice clean finish which is also super strong! The band along the top of the backpack is a good example of this. It serves the dual purpose of concealing the top end of the straps and all the extra lines of reinforcement stitching whilst adding a bit more strength. I didn't need to finish the edges of the wax cotton as it doesn't fray. The instructions only have you finish the edges of the patch pocket pieces as all the other raw edges are concealed within the lining. I finished the ends of webbing which would be concealed within the seams with fray check and the other ends I turned in twice and stitched. This particular webbing frays like crazy.

As there were only a couple of hardware kits left I didn't get a choice of colour of webbing and findings. I'm really happy with how the black and brass finish looks in combination with the wine red anyway! Switching between purple thread for the exterior and black for the webbing and webbing was a bit of a pain but luckily the F420 is really fast to thread. Everything in the hardware kit is top quality and the notions are all Prym brand. Initially the fact that the sliders are 30mm wide rather than 25mm like the rest of the kit irked me a little as they looked big on the webbing straps but actually that extra width is really useful when tightening and loosening to adjust the strap length.

A wonderful feature of the waxed cotton is the way it marks and wears. My backpack is now looking really quite weathered in a beautiful way! It had a few flaws in it when I bought it and now has a lot more scrapes and discolouration in it. It has a lovely beaten vintage look which compliments the style of the backpack. I absolutely adore the design, both aesthetically and practically. It has loads of pockets (three external, four internal) and the only thing I wish I had done differently was to check the size of the exterior side pockets before construction and make them a little larger. They are just a fraction too small to hold my water bottle. The interior pockets are really useful to keep small things that would easily be lost in the roomy interior. It is a good size for a laptop and it can be rolled up fairly small or kept quite big. I felt like the roll top makes it really secure and safe but it does also make it quite fiddly to get into in a hurry! I was a little concerned that my fabric choice was going to end up too structured for the roll top but it holds a nice shapely roll and softens up nicely with a bit of use. It won't stay as crisp as you find it on the roll! You definitely need something with a bit of structure for this design to hold the nice boxy bottom shape out and give the front zip pocket shape.
I didn't set out to make my bag waterproof but the combination of the waxed cotton and the roll top design does a great job of keeping everything inside dry...even at Victoria Falls where we got drenched in 'upwards rain'! You could easily make a fully waterproof version of this bag with a properly waterproof fabric and waterproof seam tape. Closet Case Patterns have some great tips on this in a post for their Kelly Anorak pattern.

There are quite a few features of the Innov-is F420 which help with the accuracy of your stitching and these were exceptionally useful for sewing all the tight corners on this and getting topstitching to finish neatly in the right places. I like to have the speed of the machine it cranked up to high speed for long straight lines like the side seams but turn it right down slow for curved edges like the bottom of the straps. The pedal is nice and sensitive so you can get a good variety of speeds and control going on. Being able to control the speed of the reverse stitching really helped too as there is a lot of sewing back and forth over your stitching for reinforcement. On this machine if you press the reverse button it will sew a single backwards stitch. If you press and hold the button it will very slowly slow a line of reverse stitches. If while you are holding the button down you put your foot on the pedal it will sew at the usual speeds but backwards!
I loved putting this bag together as it was so different to what I usually make and working with wax cotton was a new experience too. I am so pleased I took the time to make just the backpack I wanted rather than buying one. It was a really enjoyable project which I highly recommend if you're looking to make something a little bit different.


